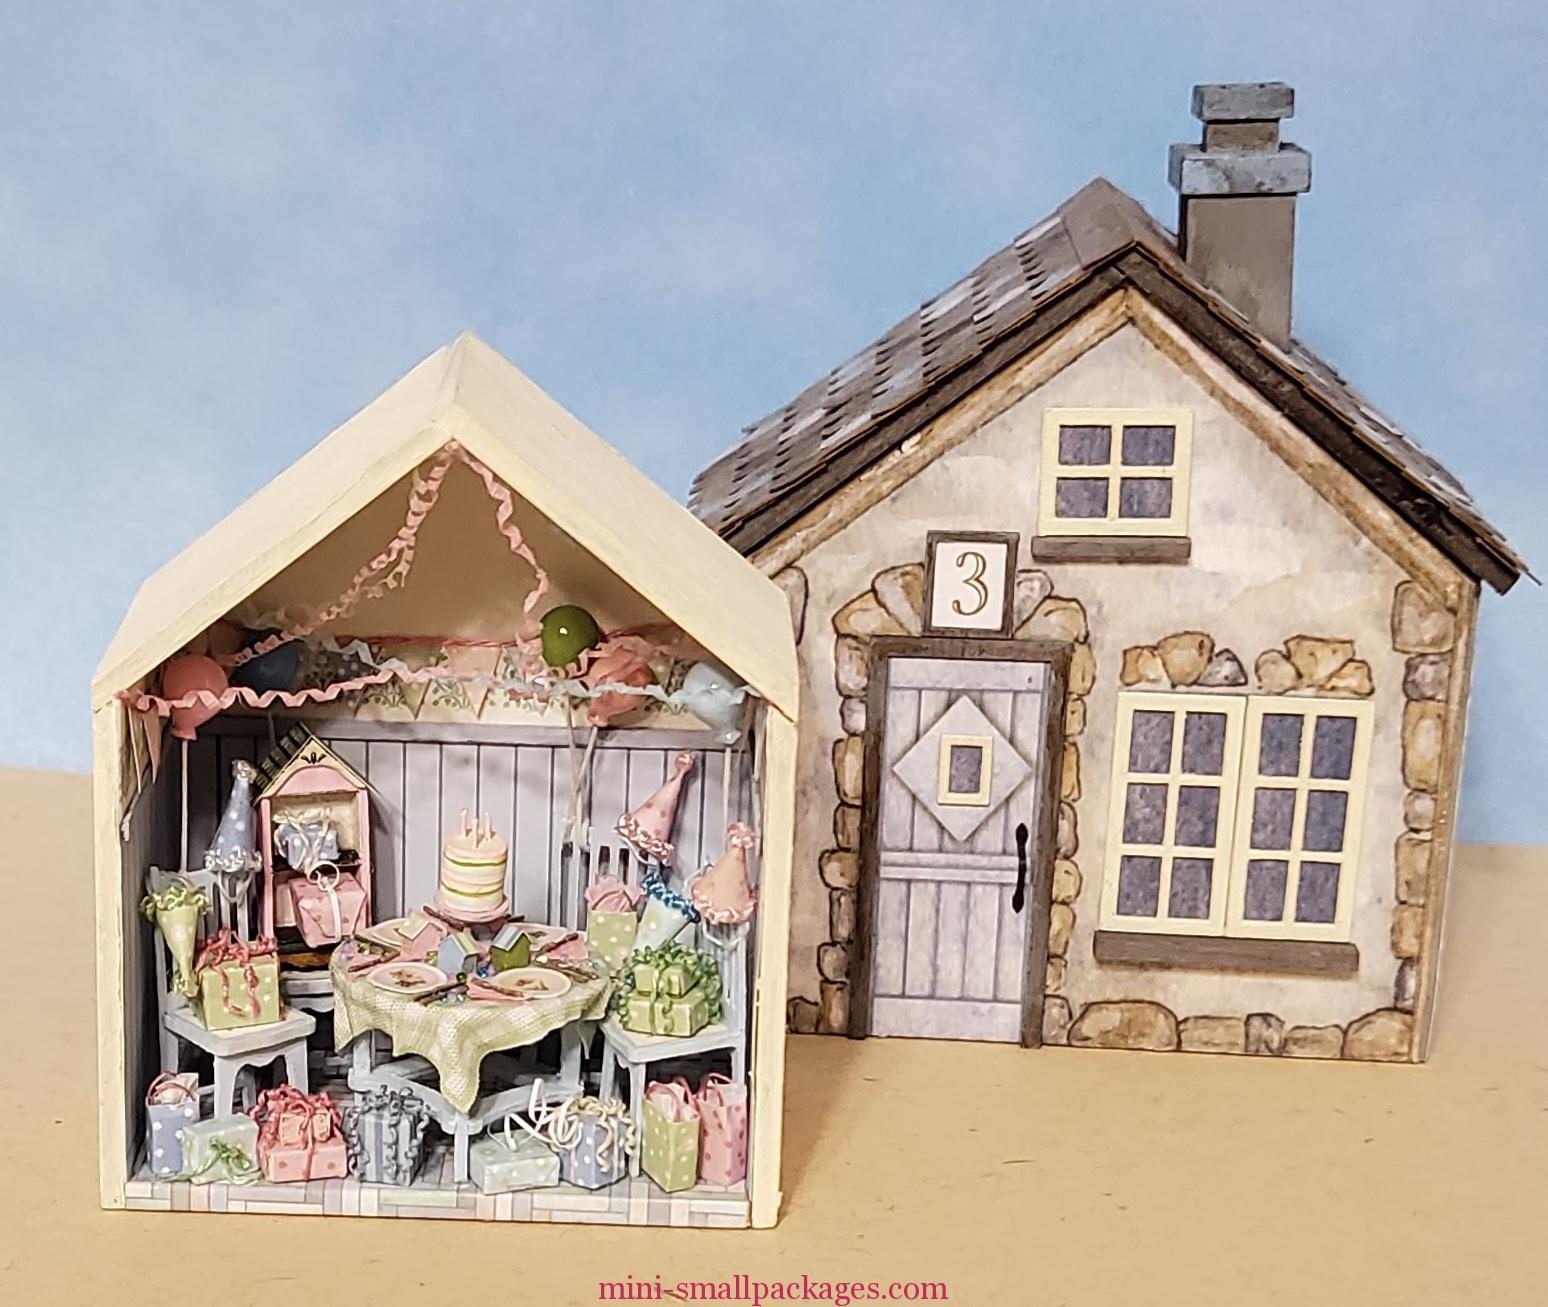
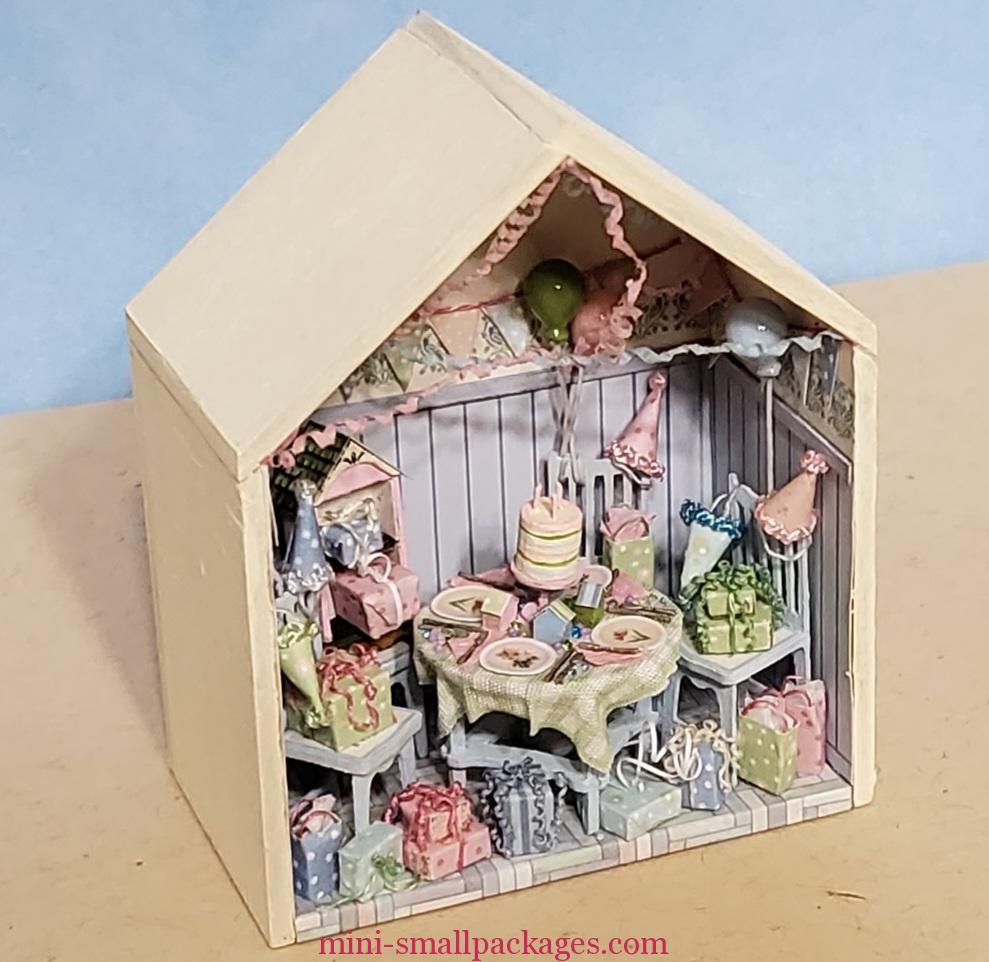
March Robin Betterley house kit is a Birthday party.
Working on minis at the beach
I went to the beach with friends and brought this kit to work on. My friend assembled a real size lap quilt while we were there. I was pleased with my progress even though I didn’t finish it before the trip ended.
Here a few beach pics from Edisto Island, SC.

There is nothing like sunset on the beach.
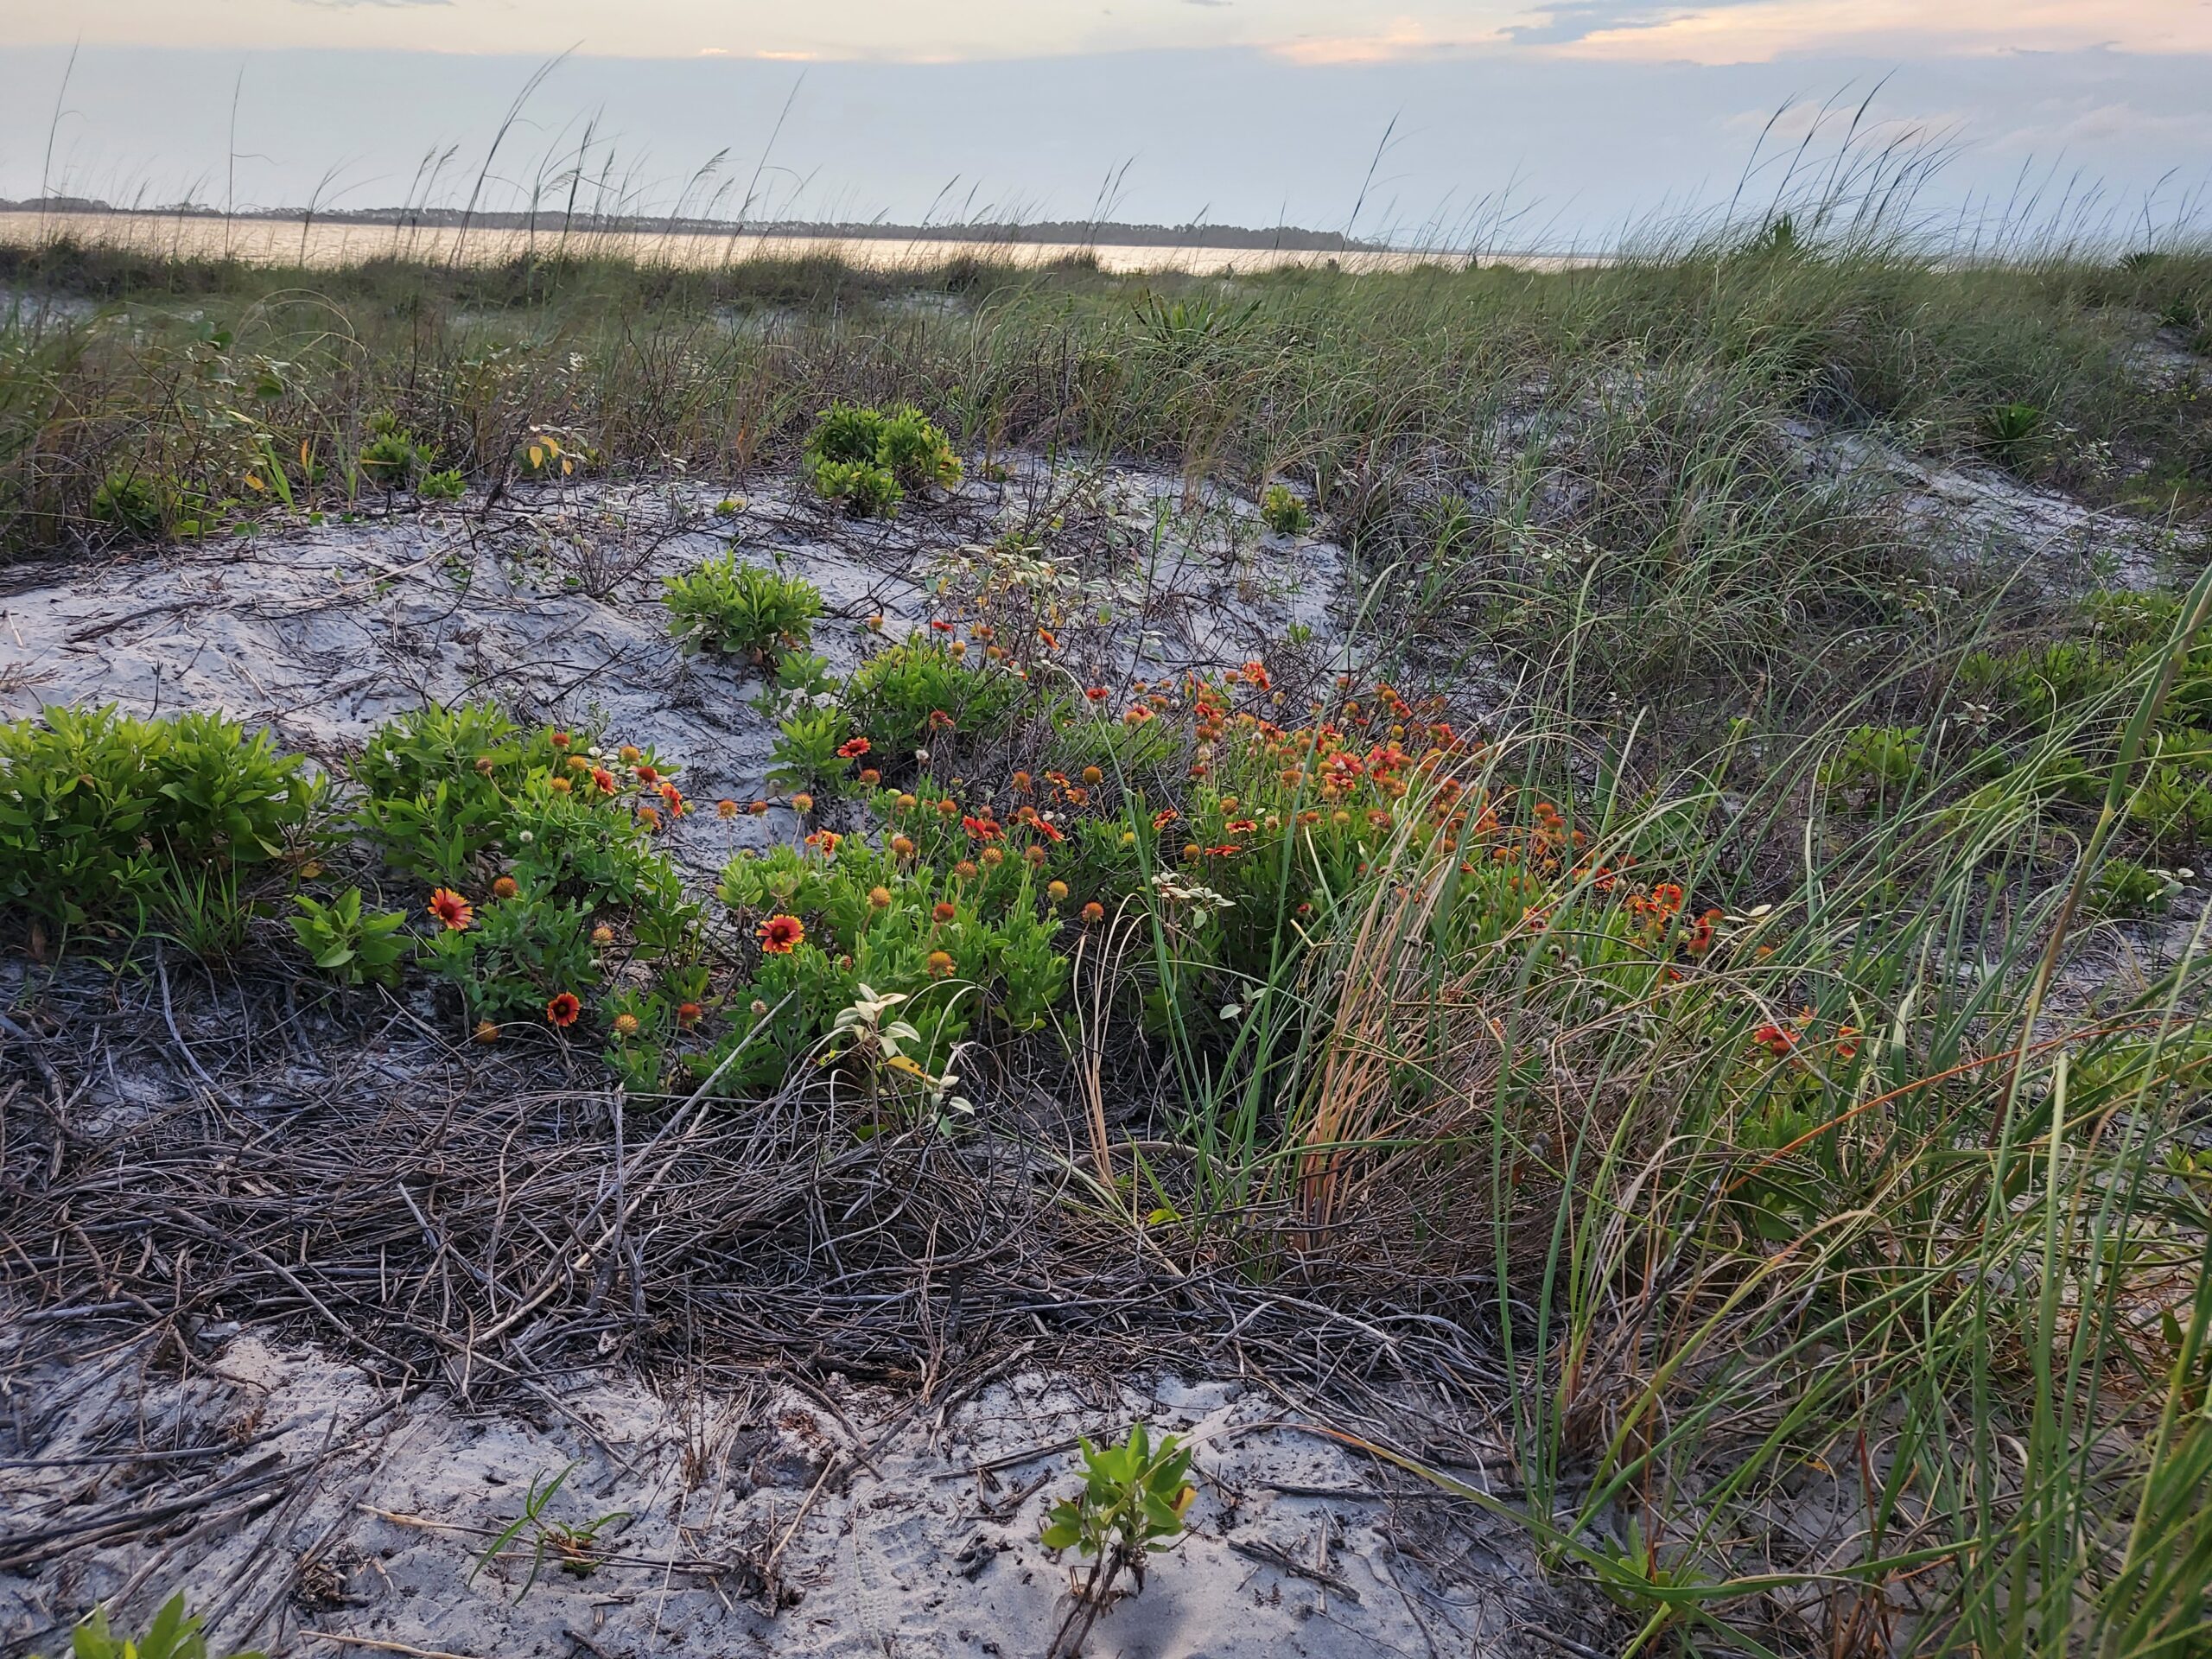
I love color and these flowers are gorgeous.

Previous trips to the beach I have tried to find tiny shells and have done so. There are many here. One just needs to look in the sand not loose on top. I literally bring home several scoops of sand in a spot like that and then pick through once it is dry.
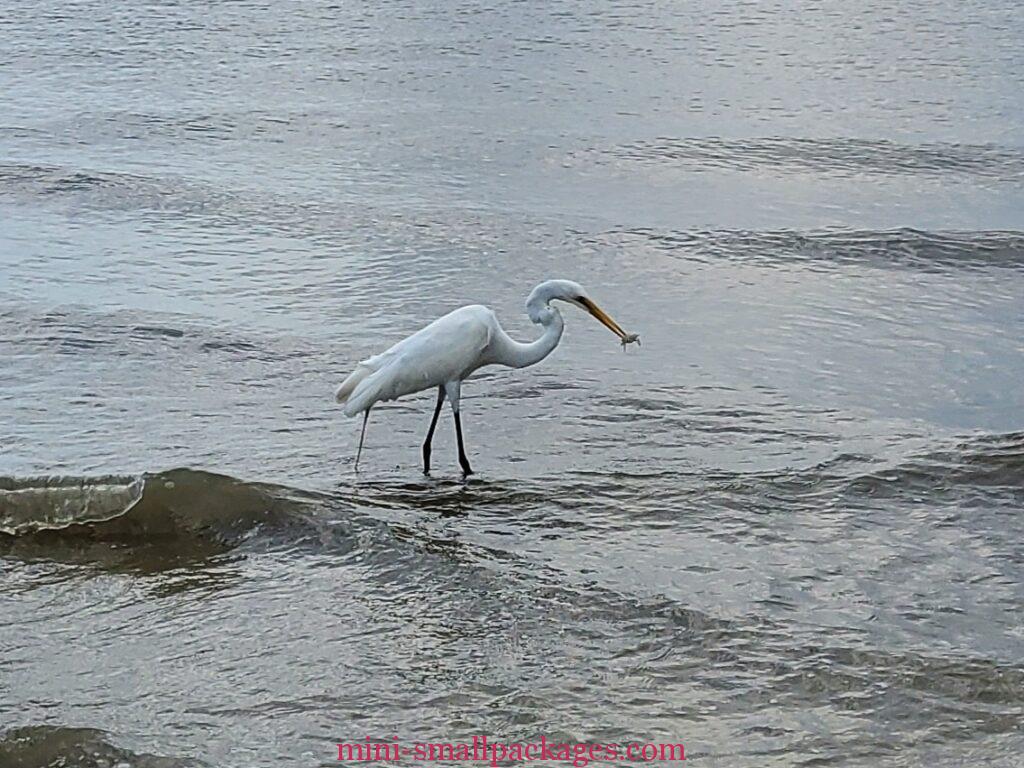
Our last day was overcast and raining in the area. Plus the tide was going out. This is when I’ve seen birds fishing. I caught this picture as he walked several yards in front of me.
Now on to the 3rd house.
Interior
The first issue I ran into was that the wallpaper for the back was too big. It made me question that I was doing something wrong. Now that I’m on my 3rd house, I am trying to be more careful about each step in the instructions. I look at the pictures to help me interpret what I am doing. Based on the floor I decided I did put it together correctly and it is just the wallpaper.

I cut the paper to fit between the walls. In a situation like this I mark and trim, then check the fit. I trim more as needed. I want to be sure and center a piece such as this. That means I had to trim on both sides to balance.
Shingles and Chimney
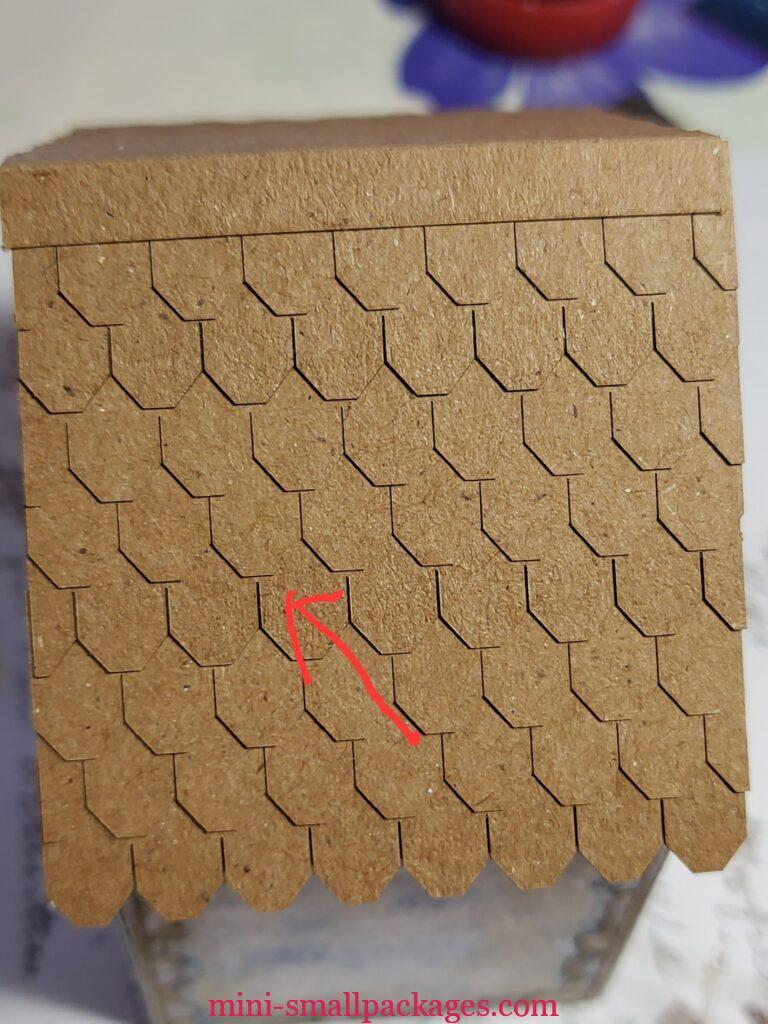
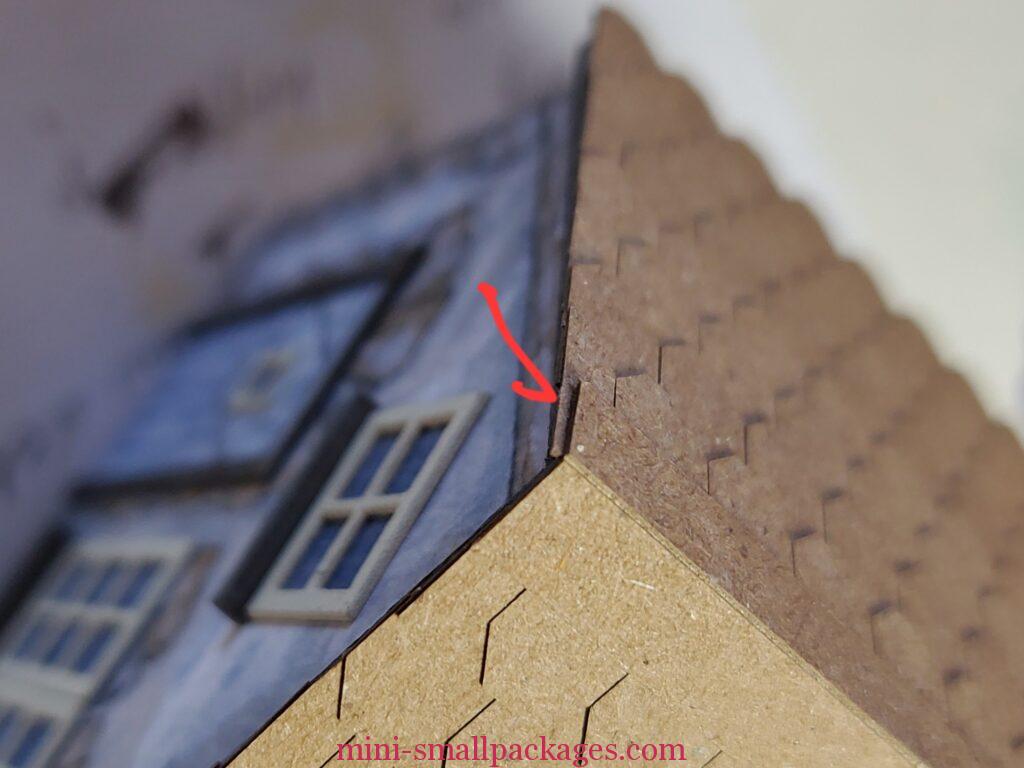
I counted the shingles and determined how many rows per side. There was one row extra available. I centered each row across the roof and just made sure to use the alternate rows. On January and February, I wasn’t paying this much attention. I tried to make sure each row was laid so the overlap was to the edge or slightly over the vertical cuts. But as I show in the picture I missed one. Since it doesn’t really show I am OK to leave it this way.
Another aspect I didn’t consider was how I like to have an overhang of shingles so I don’t always trim to exactly the width of the roof. With the way the shingles were cut for this house they aligned perfectly on both ends. I didn’t see the need to cut anything. Well until I added the cap. My shingles layer was not aligned from one side to the other. This just meant I needed to trim at the top a bit to fix.
Chimney
I decided to not work around the chimney. This is what I recommended to do for the February house after not doing it. This time I did.
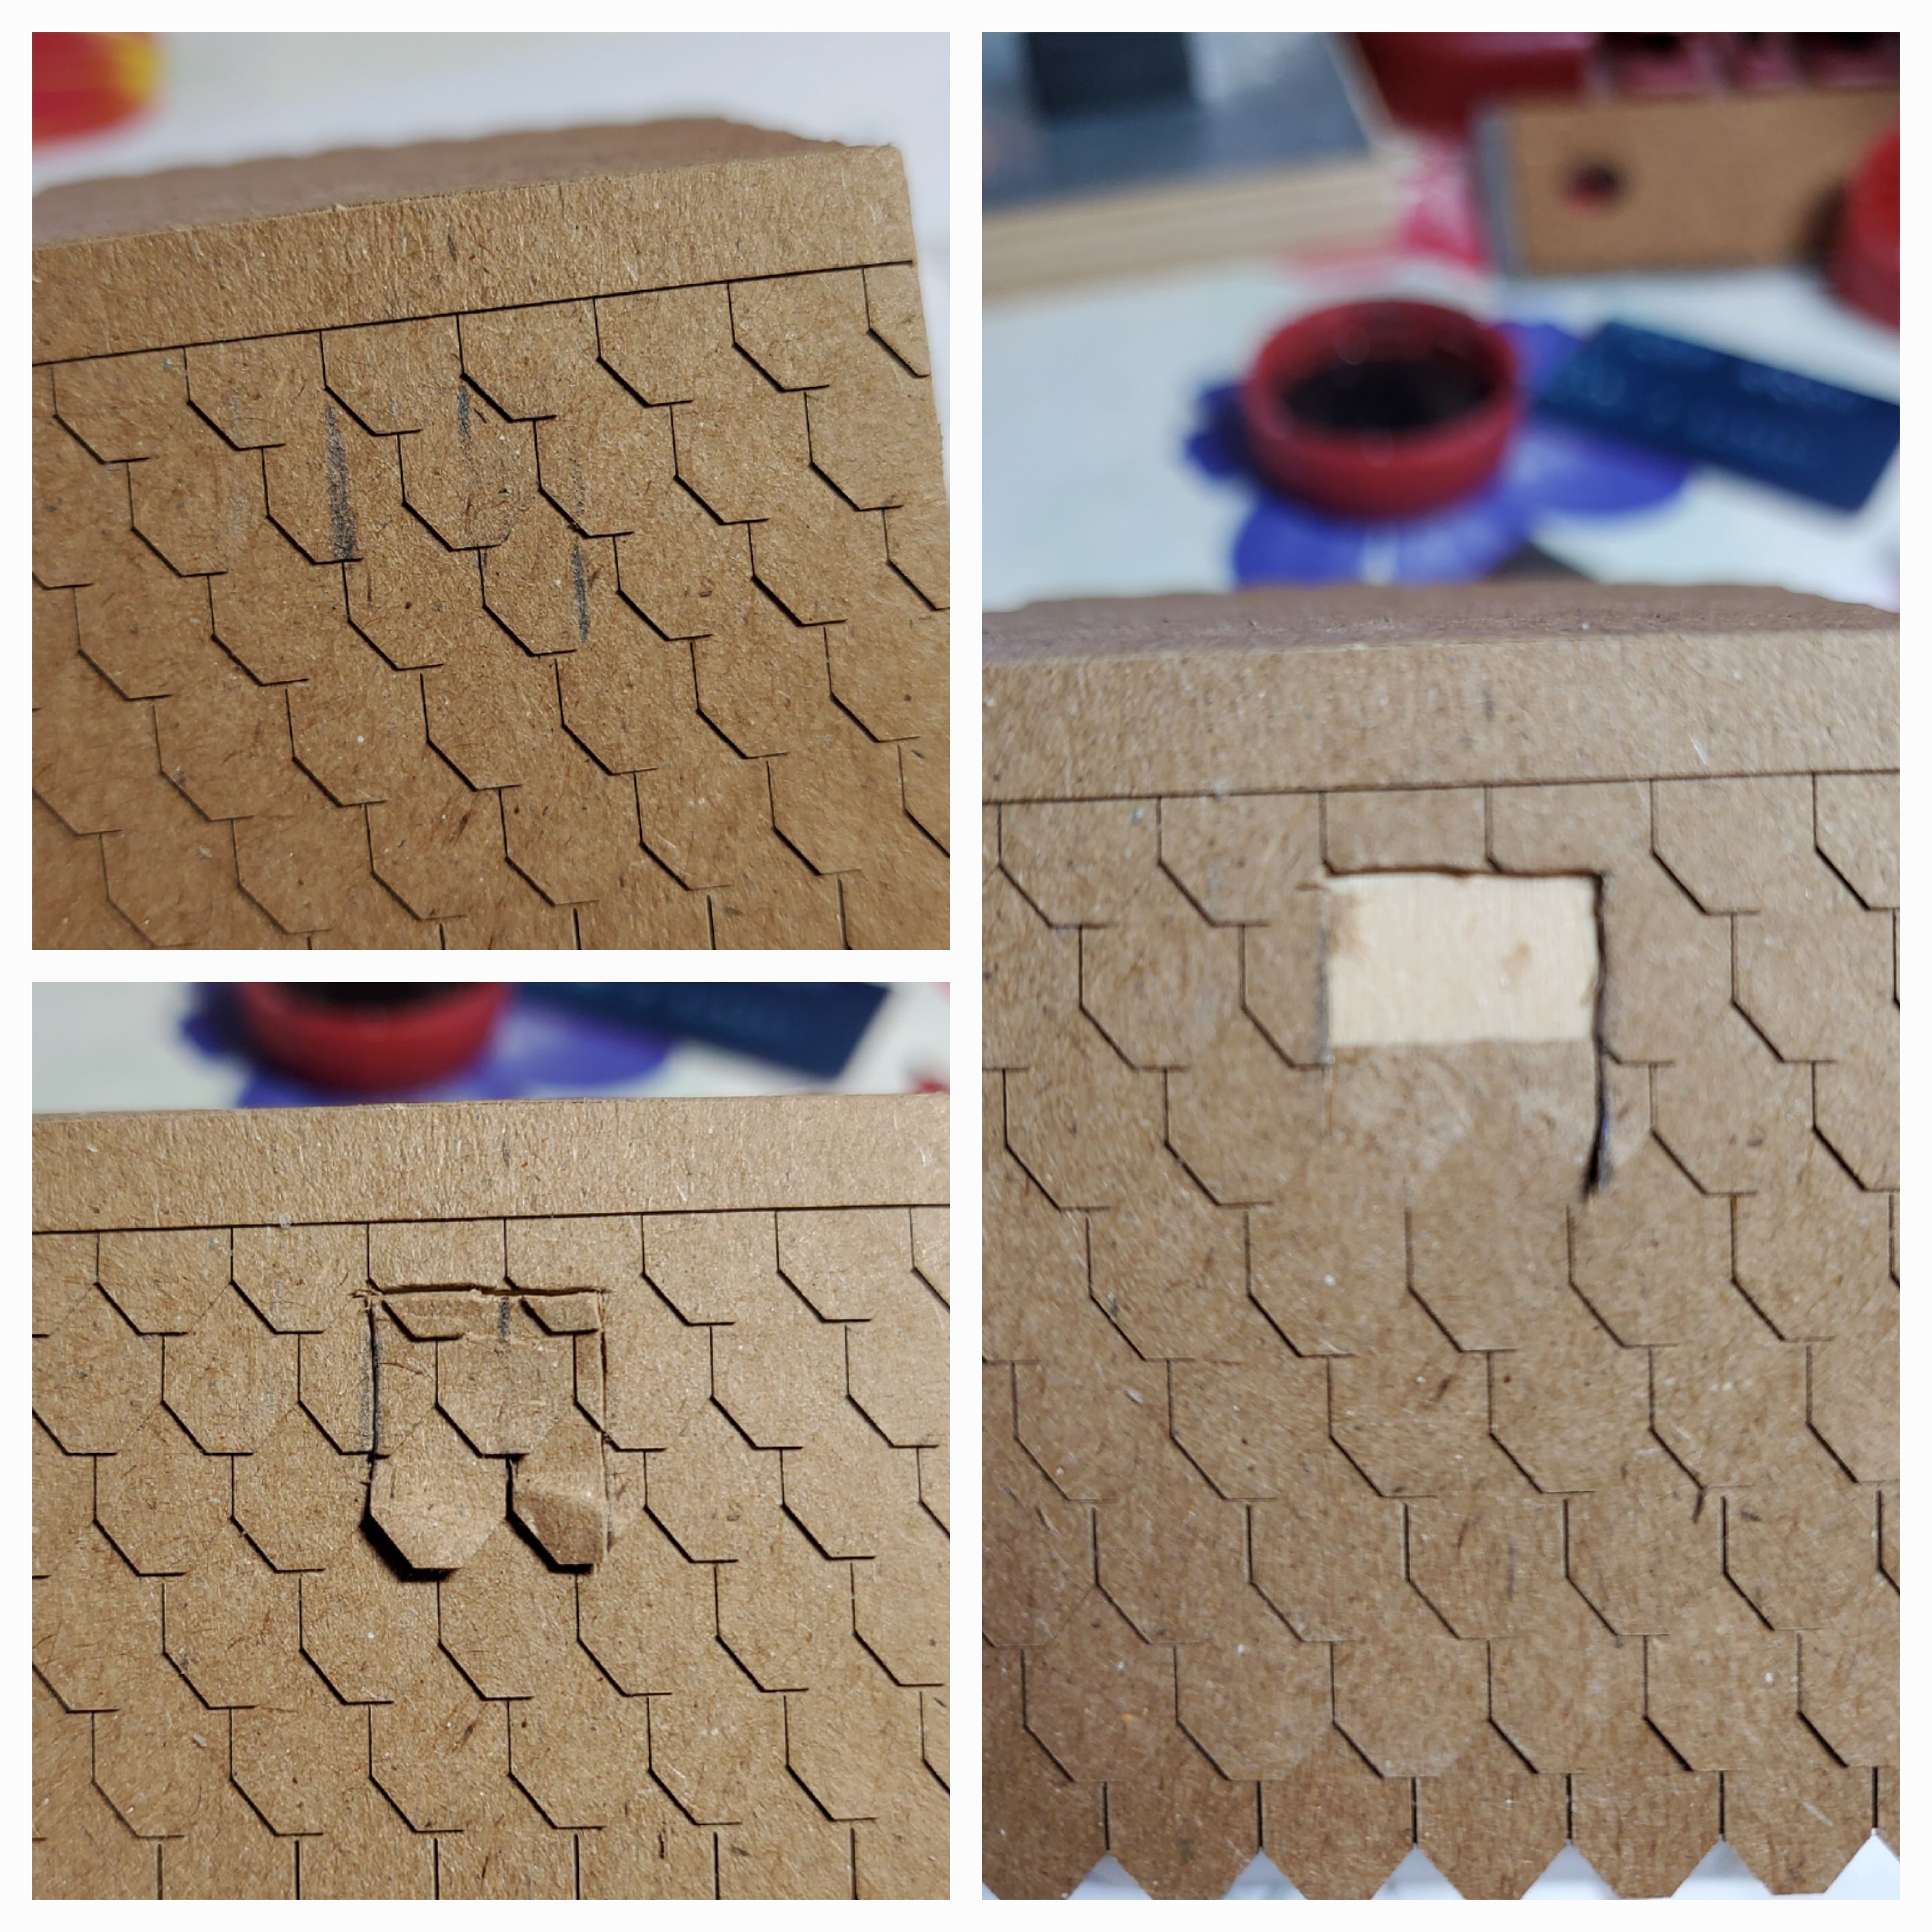
After the shingles were added, I completed the assembly of the chimney. Then I used it to mark where I wanted it. I lined up the bottom along the same lower edge of the row of shingles. This way I did not have any shingles to trim to fit just below like I did on February.
After marking, I used my craft knife to cut into the shingles on the roof.
Because the shingles are glued, I had to gently pry them apart. Lastly I glued the chimney in place. However it might have been better to wait until I added the color to the roof only because it is harder to add the dry brushing colors. Although there should be some differences around the chimney. I haven’t yet in this picture.
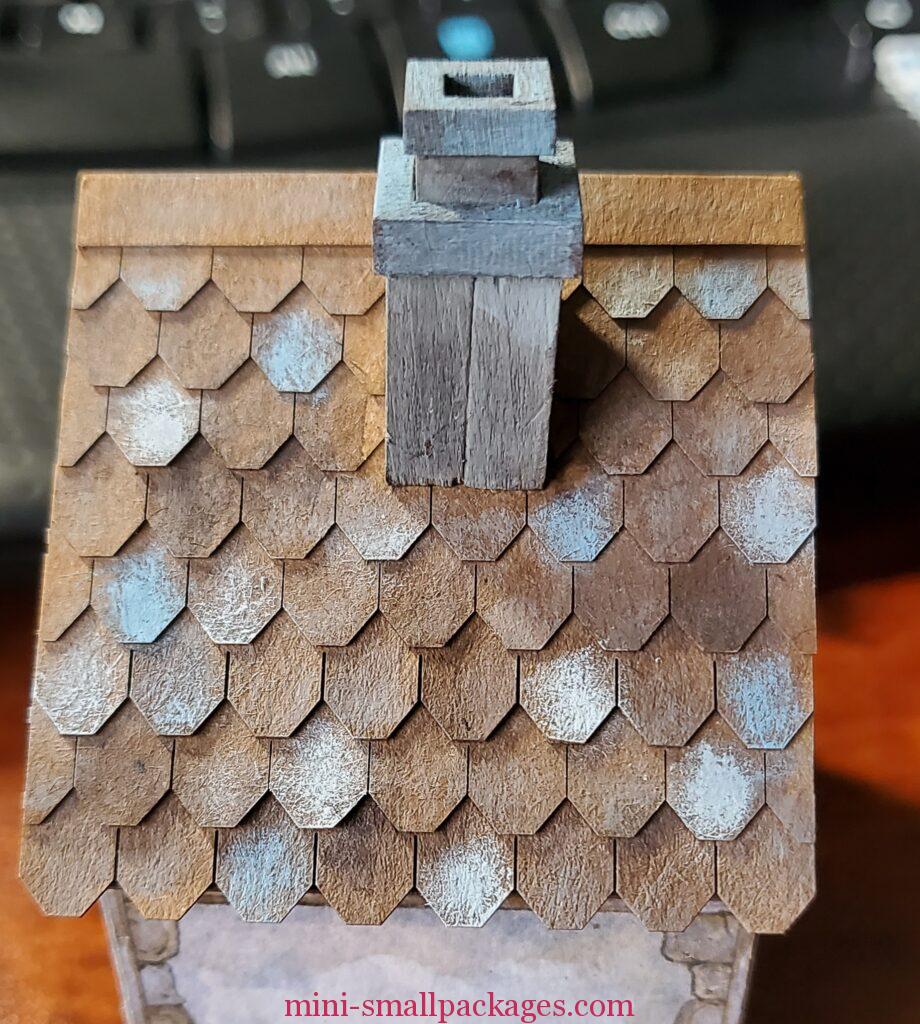
These colors are bit bright and I may change them.
Furniture
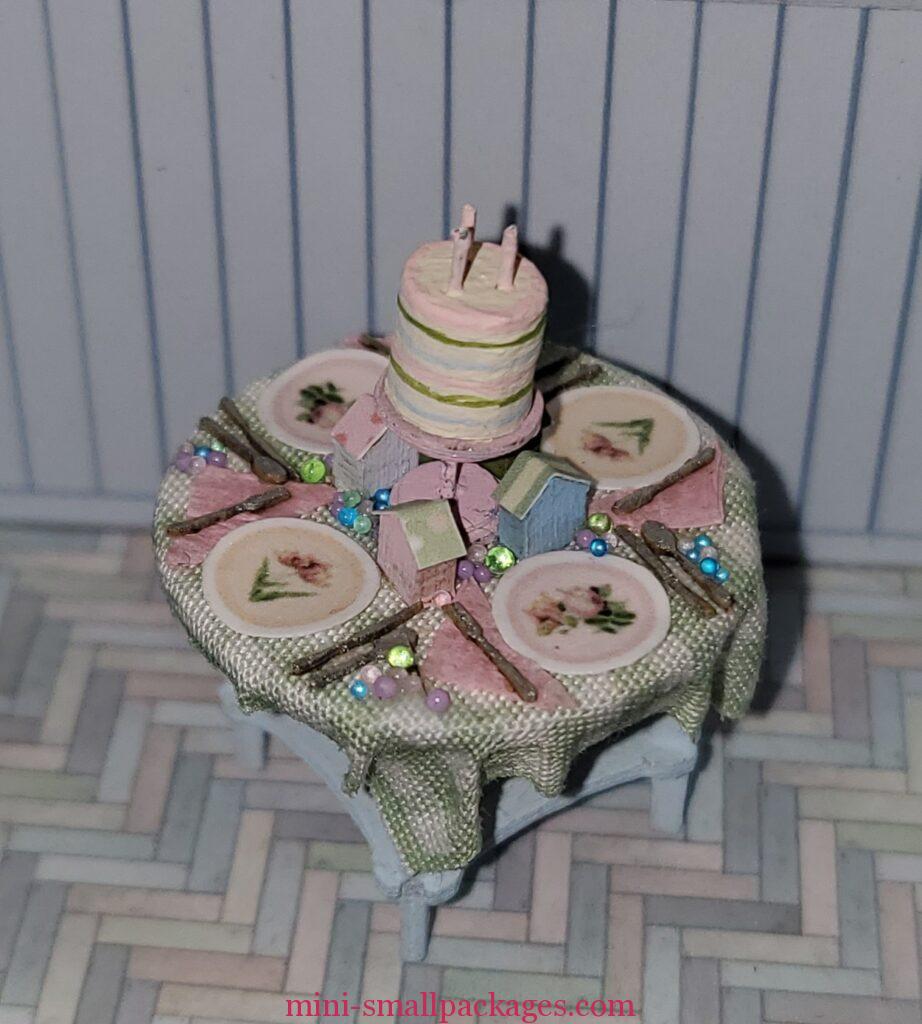
I followed the instructions on the table. I didn’t have any issue. On the back of the table cloth, I used my silicone brush to apply the glue for the edges and then for applying to the table itself. After glue had set a few minutes, I went back with the tweezers a second time to help with folds. The first time the glue may be too wet so they don’t stay.
The napkins gave me a hard time. I cut the 1/2 inch square and then proceeded to fold in a triangle. Then cut in half. Then fold, then cut again. I suggest cutting a 1/4 inch square, then fold in half. This is more in line with the plate size. Mine were folded diagonally. Looking at the kit photos maybe the napkin was folded twice. But I felt once was good thickness.
Silverware – I painted with acrylic while in the motherboard. These are so tiny and looks great.
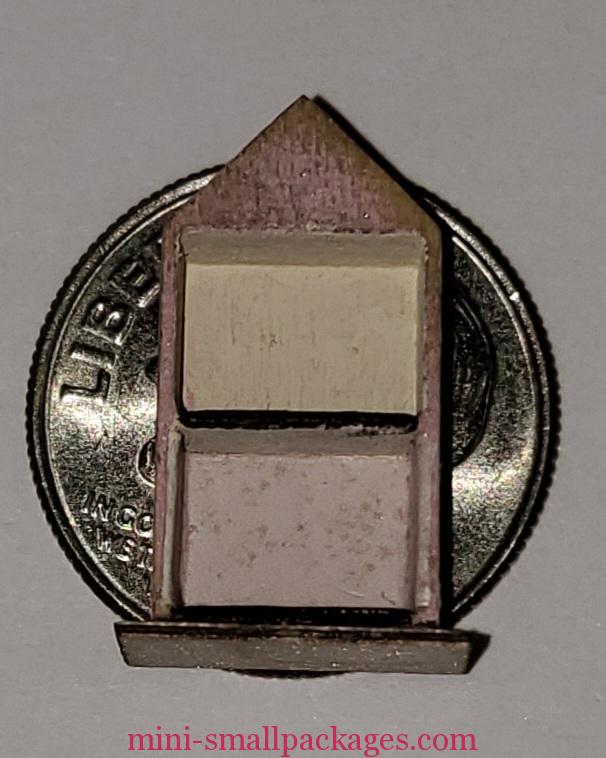
The tiny houses table favors – I went with a mismatch of colors and roofs.
Cake – right now it is plain. I may come back for a change.
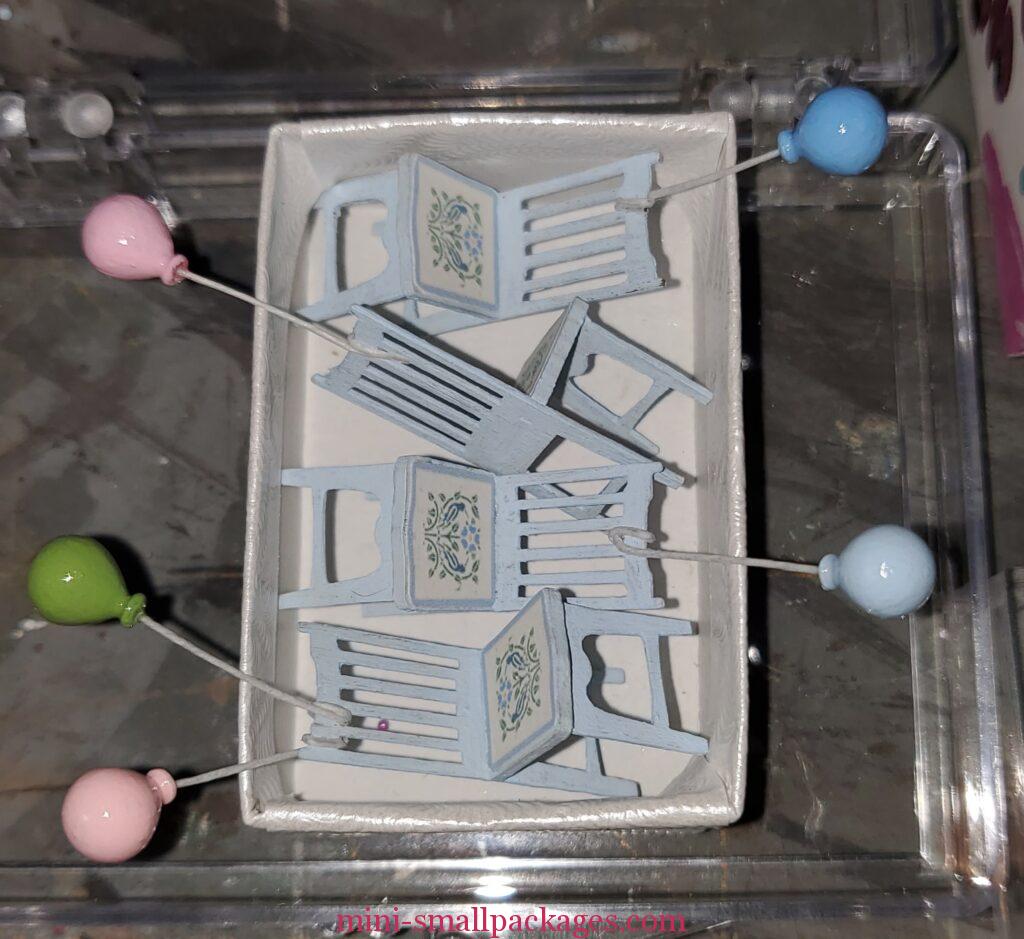
Chairs – they went together fine. I painted them all the same but I missed the chair art until later.
This is where I was by the end of our vacation. I was pleased with my progress. There was no pressure to finish.
When I returned from vacation, I was able to start back with the tiny doll house. But I only installed the wallpaper of the lower floor. Two weeks later I come back and start on the presents having forgotten the dollhouse. I was cleaning up my desk (which I have to do because of my cat) and noticed the wallpaper for the dollhouse was cut out from the sheet as well as the not used gift wrap I had put away. I proceeded to look for this cutout. I looked and looked. I even dug through my trash because I had just tossed some paper bits. After not finding it in my trash, I decided I will just paint it. I put on my stronger readers and low and behold I found my lost wallpaper – already installed.
I painted the apex on temporary tape so I could get to the edges and have something to hold on to. It looks rough here but not on the house.
Presents
I selected all the wood pieces for presents. Some I doubled for larger size. Then I painted in three colors with one coat. Next I cut the papers and started applying to the painted wood pieces. Although not all at once. I wanted to see how the ribbon (thread) looked. I glued two together and wrapped the thread around like I would do normally but adding a touch of tacky glue as I go. Then I decide I want curlies in addition to the bow.
Curlies for presents
When I wrap a gift I prefer the curling ribbon. For these gifts I want to try for this look. Ribbon would be too thick although you might could use it. Instead I used the same thread. I applied thin white glue and then wrapped it around a piece of wire. Let dry and slide off.
This first pressie, I added the curlies to the bow I tied.
Next I decided I wanted just the curlies.
First I separated one stand of embroidery thread from the kit. I then applied thin white glue to the thread in a section and wrapped that around the wire. Repeat until the Whole thread was wrapped around the thin wire.
Next I added a drop of tacky and wrapped the present with another strand.
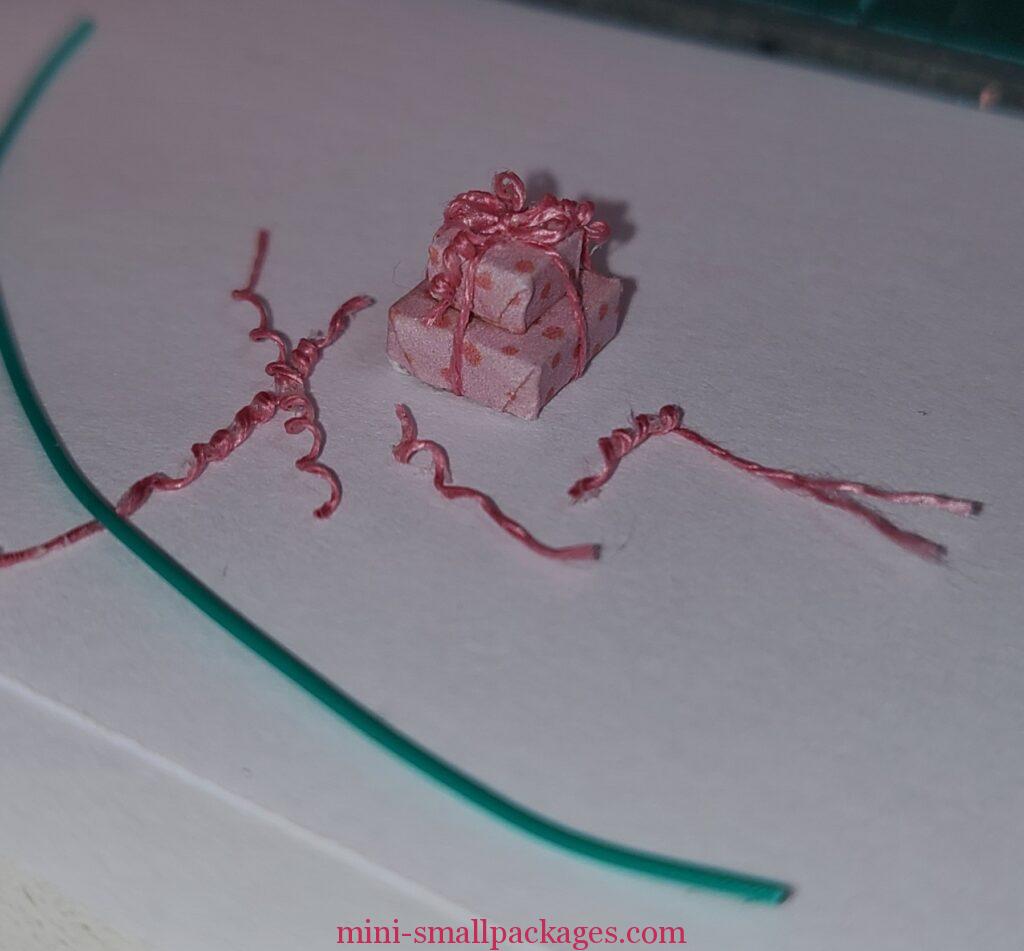
Then another tiny drop of glue on top of the thread and added cut lengths of the curlies and adding more glue as needed. It was after I placed the fourth short (half) lengths I realized that I could use 3 long curlies to criss-cross for resulting in 6 sticking out.
Lastly I added glue to the curlies to have them hang off the sides.
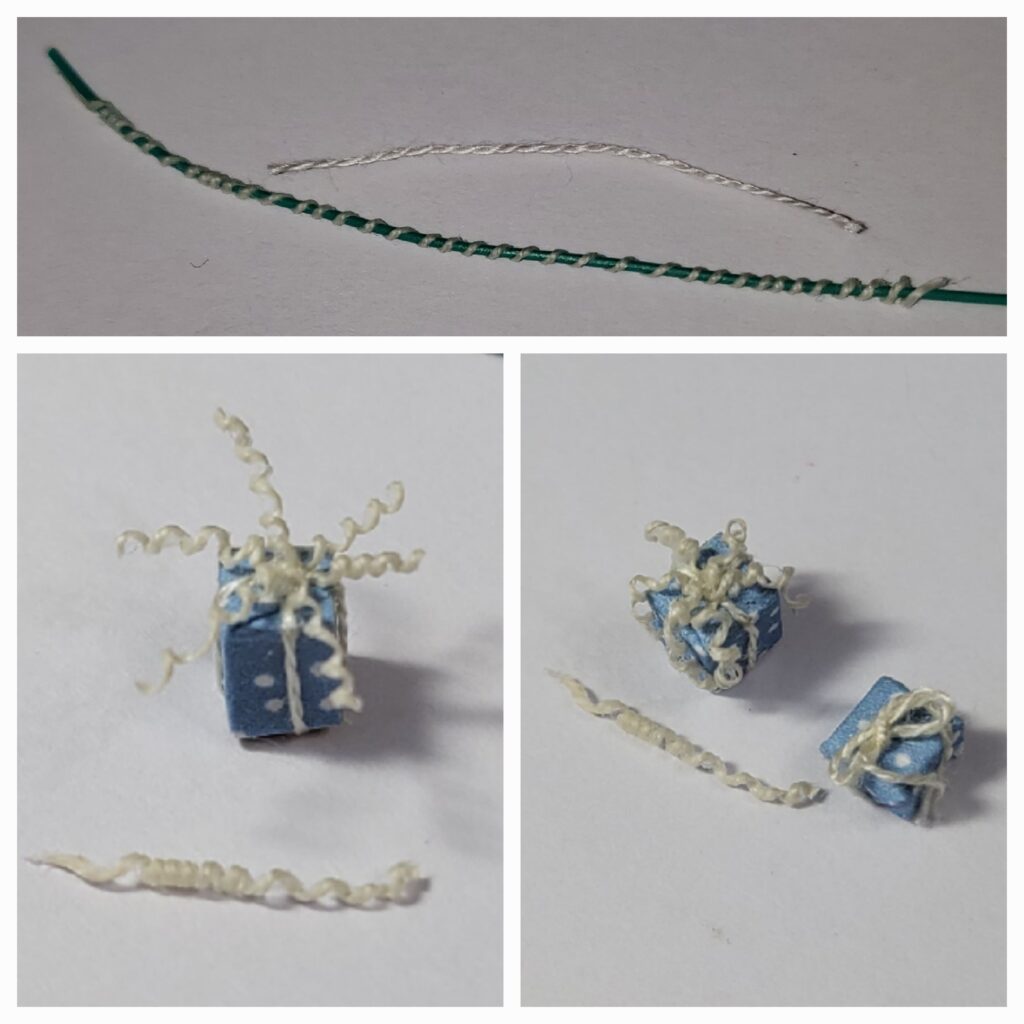
- Plain thread and then wrapped around thin wire.
- 3 curlies glued to the top of a present
- The now 6 curlies glued around the present.
- Bonus present shown with bow only for comparison.
The smallest present uses only a simple bow. The instructions say to make the bow separate and glue on. I missed that initially and struggled to tie around these presents. Although tying a tiny bow is easier on a string, it still helps a lot with tweezers.
Shopping Bags
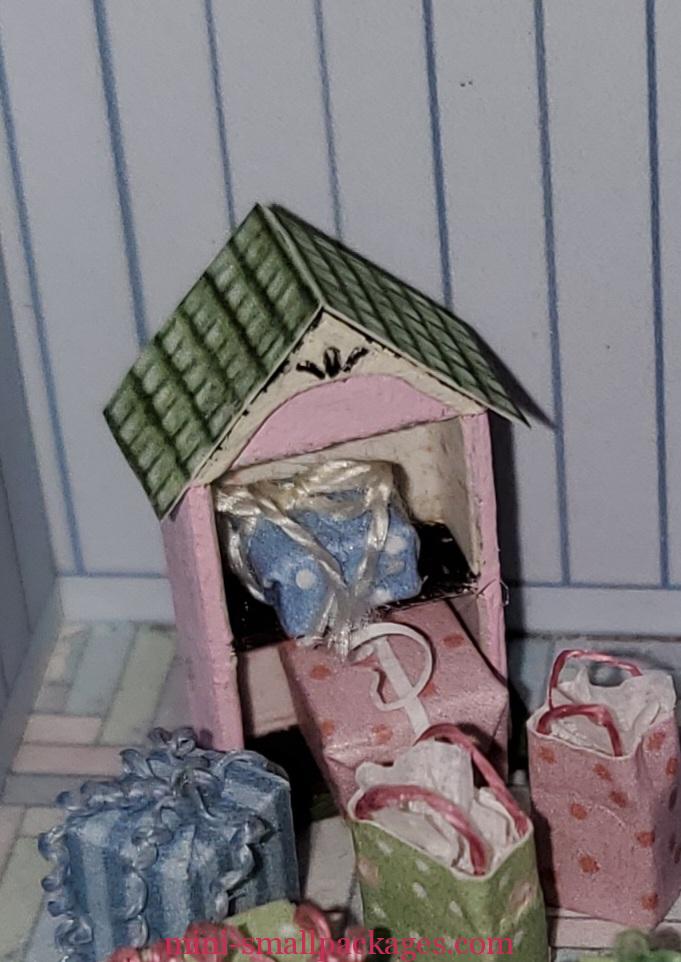
These were simple enough just wrap around the blocks. It is the handles that are the hardest. My solution was to figure out a length, cut two and glue one side first and let dry. Then I could glue the other side. Then add a tiny wad of the white crepe paper. I loved all the paper choices included in the kit.
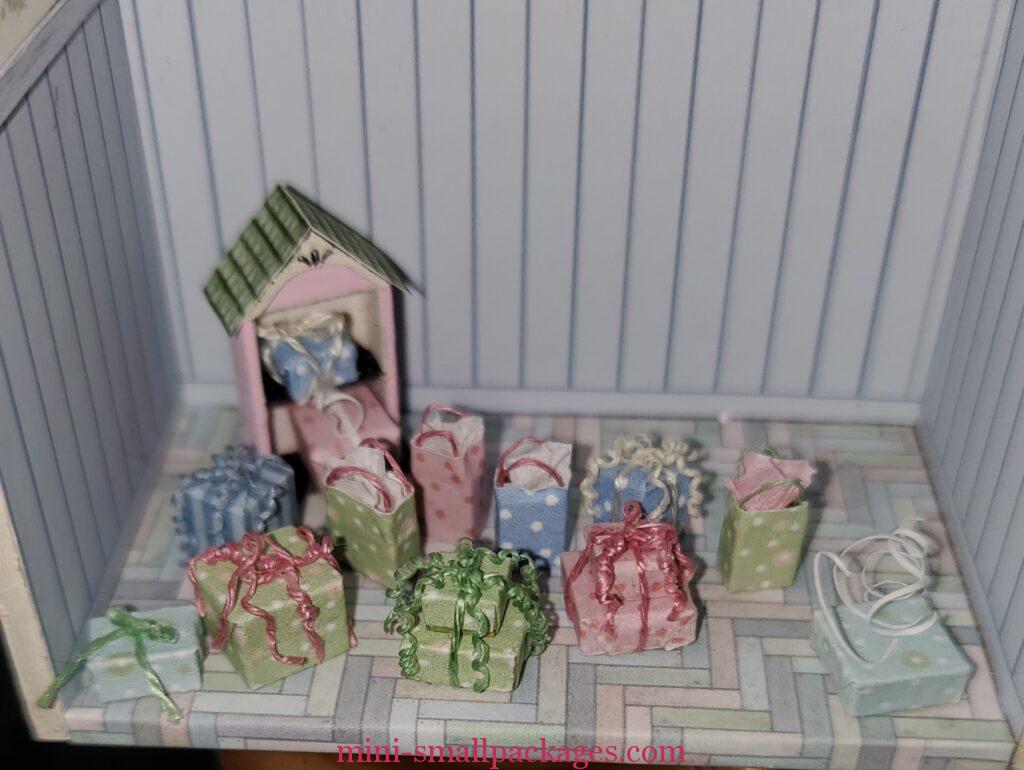
I tried one more type of present decoration, seen on the right, using paper curls. This was from plain paper trimmed very narrow. They have a tendency to curl as they are cut. It isn’t quite small enough but I stick it in any way.
Streamers
I wanted my streamers to curl, so I used my thin green wire again.
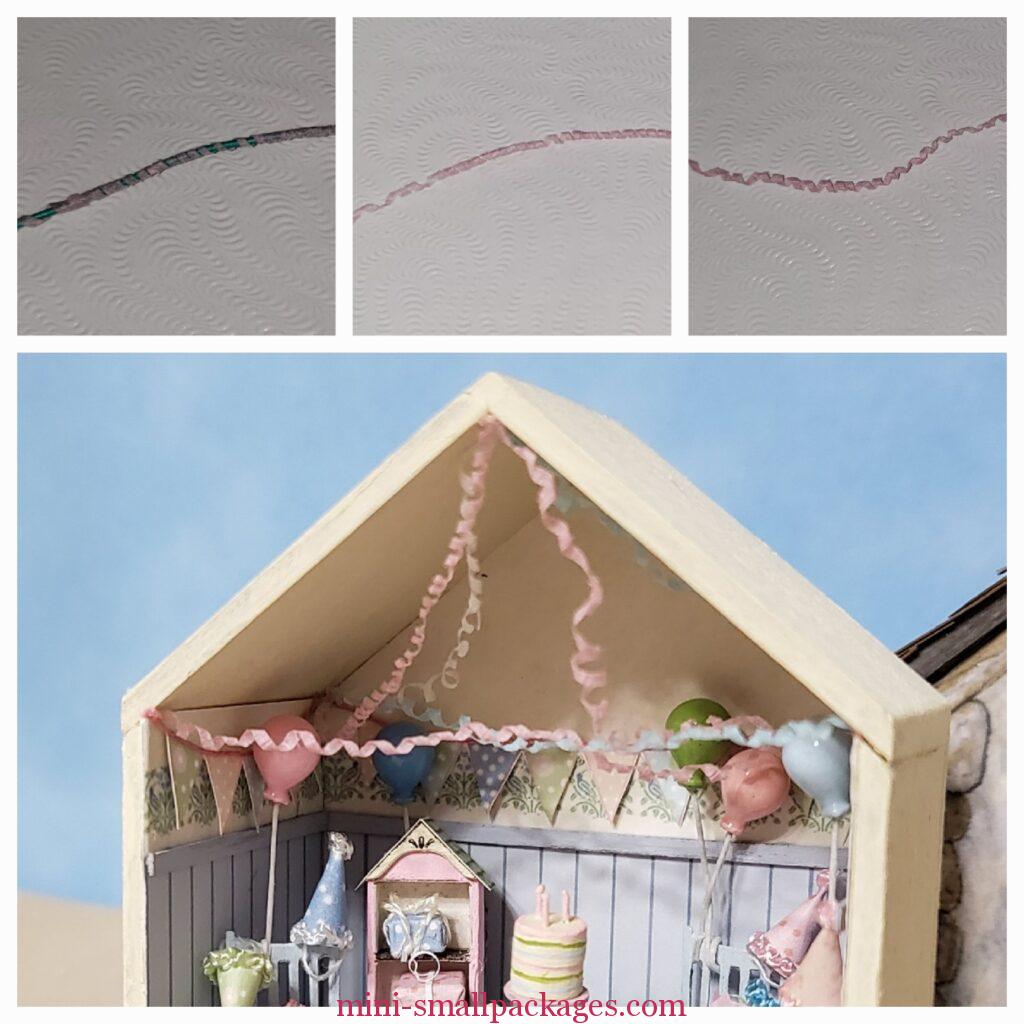
- Cut thin strip from the crepe paper (not shown)
- Wrap strip around the wire. No glue just gently press.
- With wire removed very curly. Can be used this way.
- Or gently stretched out for more relaxed curling.
Banner
I’ve mentioned before I read the instructions and then forget what is said. Sometimes I retain the information anyway.
My banner I cut oh so carefully to stay together and then later read to add thread. Duh, how much easier to do.
I hung mine along the wall. I was tempted to write Happy Birthday but decided too late. I did however cut an extra flag for the right side. With position I chose could not read it fully any way.
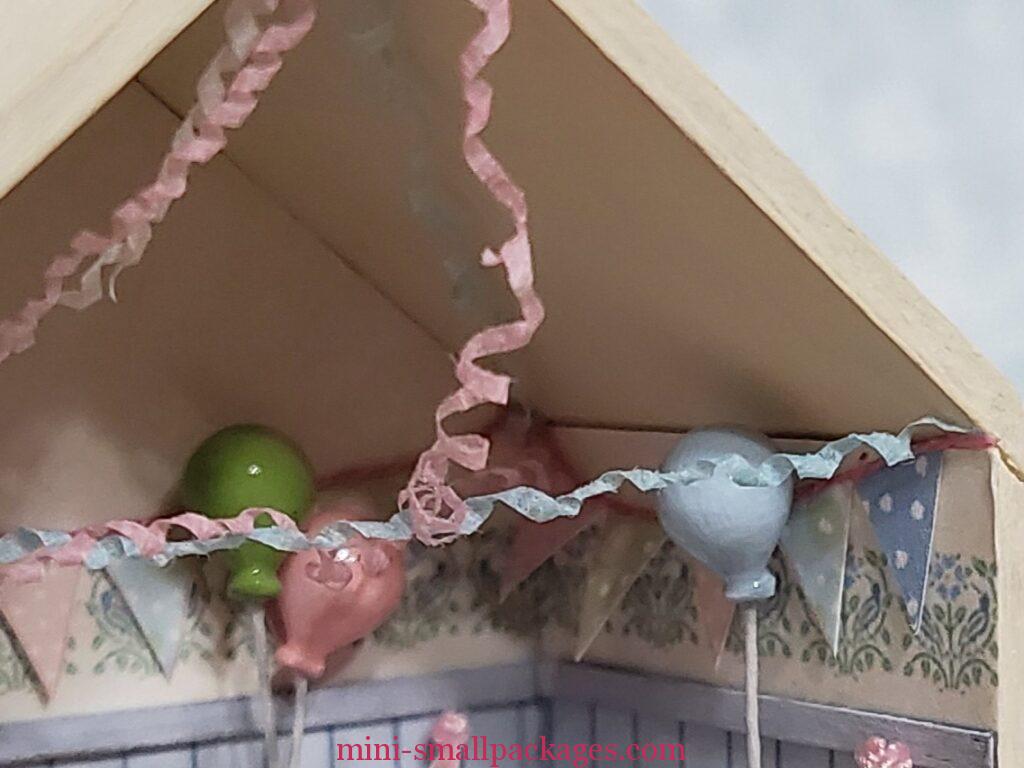
Balloons
The balloons were 3d printed in clear resin. I painted them on the sprue, then later painted the gloss after removing and touching up the paint in spots. I tried sanding and it was more likely I removed too much. After applying the gloss acrylic varnish I saw how I wasted my time with most of the sanding. This gloss easily covered up any problems except missing paint. I just applied thick enough to make it cover the difference. There were no brush strokes. When there was I added more and magically the stroke disappeared.
For some reason I was low on super glue (I should buy stock as I’ve bought more bottles lately than ever before). I tried gluing the balloons to the wires using E6000 but they popped off later. Back to getting some super glue out of the bottle (I like the gel type). That worked but wonky since I didn’t find something to hold them in place while glue set. I also used a pointed round file to ream out the E6000 glue.
To apply balloons to the the chairs I attached the wires first and trimmed to right height. Then I glued them to the wires. I applied the gloss after they were glued to the wires. I thought it would be easier to paint them on the wires and on the chairs. Some where more easy than the others because my wires moved. More wraps around might have helped them.
Cake
In finishing up, I decided I wanted to paint stripes on the cake. I did these with a 30/0 liner.
I also used the provided tiny beads on the table. I think they make interesting candies.
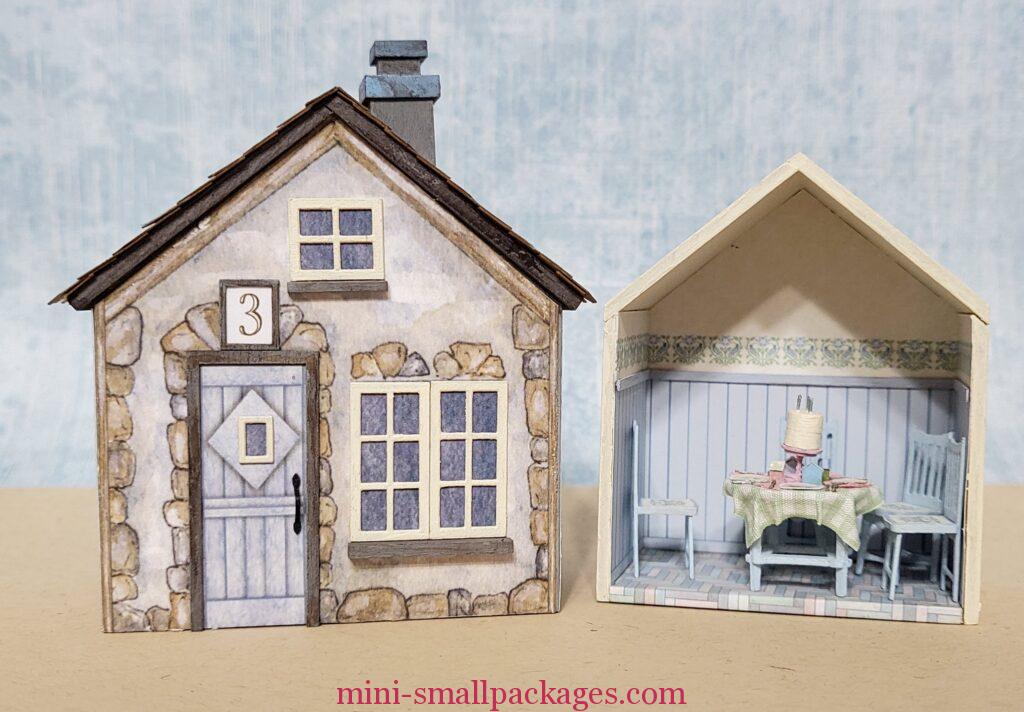
Finished
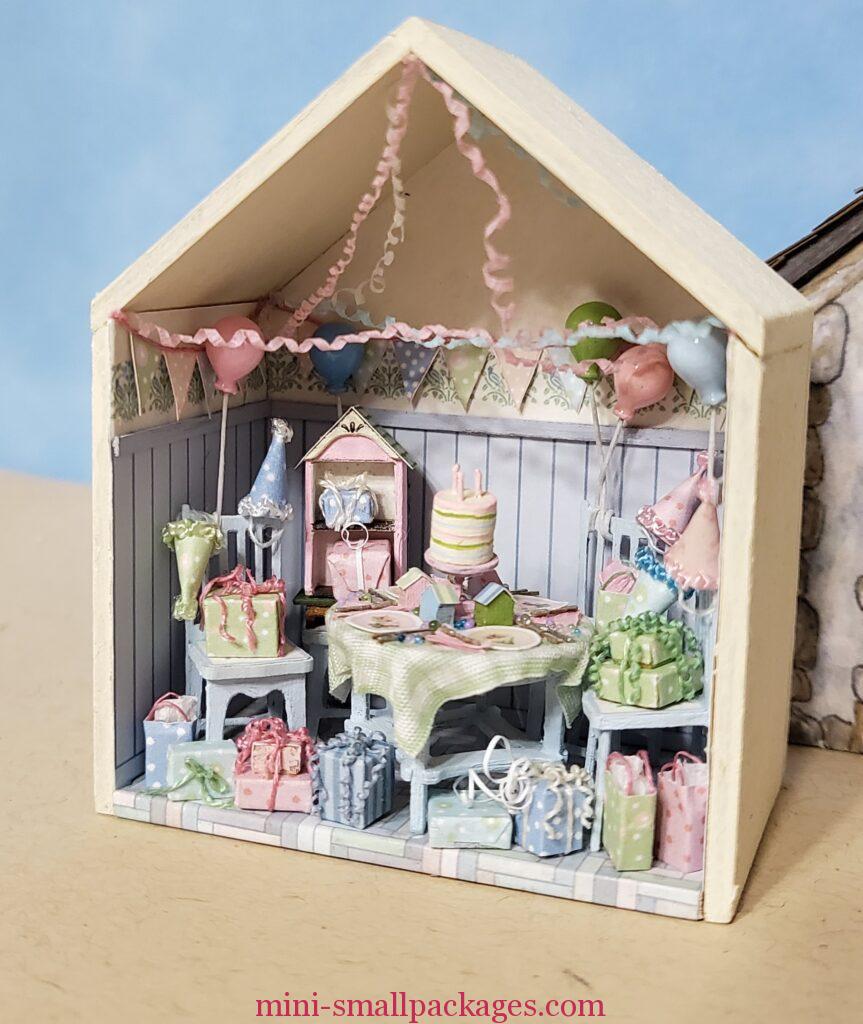
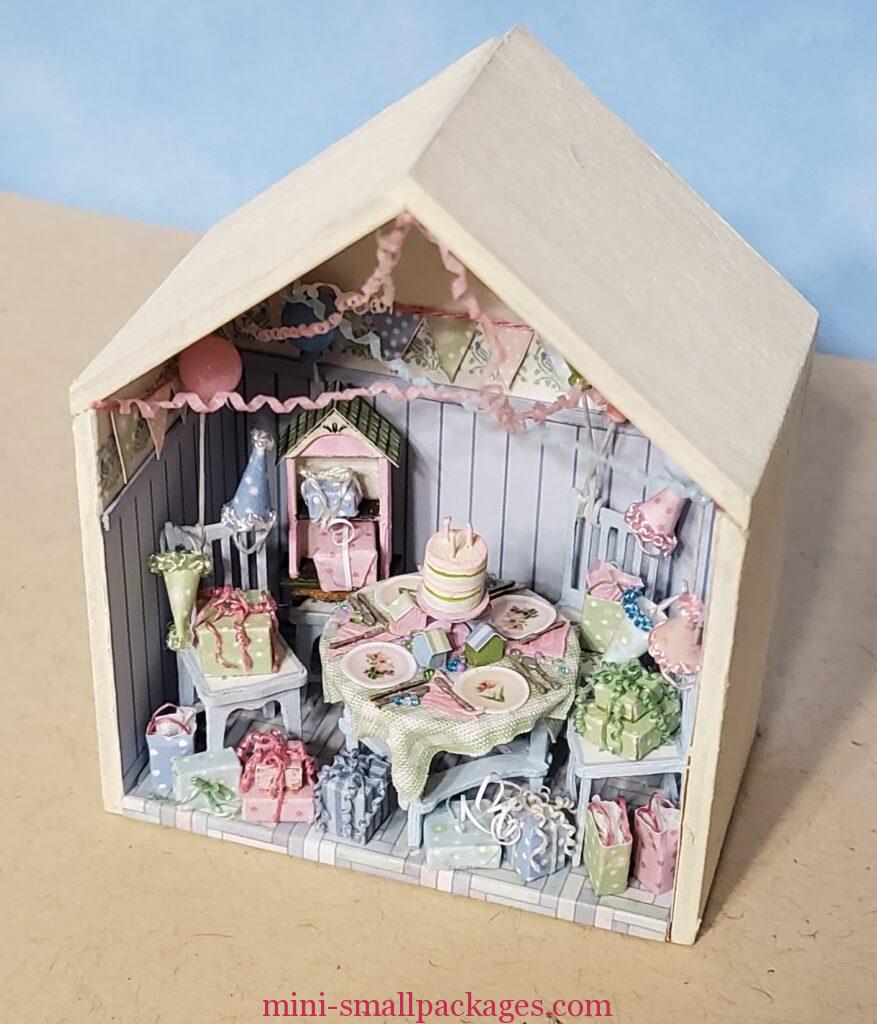
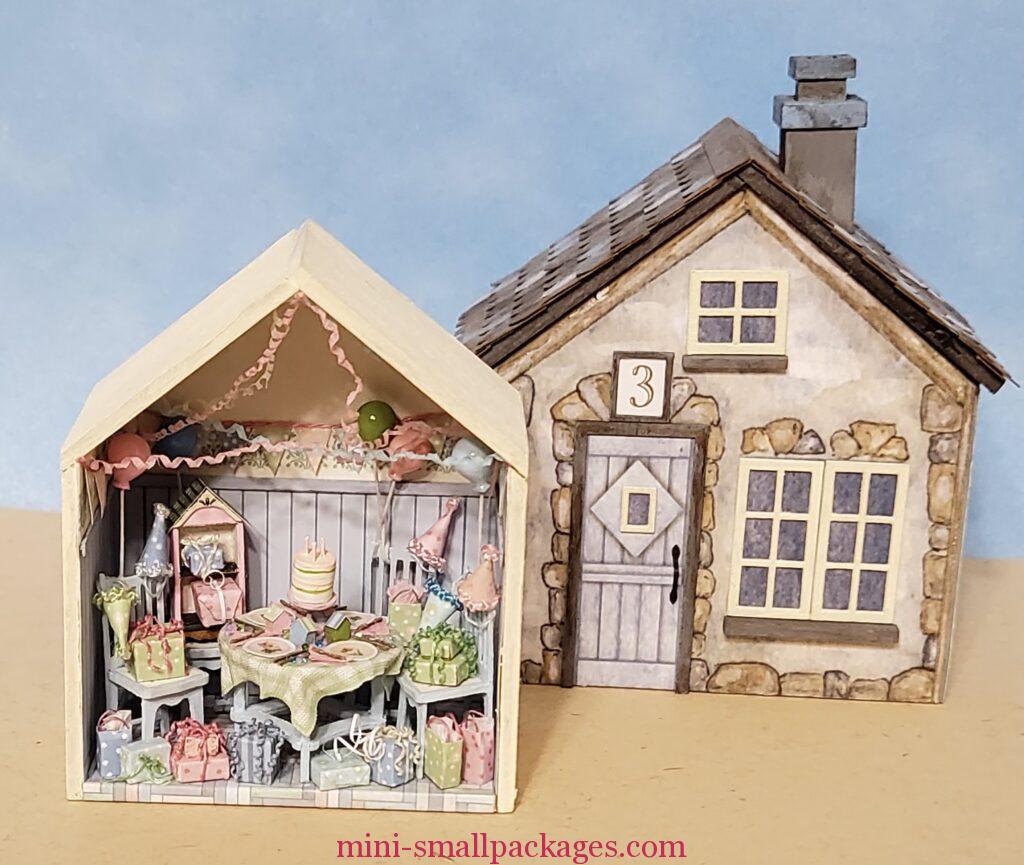
To see the other 2, check out my Secret Traveling Village page.
Happy miniaturing!
Preble

Love your work and suggestions. I’m having trouble with the party hats. Not sure how open in the back they should be. Or if they should close all the way. Any suggestions, gratefully appreciated. Than you.
Hi Fran, The hats are a cone shape so they should be closed (slight overlap).
Thank you for looking.
Wonderfully done and thanks for the tips along the way. Like the colours too.
I love that you are posting these!! So helpful since I am further behind than you. I hope to start on the first one soon!
Dear Preble,
I am following your tips. I finished #1 and am starting #2 keeping in mind your tips. You have been ever so helpful. Just read about #3. Again, so helpful.
Thank you. Carole from Winnipeg