the secret traveling village project by Robin Betterley’s Miniatures
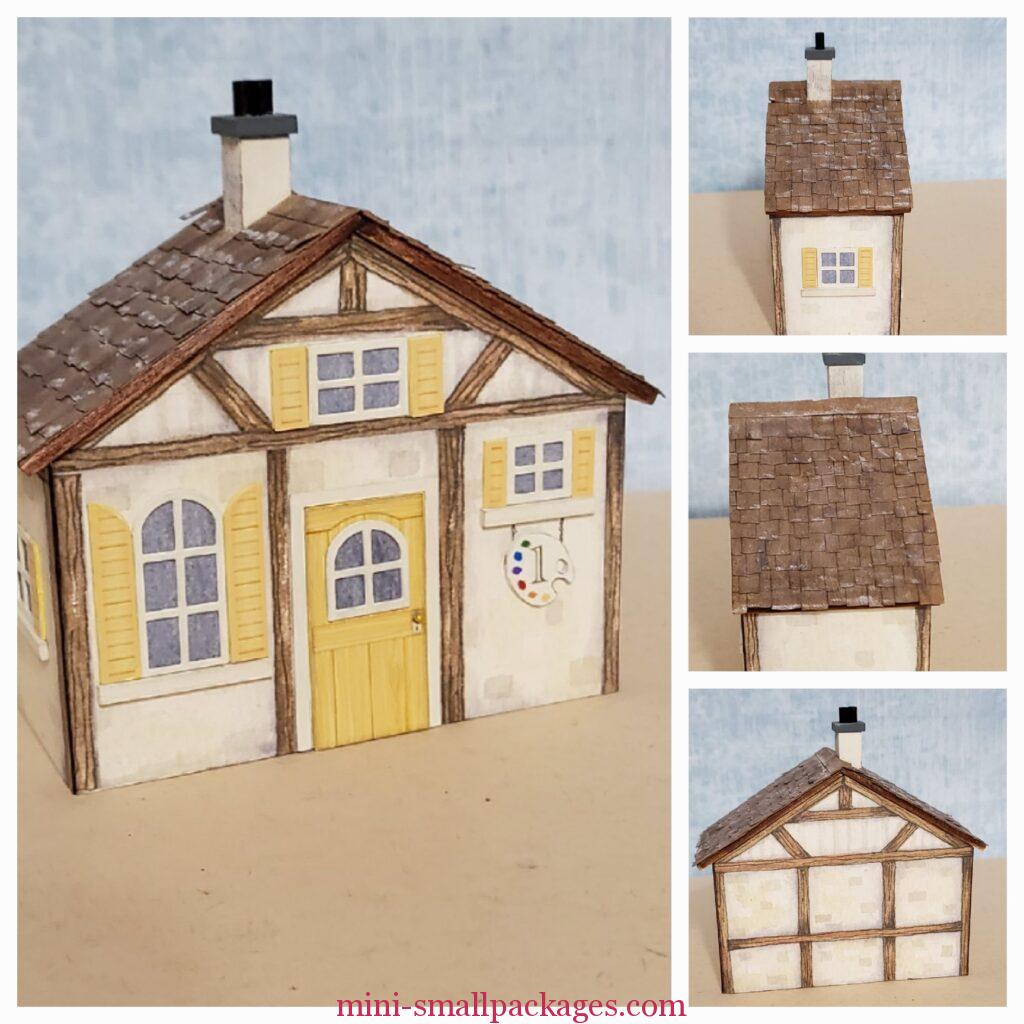
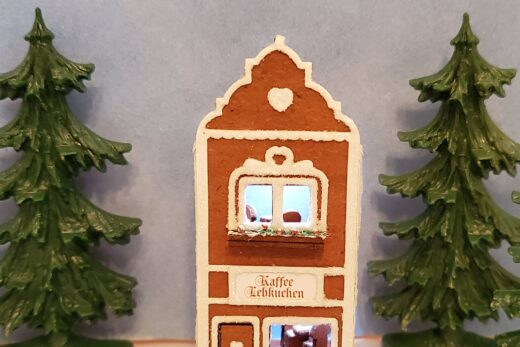
JANUARY kit is a painter’s cottage and adorable. I’m in love and I’m just the first month in.
My Tips
Edge coloring
I did not have many alcohol markers so I looked for a stain pen. I chose red oak because it matched closely with the graphics. I have a dark walnut and after applying to the wood thought it to be too dark. My problem was the pen wasn’t able to get in the corners where it needed to be applied. I had to use way more stain than I liked. It worked out OK, but a marker with a brush end would have been helpful. I’m going invest in some wood colors next.
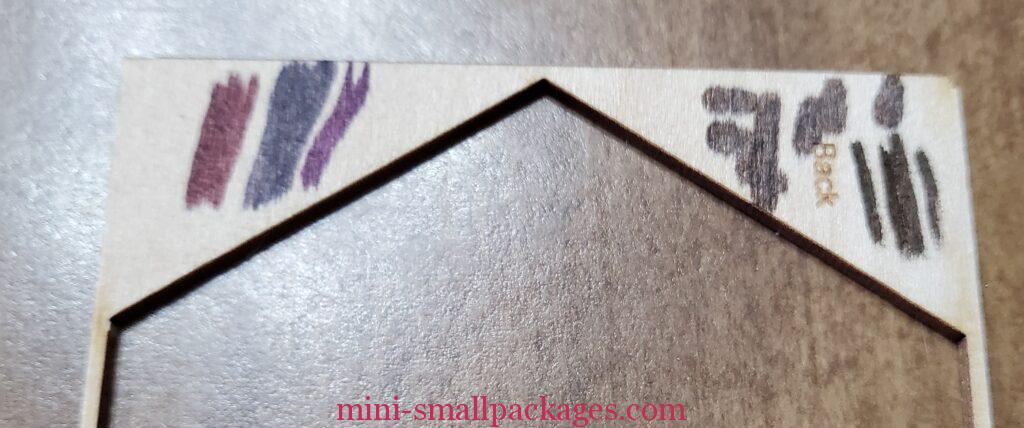
I have since purchased some alcohol markers for future projects. I have chosen the dual tip with chisel and brush tips. The brush would make quick work in the corners.
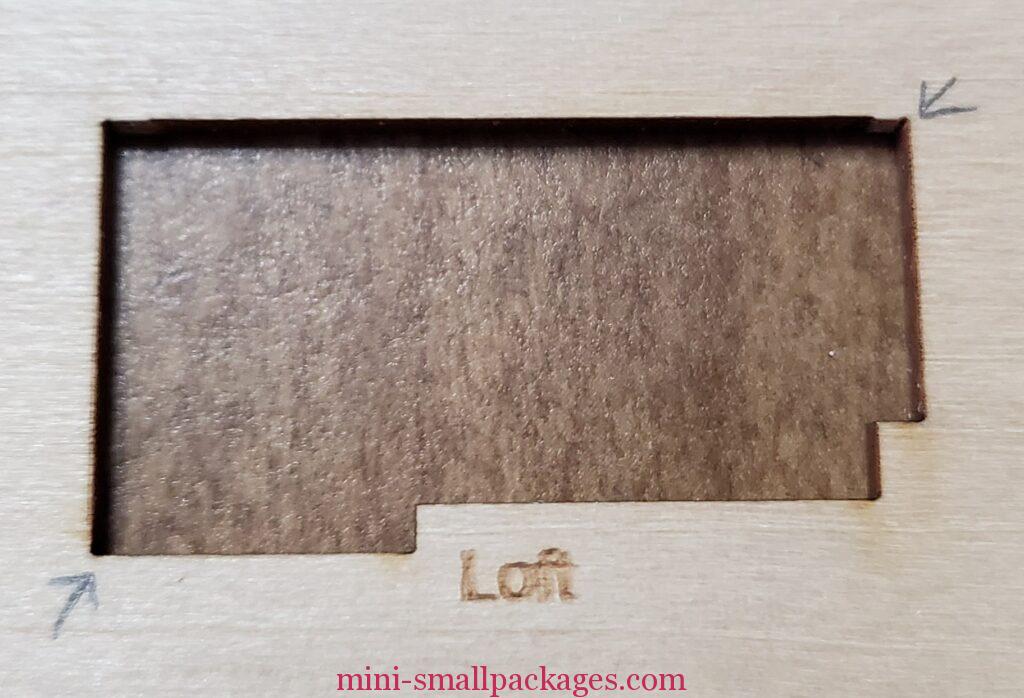
Loft piece
The loft piece fits really tight. I decided after several tries to add a notch. My notches were probably overkill. Just sanding a bit of the corner probably would work. It can be fit in place if the paper is trimmed well.
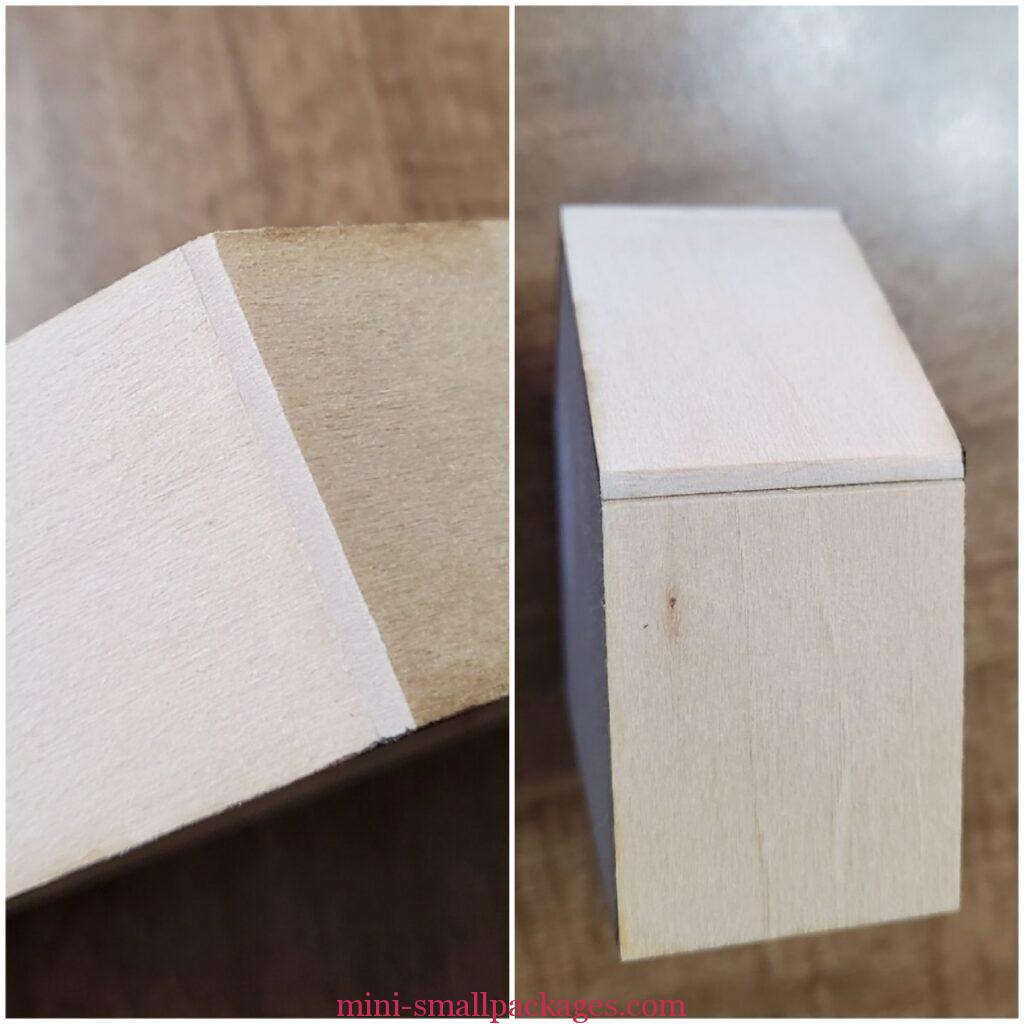
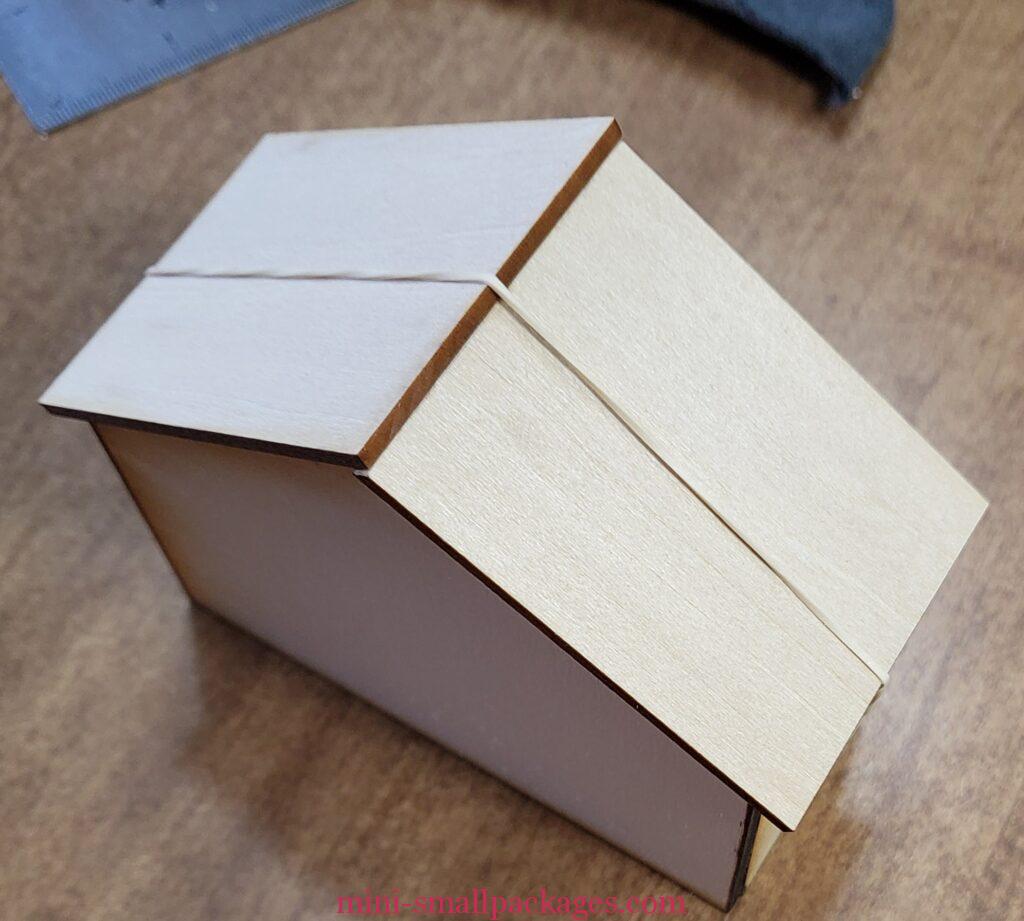
Roof Sanding
My next challenge was the roof. One is expected to sand to match the roof angle. I hate this sort of thing. I tried with heavy grit nailfile. I like the kind with the foam in between. It wasn’t gritty enough so it was going too slow. I got out my wood rasp and that worked. However it was slow too. Someone mentioned using a Dremel and I decided to try my new Stylo+ and I’m in love. It is so lightweight and I want to play with it more. When you compare holding a heavy glue bottle vs a lighter fat marker, yes I will pick the latter. After using the stylo+ I did some light sanding to finish up.
Next I realized the interior house has no outer graphics so I add wood filler to make smooth where the slots are for the loft. I will add the butter cream paint all over once sanded.
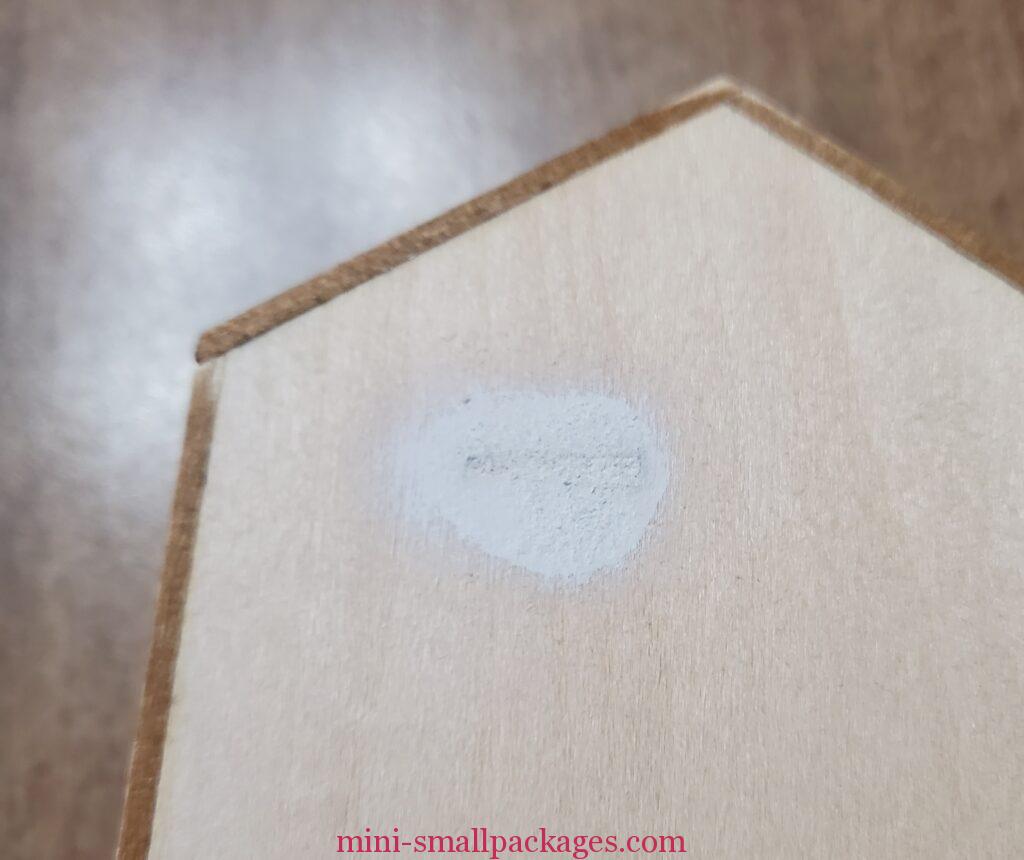

The sides of the interior show in the instructions as being sanded smooth but my interior fit inside before sanding. Another person working on it at same time did not fit without sanding.
Exterior house
Next I assembled the exterior house. It has to be sanded at an angle as well. Love my Stylo+
I used the same stain pen for the edges. I continued following the instructions to finish the exterior. I did consider cutting open the windows until I realized they would not match on the inside. Another person doing this project did cut open the windows. Yet another person, used the pictures from the instructions behind the windows on the outside. It was a neat idea. Some used boards over the top of the print. I had decided I didn’t have the time or patience for all that. I respect that they did though because in the past, I probably would have.
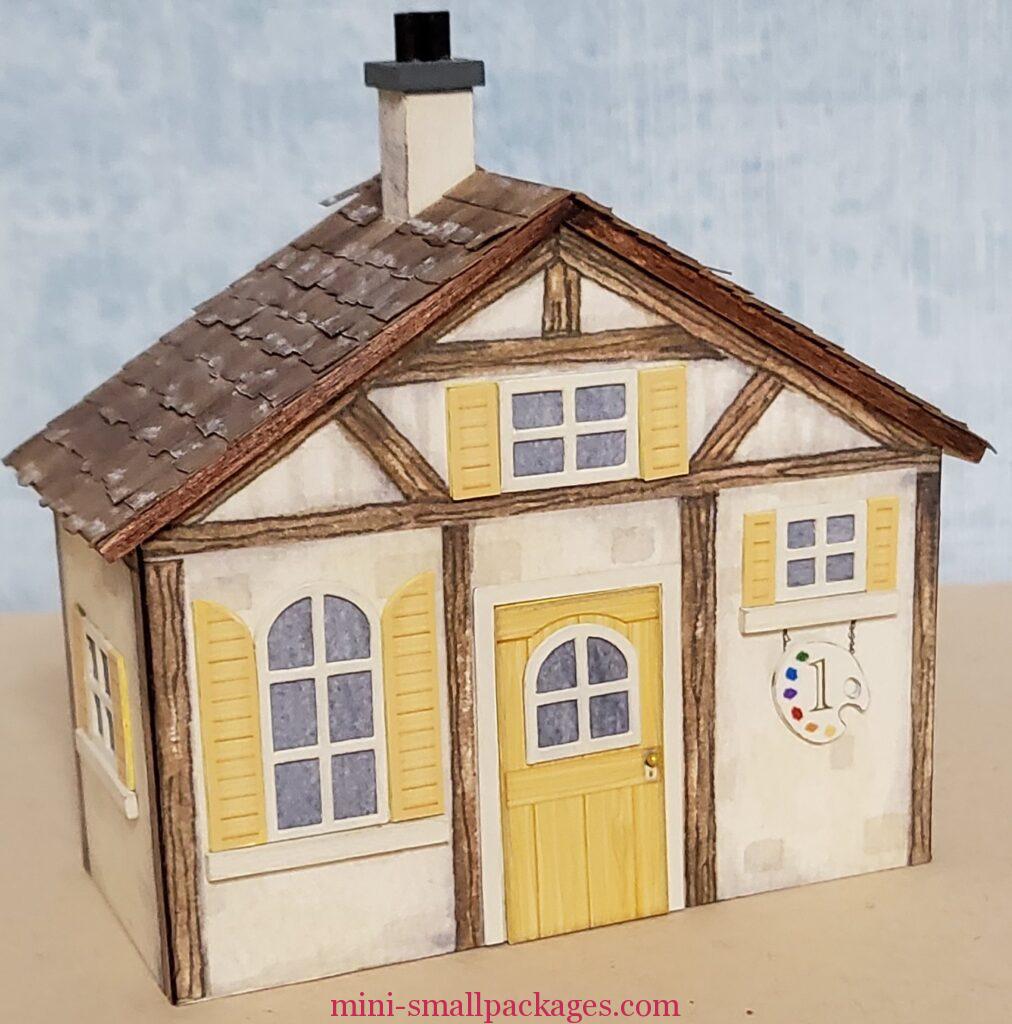
Roof
Ideally there should be 11 rows of shingles on each side. This is what it looks like when you don’t pay attention to this.
Interior
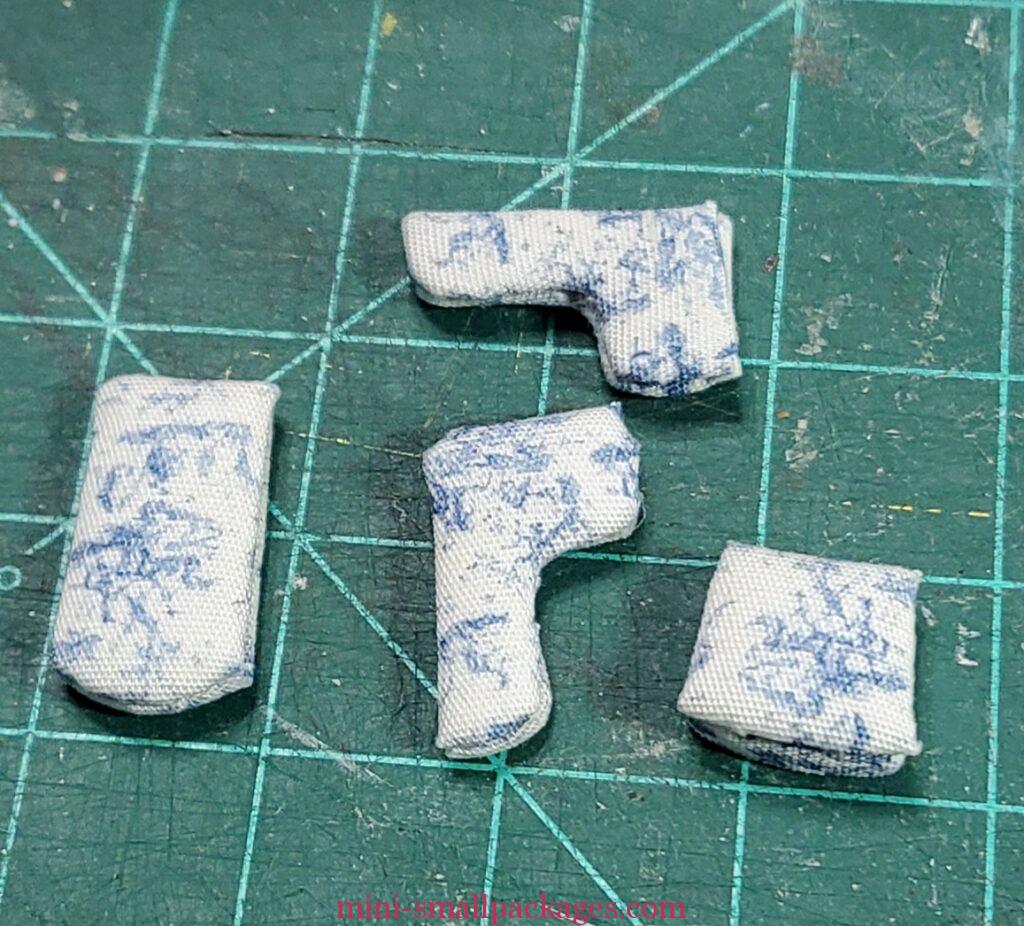
Upholstered chairs
There are multiple steps to these and some parts are treated differently. I didn’t understand about the layers of batting that was added. I added a layer to the cardboard and two layers to the wood pieces. No wonder I felt the need not to trim to the printed edge. I needed the extra to reach around the extra batting.
Note to self: Before I start on the next kit, I’m going to try to do better reading and understanding the instructions. It has been nice to work on zoom with others, since they have experience. I have been able to give, as well get help.
Paint brushes
Thank you Debbie Young for your alternative brush idea. We were both on a weekly open zoom. She went and snipped off bristles from various real scrub brushes and flattened the end. She was really pleased with them. I did that rather than use the clay. I’m not clay challenged so much as clay lazy. It’s not my favorite thing.
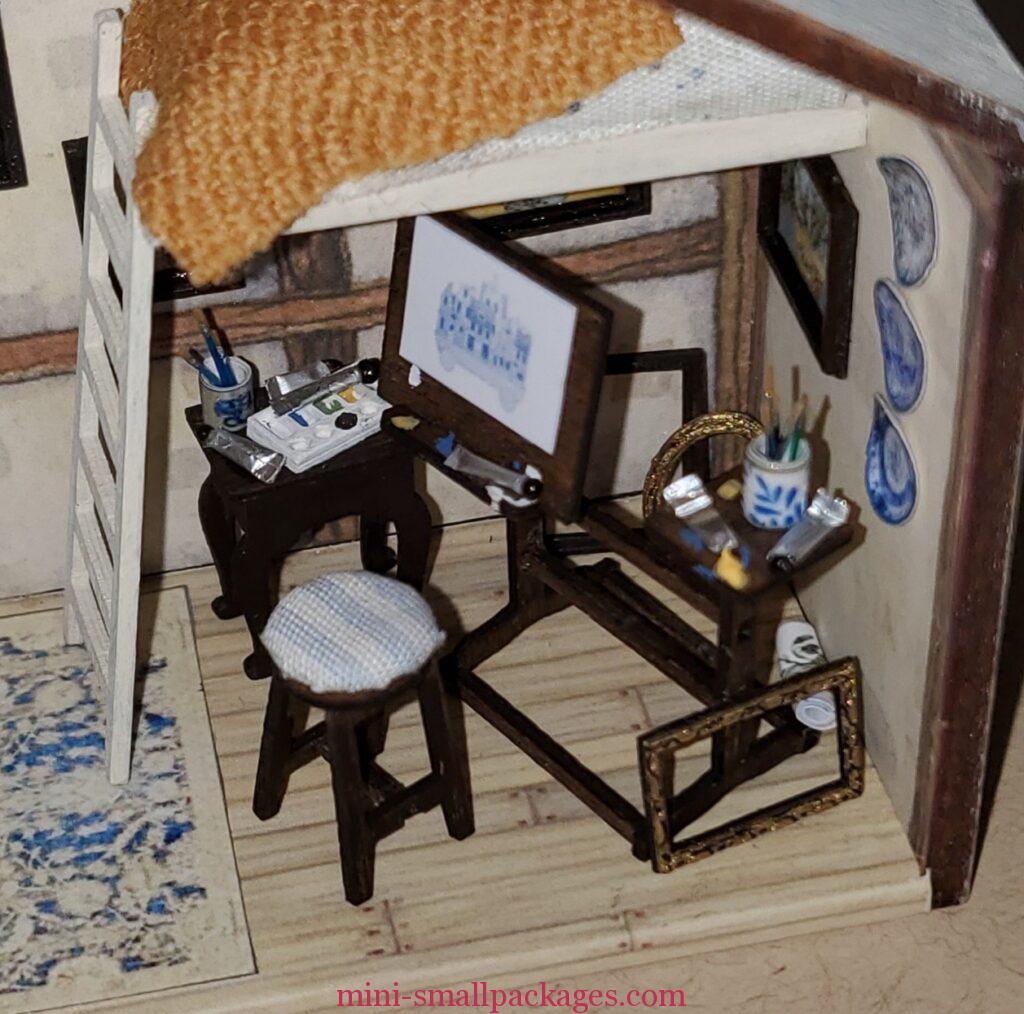
Paint tubes
We were provided with foil to roll for the paint tubes and they were just the neatest thing. I used a strip maybe 1/4th inch wide. I rolled around my smaller quilling tool. After rolling so far I decided to stop and apply a touch of glue. The width of the roll to make ones in scale. Granted tubes do come in different sizes. After that is when I cut then into 2 tubes. Certainly I could have rolled the full width then cut them apart. However doing so requires one to open one end. Might try alternating direction of each cut. Meaning rotate one quarter turn. This would put the crimped spot opposite. Can then squish together one end for the opening end.
I loved making them. It was oddly satisfying to carefully flatten the foil seam with my fingernail. Crimping the ends was fun, too although I just did plain crimps. I was checking pictures later and noticed the extra lines Robin used.
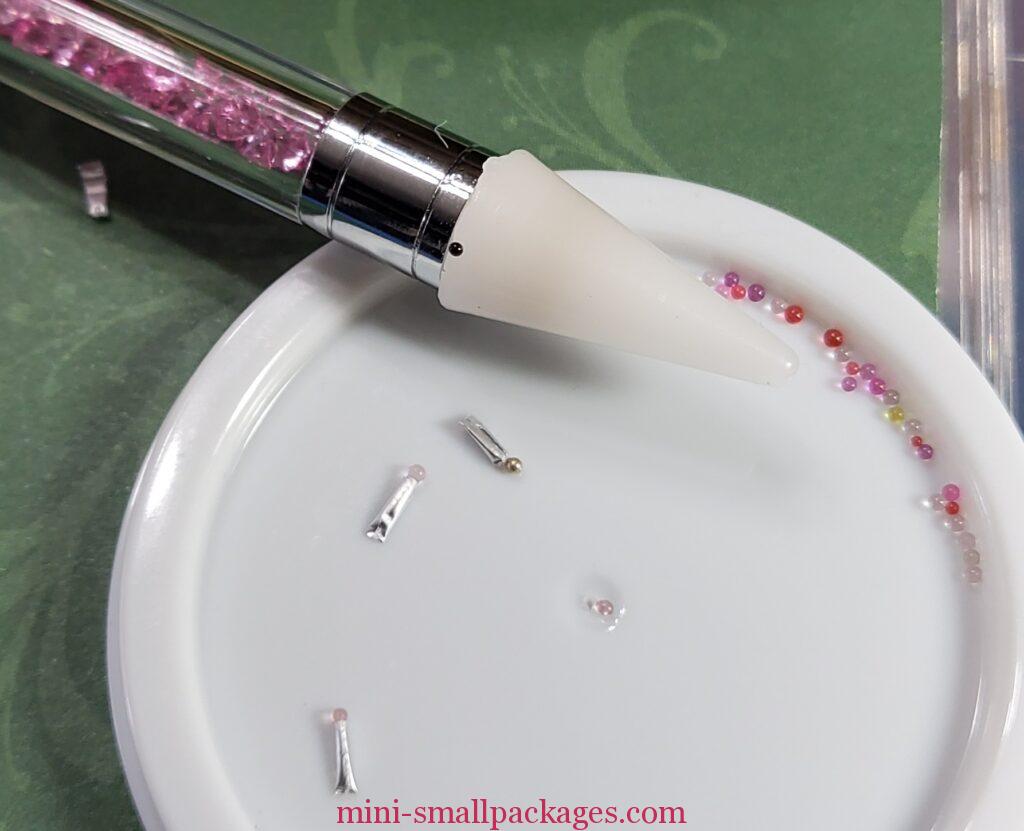
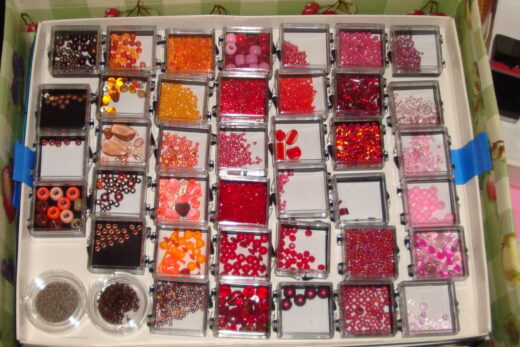
For the lid we were provided with no-hole beads (also called caviar beads or marbles). I lost one so went looking in my stash for a replacement. I just painted with alcohol marker after it was glued on the tube. I am showing a new tool I purchased for working with beads. It has a wax tip. It is designed for nail art and called a rhinestone picker. It works better or same as other methods I’ve tried. I guess could use a wax candle instead to try.
Framed art
My mistake was not keeping the frames that go together – together. Well plus being in zoom chat, moving things around and just generally not paying attention. Some may hinder themselves by not doing, I hinder myself by not considering I made a mistake. In this instance, I thought the extra frame layer was missing (as in dropped). Only I later discovered I had glued 2 together wrong. I made 3 when it was supposed to be 2. I thought B & C went together as a different type of frame. Then I had two single frames , I was OK because not all frames as thick as others.
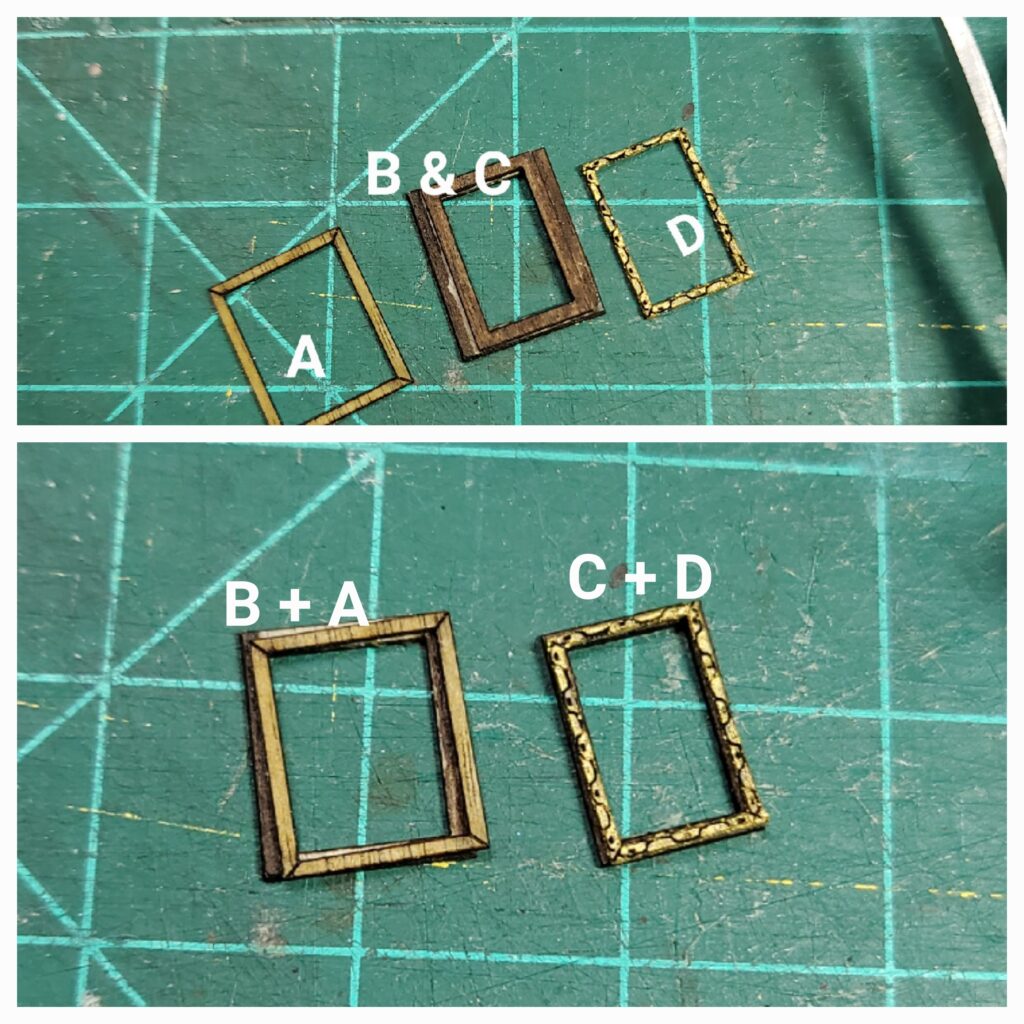
It was an easy and quick fix prying apart gently with my craft knife, unlike some of my other mistakes (in other projects).
Gold on the frames
I only used gold on a couple and I was careful not to get it in the cracks /laser cut edges. I allowed the blackening from the laser cutting to be my antiquing.
The other thing is I used a different paint than I had been using and it is a dream by comparison. It’s Ceramacoat Gleams 14K gold. I don’t know if it’s made this way anymore. I’ve had the bottle for long awhile. But maybe it was because it was old and I shook it more. Paint does start to separate. Apparently we should be shaking paint bottles longer and harder than I normally do.
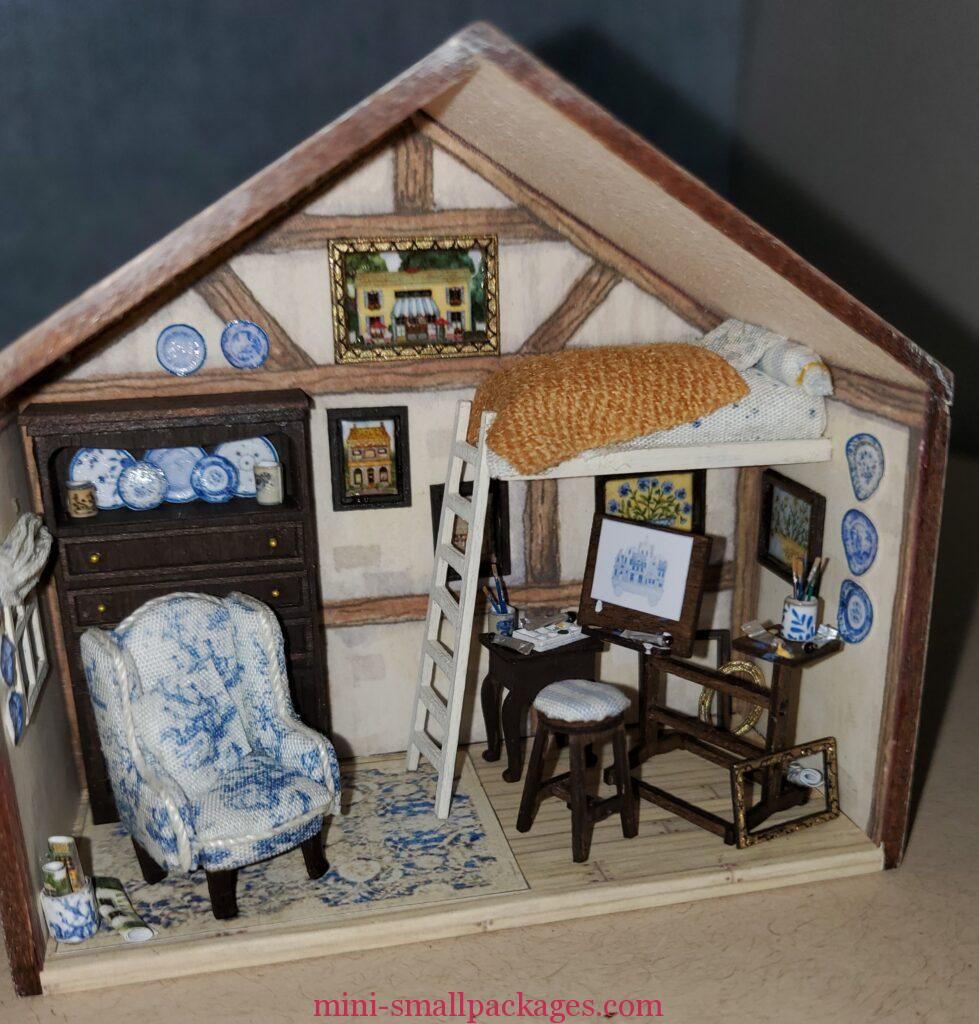
Dresser Cabinet
I had stained it too dark but I just left it. It doesn’t look so bad with the gold knobs and the plates/accessories. As for those plates, it was so nice to use a punch VS hand cutting. I would like to see them laser cut but maybe that costs too much.
Update: I was asked below about the punches I used. I did not use a punch on the smallest ones above the chair, I hand cut those. The ones to the right were punched using a 1/4 inch punch. The middle size I believe were punched using a 1/8 inch but I could be wrong on that. Measure the plates to be sure. I have one punch (nearly new) that punches and leaves a tab. Grr!
When punching a printie, I always turn the punch over so I can see what I am punching. If the punch has a guard/cover to catch the punch, I remove that so I can see.
Finished
Oh wait, looks like I need to touch up next to the roof.
Don’t forget the door knob.
Happy miniaturing!
Preble
If you enjoy my website, please consider making a small donation via PayPal.me/minismallpackages. Thank you!

I always turn my punches upside down so I can see where I will punch. I have removed the ‘catch’ from them so I can see. I will update the post with this info.
What size punch did you use for the plates and what technique did you use to get the punch centered. I always end up with them off centered.
Thank you so much for sharing.