You might remember Miss Greene’s Finishing School for Worms. If not, you can check it out here. She recently decided to retire and open a Cafe.
She was inspired by a challenge on Pam Junk’s group Smaller and Smaller Adventures. The challenge was to make an Apple themed project. To help furnish the project challenge participants could also join an Apple theme swap.
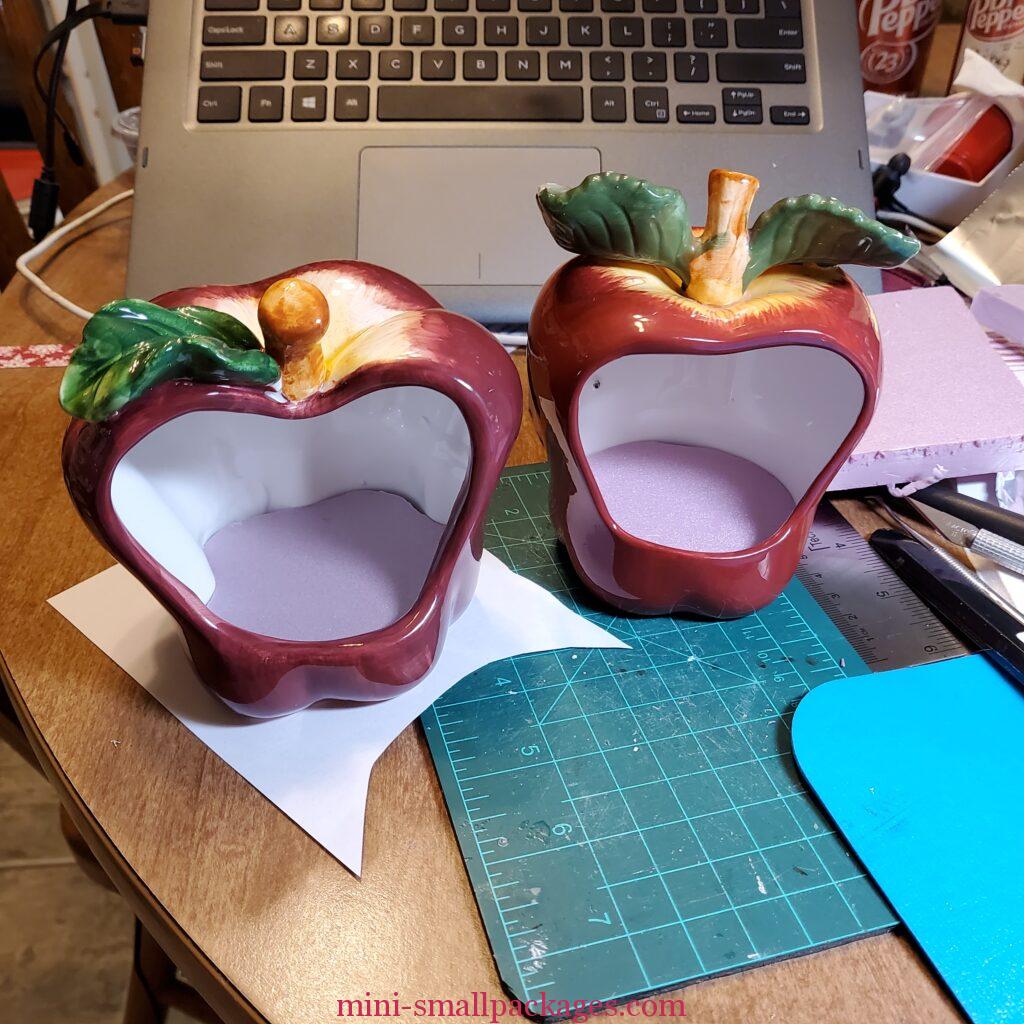
Miss Greene had collected already an apple scrubby holder. That’s much easier to make into a room than the foam one she used for her school. This one just needs a floor.
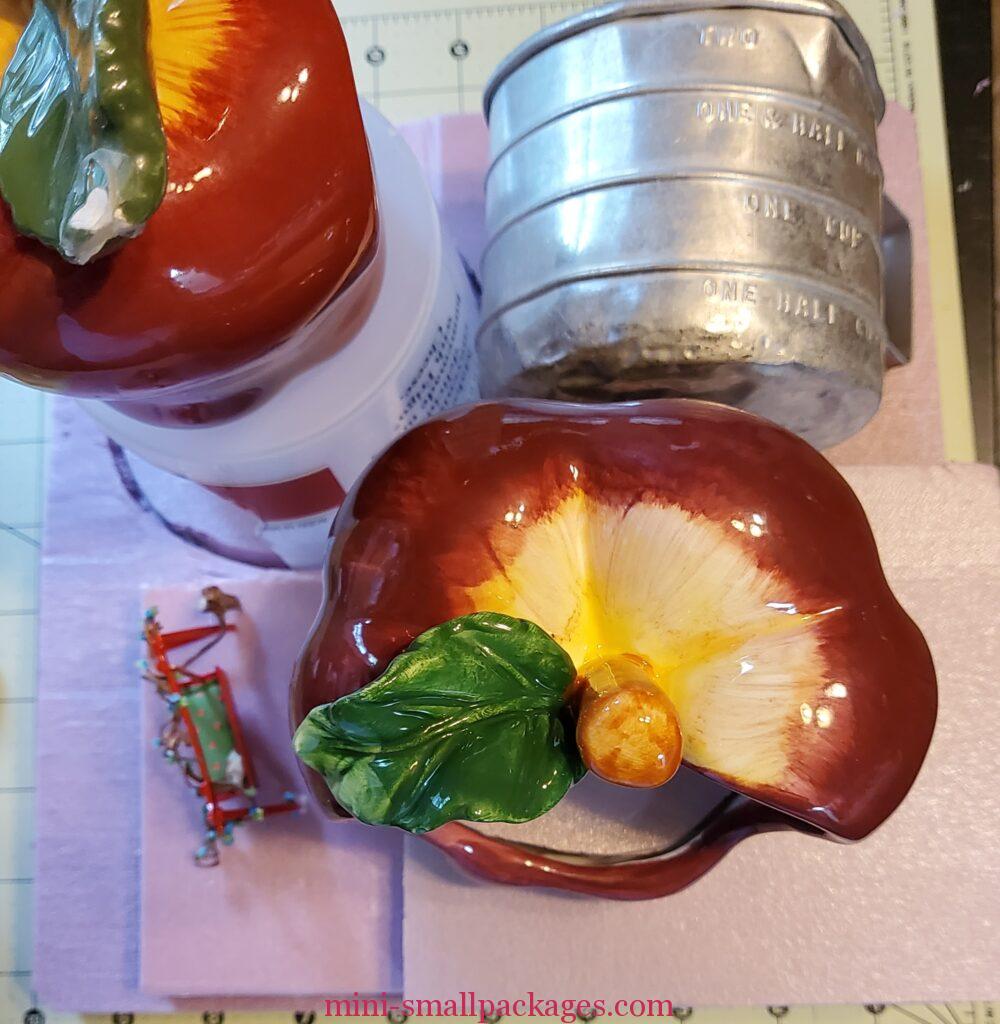
As part of the swap, she knew she would get a second apple scrubby holder. So she dreamed about what could go with them. Then she remembered the old tin measuring cup. She really liked it for extra room to hold her new kitchen. She collected several other things to potentially build with as she waited for the swaps to arrive.
Once the swaps arrived she officially retired from teaching and decided to open that Cafe. She mulled on names. Apple Pie Cafe? Apple Dumpling? Miss Greene’s?
This is when she really started planning.
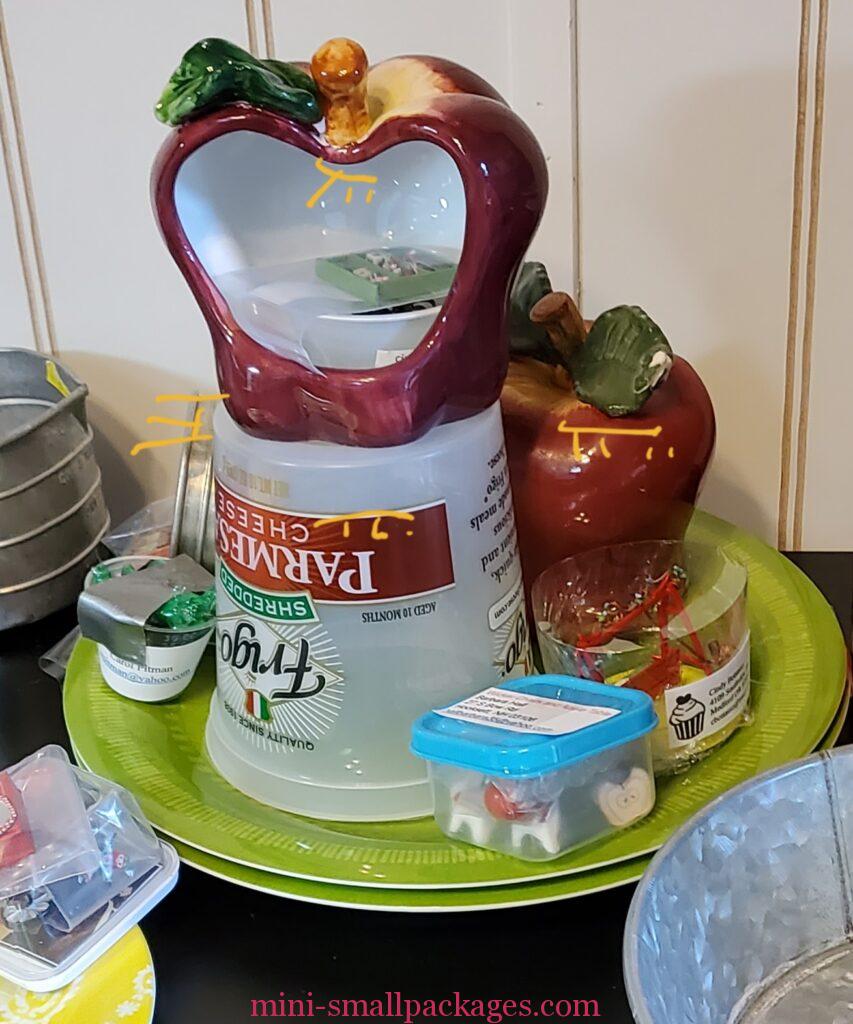
The yellow plate was out. It was too small. The tin dish was out because it was also too small. Then the green plate was out because it would not fit in a basketball cube. No domes were available and the plate too big for those as well.
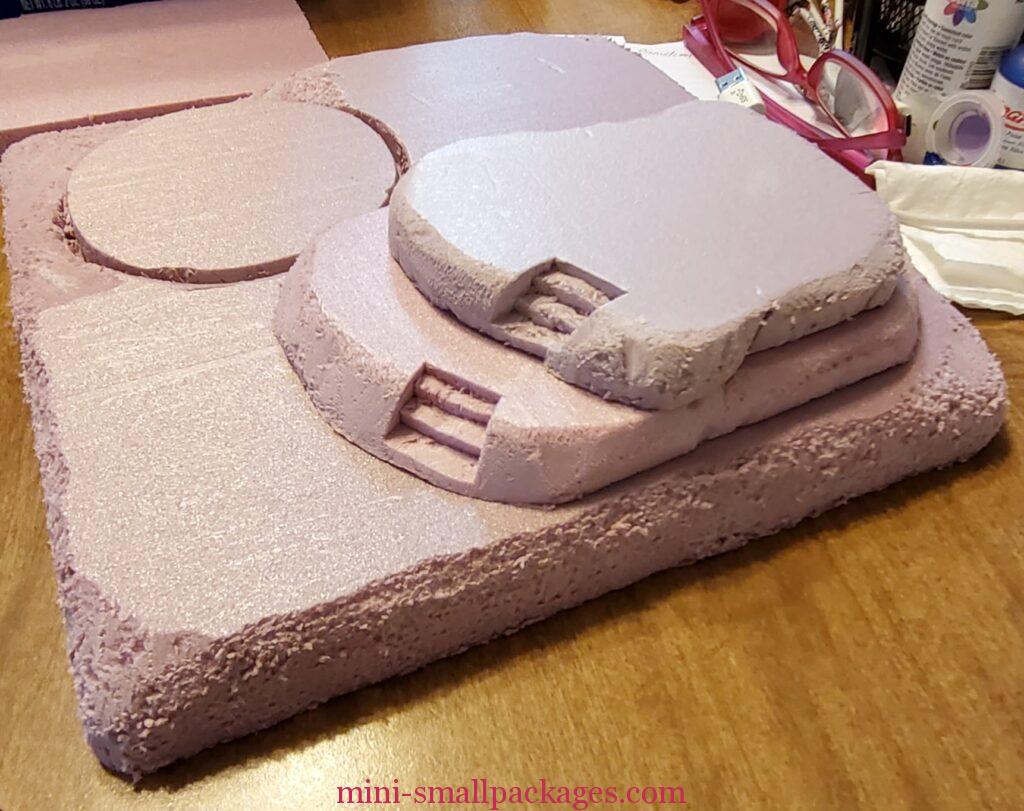
I was also thinking about where would lights go. In the above Pic, I drew little yellow markers. It is always better to plan ahead for lighting.
I cut a piece of foam to fit the display cube. Then I added the items I wanted to use and some foam pieces I was considering for levels. I find that for bigger projects that I prefer then to have different levels for the eye to go to.
Initially I wanted the bigger apple on top but then thought about what will fit and decide that I would rather the smaller be on top for the bedroom. Then the use of this arrangement will help give the right focus to each. Each ‘room’ will have its own side. I will try to reduce visibility of the other areas using greenery. Or by doing things like having a sign on the top apple.

I also posted the 4 sided photo to Smaller and Smaller group. I was asking about the cafe and how should the big opening be turned. The comments I got were for it to be open to the patio.
Next I added construction foam to both of the apples. It requires a little patience as one has to shape the foam best you can without making it to small. Then trimming away any spots that are not fitting.
Next I worked on a floor for the kitchen. I used foam core to make it.
To shape the floor to fit I used my craft knife to cut away bits. This takes patience. I will press against corners to help mark where I still need to cut.
Planning is important but I tend to do some as I go. In this example I am planning how to cut these scrap pieces.
However all the planning does not help if one does not think about the next step. In my case, the steps. I cut in my steps and I was really pleased with how they got together until… I put the apple on top. That’s when I realized either I don’t need steps or they need put somewhere else. These are worms I’m planning for. They probably don’t need steps but I like them so I will have them. But I will move them. That means I’m going to cut new pieces.
Construction Foam
Before I continue let me talk more about this construction foam. I have used this pink foam for years. It comes in several thicknesses.
For a long time, all I had available was the half inch thick sheets. Sheets are 4 x 8 feet. One sheet may go a long way, but it’s a reasonable investment. I recommend that you have a craft knife available in case the hardware store doesn’t cut it for you. That’s if you are driving a car and a sheet won’t fit.
More recently available is a 2×2 foot board in one inch thick. These are called project boards. This is what I am using for the base.
This product can be easily cut with a craft knife. I recommend the snap blade style because it will extend so that can cut all the way through. Use a sharp blade. The newer the blade the less likely it will tear. Make several cuts rather than try to cut all at one time.
Can also use a hot knife for shaping. I have used a soldering iron before to add grooves but it wasn’t for miniatures. However that technique may be useful.
The rasp file is extremely handy for removing edges from the construction foam. It is messy. I have left the edges rough as I think I want rough dirt. The rasp has multiple teeth for removing material. I used the larger teeth to do this. Mine is half round.
Meanwhile I was waiting on a package of Plaster cloth. Well a multi pack. I got a great deal of 10 for $21 vs $12 for one package marketed to the hobby industry. Then two days later I got a small unopened package third hand for free. This smaller package will probably be enough for this project. But I have this other to use later or maybe my daughter can use for a cosplay costume.
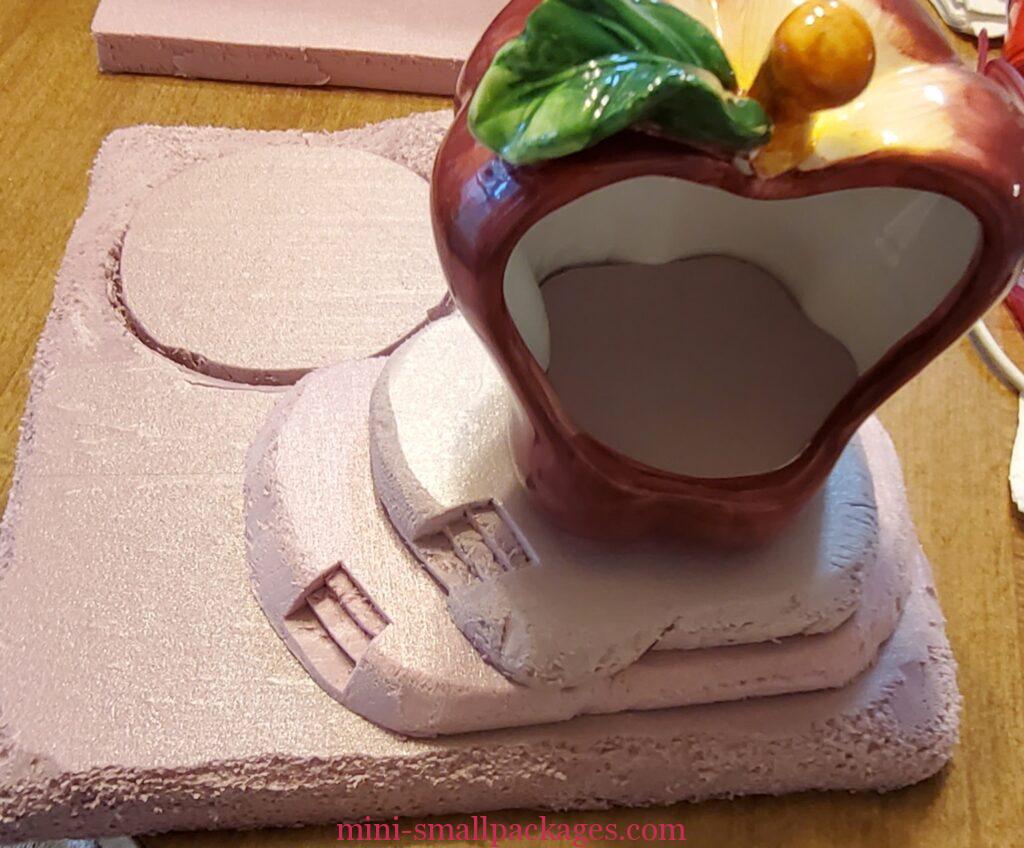
Before I use the Plaster cloth, I decided to rethink my shape. The cut foam (from scraps) don’t allow me to add the path I want. I will cut new pieces.


In cutting a new piece (from the one inch thick like the base), I decided that I would plan for each other part. I started with a section that was about half of my base. I did offset to leave the patio. I cut the circle tip for the cafe. Then I cut for the tin cup. To help get the shape I used a scrap foam to hold at the top to draw around. Next I shaped it more to make sure the cup would fit before edge shaping.

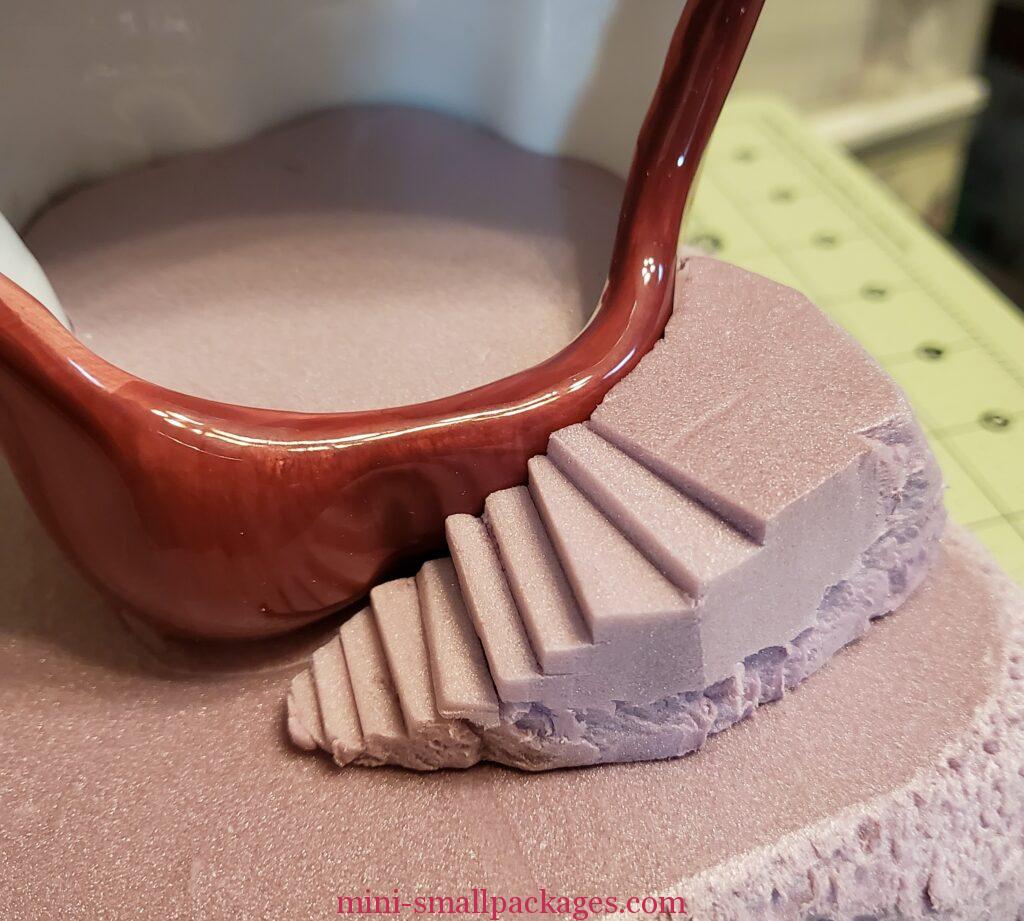
Next up were the steps. I did make sure where I was placing the apple before cutting themthis time. I did these differently. I cut the side first. This was to serve as a guide so I didn’t cut too much into the base. Then I started at the bottom and cut my first step layer at the bottom. Then I sliced down. I did the next step up and repeat. I usually start from the top down. After trying it this way, I can say it does not matter which direction one starts with. Now, if one wants to be more accurate, then better get out the ruler and square.
I also cut a set for the apple itself. These were cut the same way as the others. Only this time I had a curve to deal with.
Stumped
Using Plaster cloth
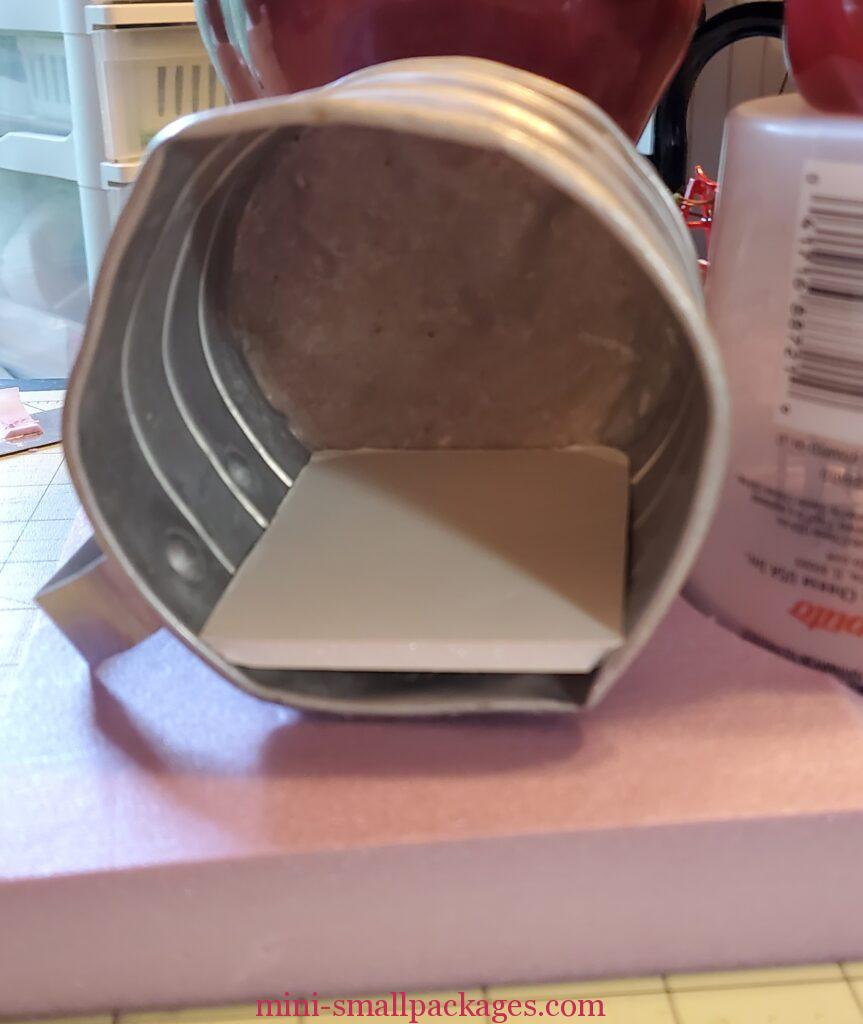
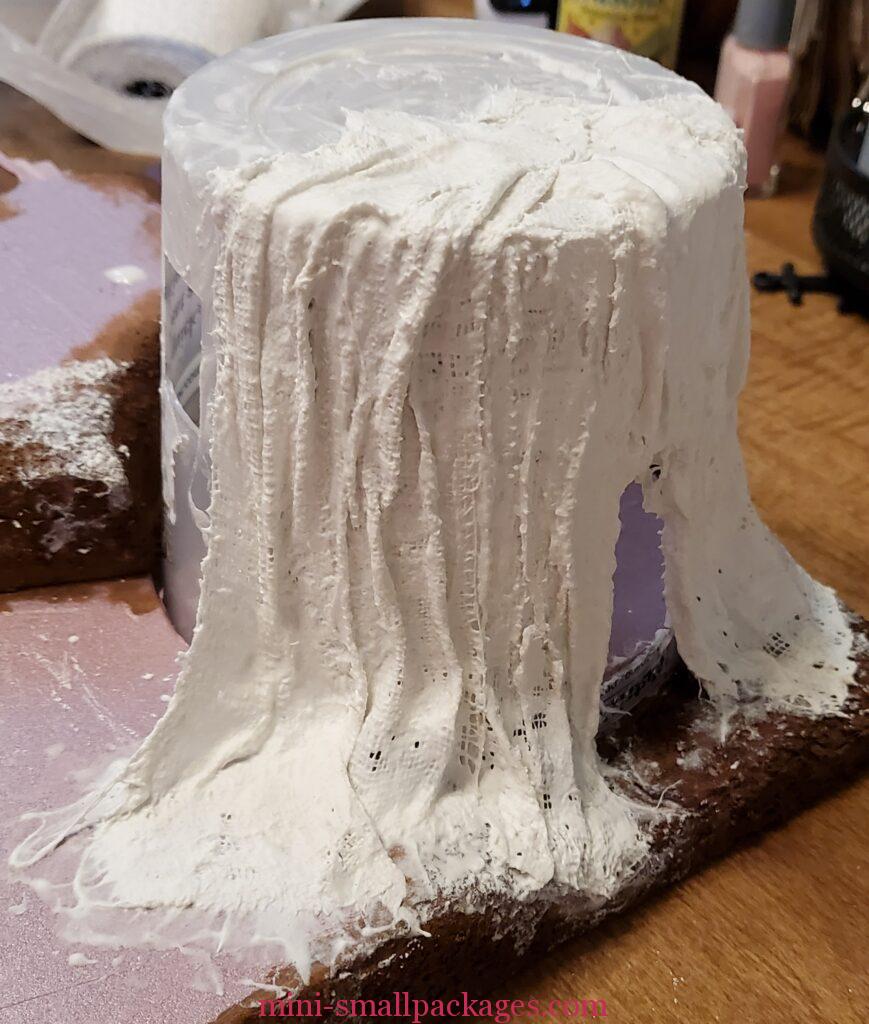
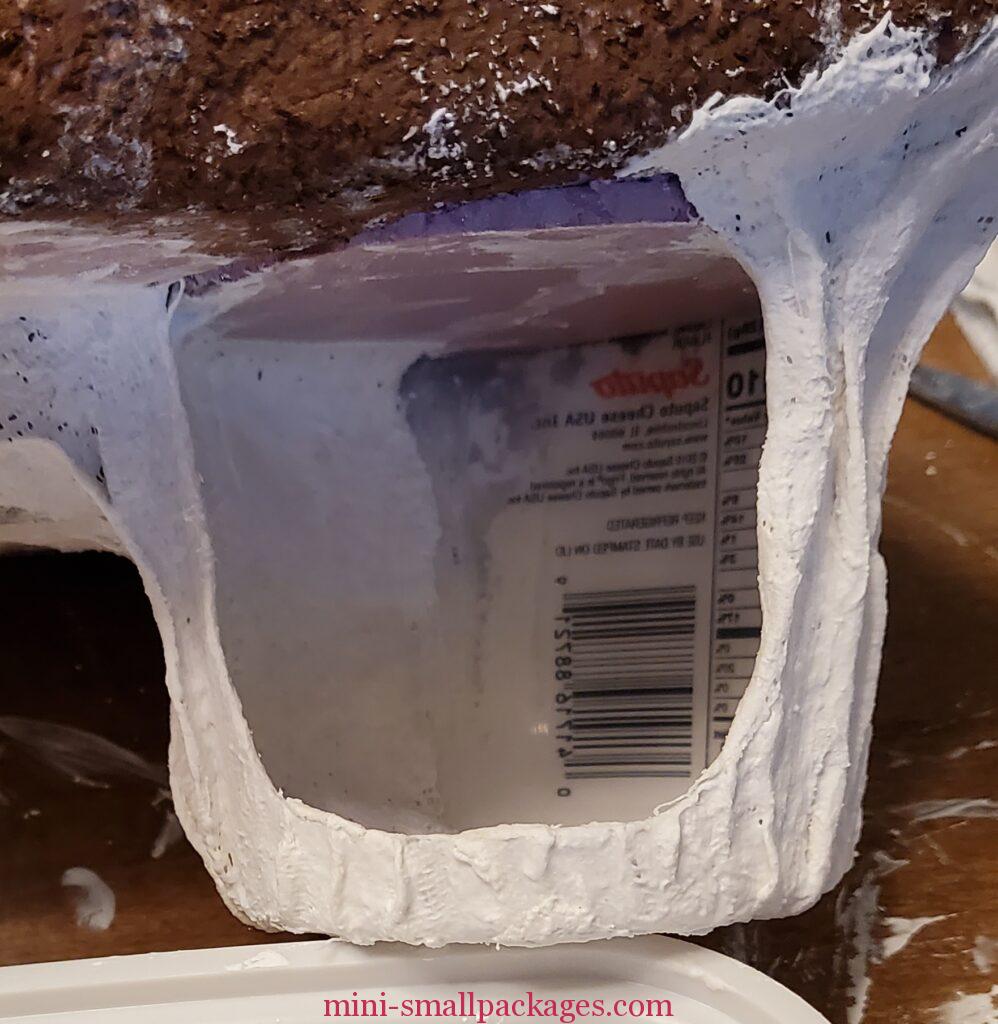
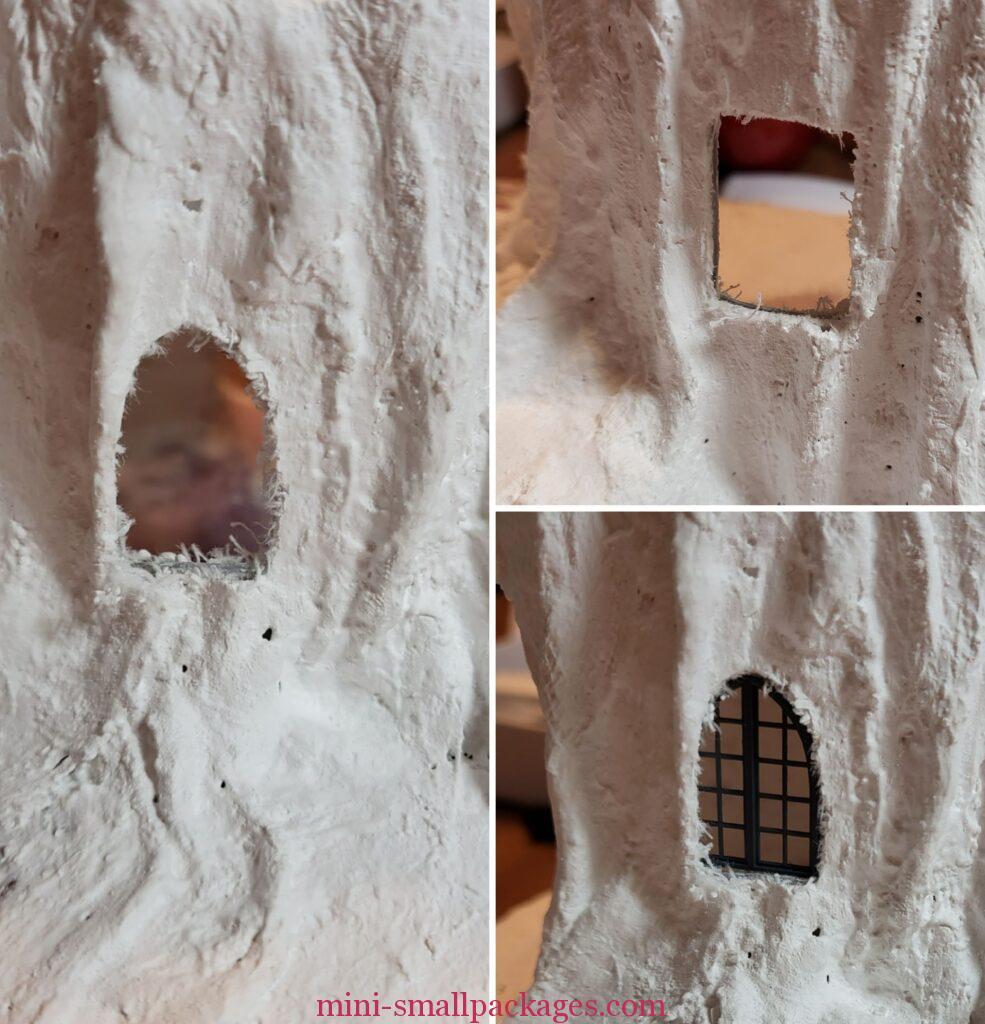
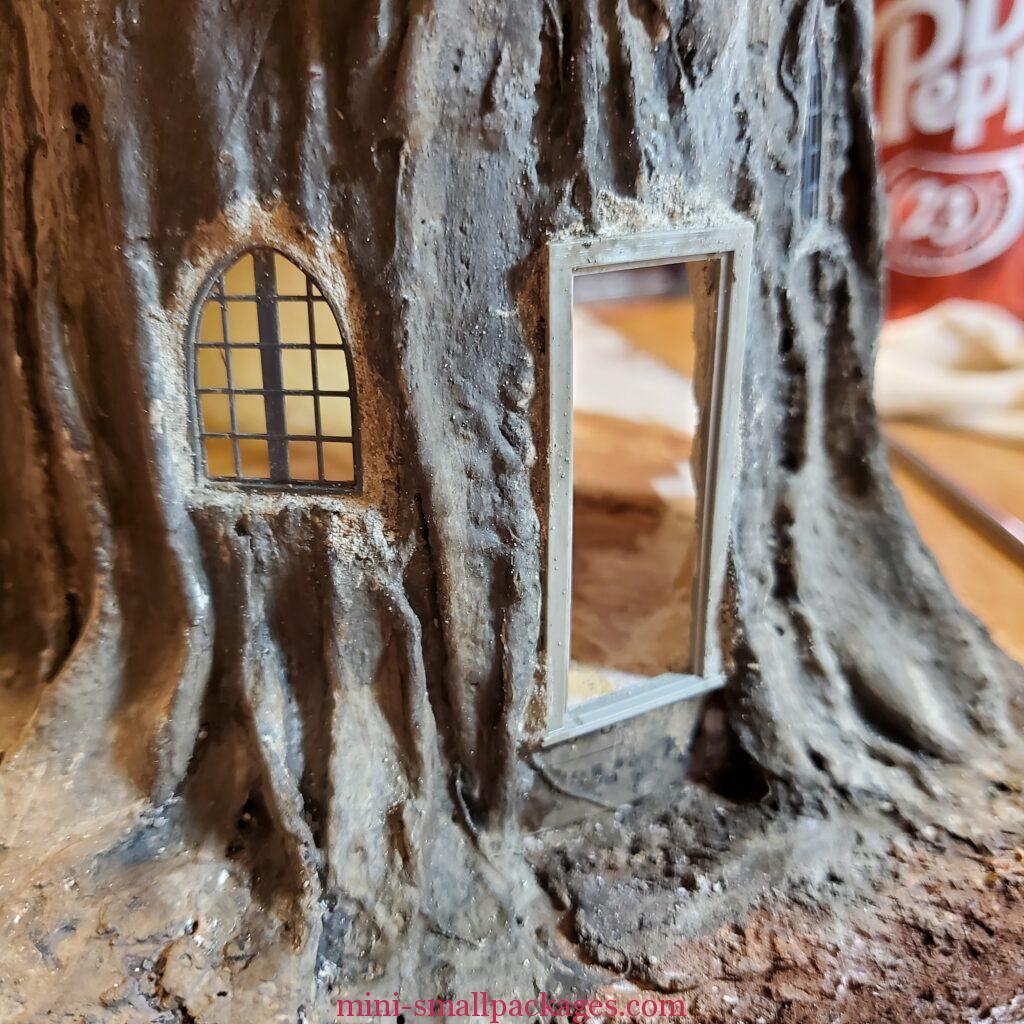
Turning the plastic cup into a stump started with cutting it open. I used my craft knife to cut out a large opening and ones for a door and some windows. I used the writing as a guide when doing the windows. This plastic took a little effort to cut. I even poked myself. I didn’t make sure my fingers were out of the way. The main problem is that it is thicker so just require a slight more effort than other plastic. I could have used a dremel tool instead. For the windows I chose different types rather than all the same.
Next it was time to use the Plaster cloth. It’s available in craft stores but can get bigger quantities if purchased not specific craft version.
I follow the directions for using but here are some extra tips.
- Use old t-shirts or other rags for cleaning hands. This is needed during and after use of cloth.
- After dipping in warm water, squeeze between fingers to make the cloth smoother.
- Extra bowl or dish to catch drips when squeezing cloth.
- Use a paint brush to smooth the rest of the Plaster.
- Scrunch the cloth to form ridges.
- If the cloth has dried, one can add more layers. But wet the area first with a brush.
- If cloth is dried, don’t squeeze the second cloth first. This is because the area is dry and will suck up more water from the additional cloth.
The tiny squares are the holes in the cloth that can be filled by smoothing the Plaster around with a finger or for smaller places a paint brush.
I initially thought I would be making the stump off the base. However I like having done it on the base.
I forgot to check placement of the windows relative to the other buildings. I didn’t realize this until I cut open the windows.

Waiting to cut the cloth from the openings was a mistake I will deal with later. For one I wasn’t sure exactly where they were. It isn’t a bad mistake just would have been better to not wait. My choosing to wait was due to how messy my hands were. In order to deal with small windows, I needed smaller scissors that were going to get messy as well. The Plaster won’t necessarily harm the scissors but it could dull them. So don’t use your best scissors.

What about the apple?
Yes, I forgot about putting the apple on top. I need some stump like projections. Well I suppose I could have made it flat like it was cut but I didn’t plan it that way. I plan things and then get busy implementing. But I didn’t plan far enough or just get distracted in the play aspect. Plaster cloth is fun to play with. As Miniatures should be.
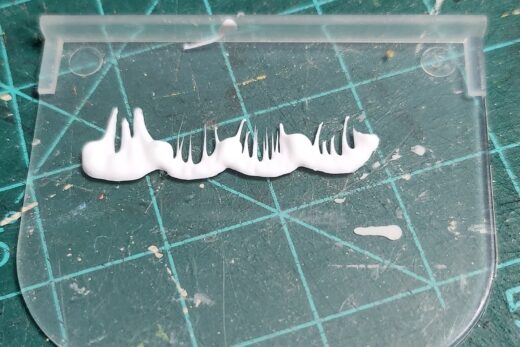
To add some projections, I started by adding strips that I turned back on to themselves. They aren’t bad. But I didn’t like them with the apple.

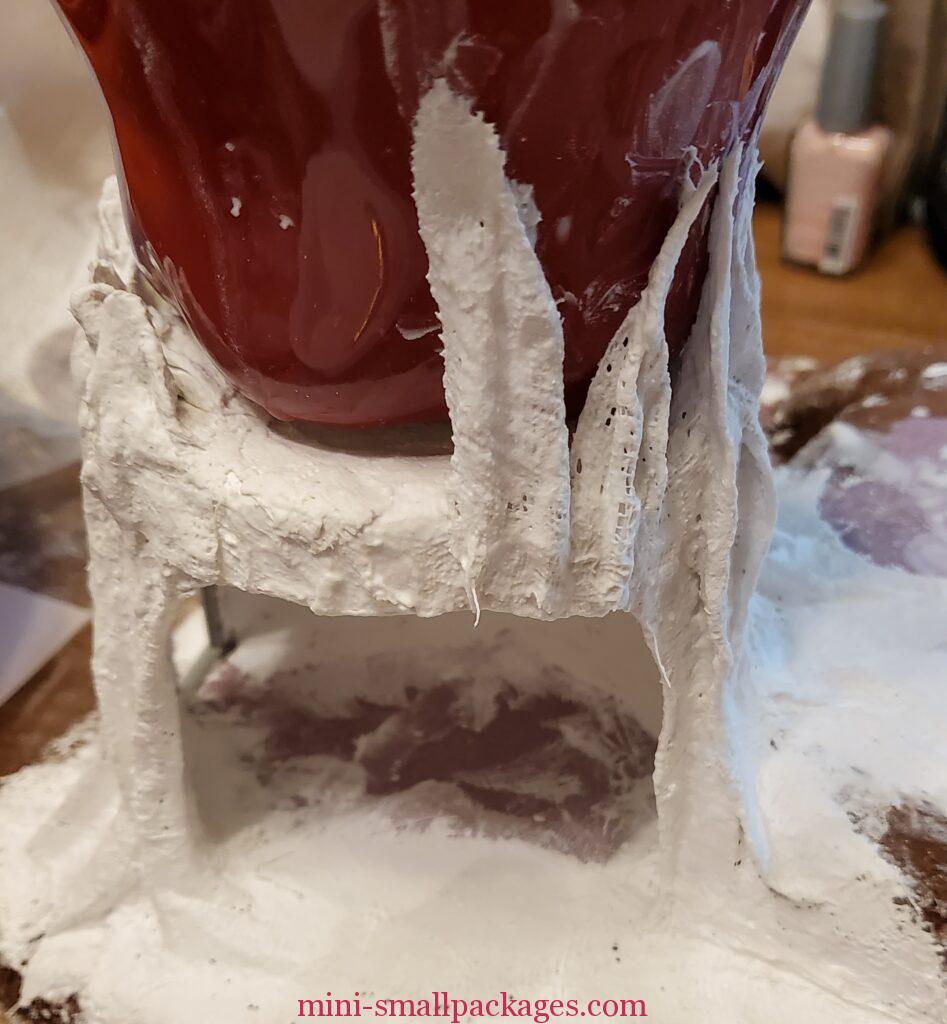
I attached the strips to the apple. The apple could be washed so no worries there.
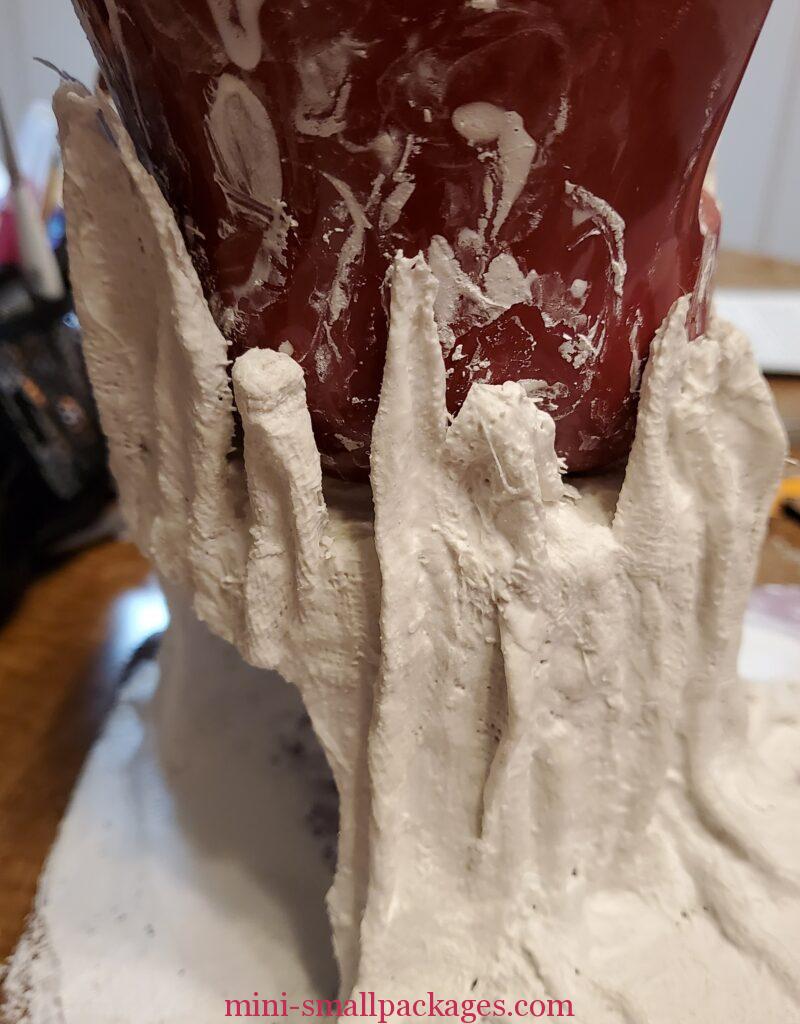
I continued adding more all around. I removed the apple after drying. I added more to most of these spikes. Inside top of stump, where the apple sits, I added a few strips and set in to level it before they were dry. Once dry, I washed the apple off.

After it dried, I cut out the door and window openings.
Back to the Stump
When the cloth is dry, it is easy enough to cut. However it will likely fray. This can be resolved with glue if unable to cut close enough.
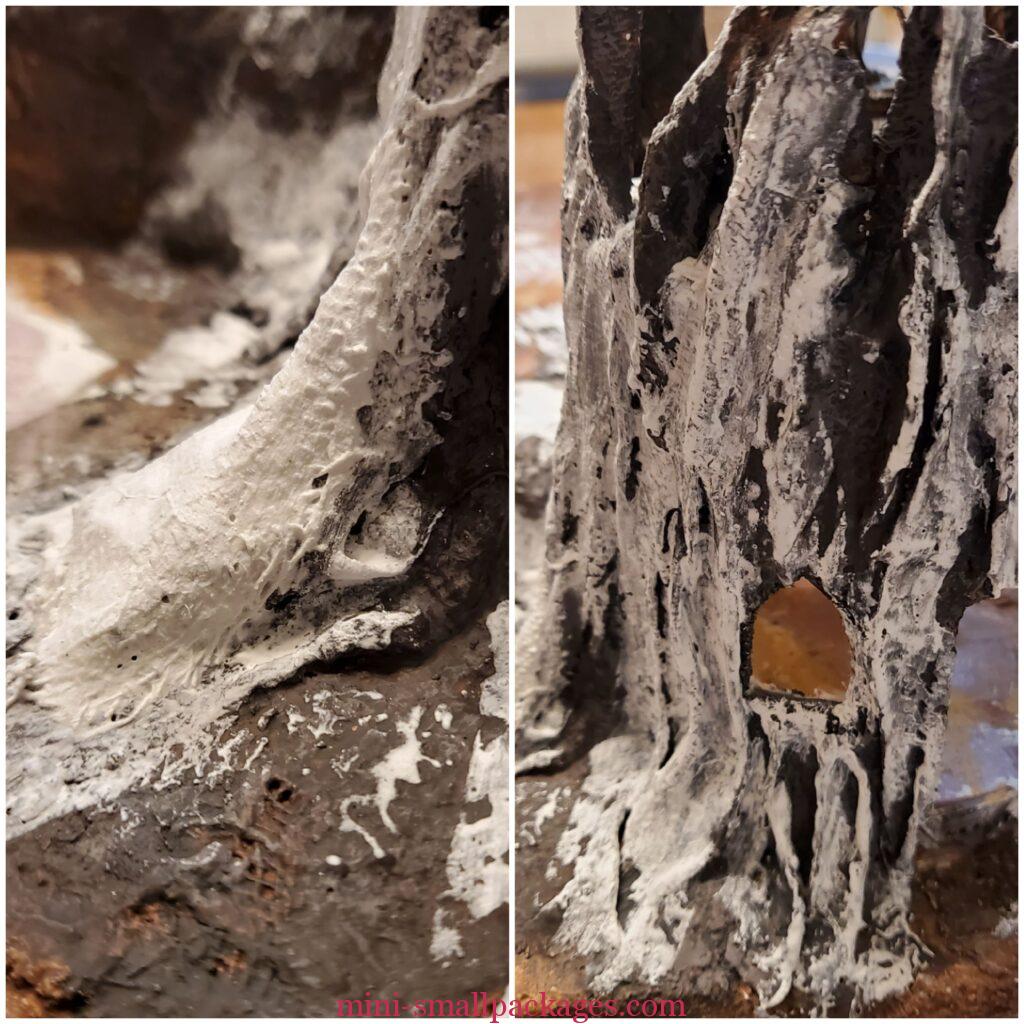
Time to add color to my stump. I made a wash with charcoal black paint to start. Next was a lighter gray. This was dry brushed on so as to highlight the texture of the tree. Not the cloth though.
As I applied this lighter color, I noticed several spots that I had gotten in a hurry and I didn’t smooth them out enough. I continued painting until I noticed the inside wasn’t covered completely. So it was time to add more strips.
Based on my previous experience days before, I knew to work more with smoothing but also to scrape extra from the cloth to try to fill in. This was needed because the dry portion sucks the moisture much faster. It really helps to use a paint brush with the water and any extra Plaster.
That dried and I started the painting again. Well, there was still a problem with the cloth texture showing. So I switched back to the cloth process again. This time instead of layering the cloth or adding cloth were is missed inside, I was just using the Plaster goop. Since I didn’t have any separate Plaster of Paris, I improvised by squeezing from the cloth and using the brush to apply.
The lesson is two fold. Either go ahead and purchase a package of Plaster of Paris along with the Plaster cloth or be prepared for this part of the process of squeezing excess for filling in gaps. Go ahead and use the brush as you go. If your finger fits use it to smooth out as well. Don’t wait until it’s dry.
Here is the stump after I brushed on excess.
Next I did another layer of cloth inside and I knew this time to add the excess.
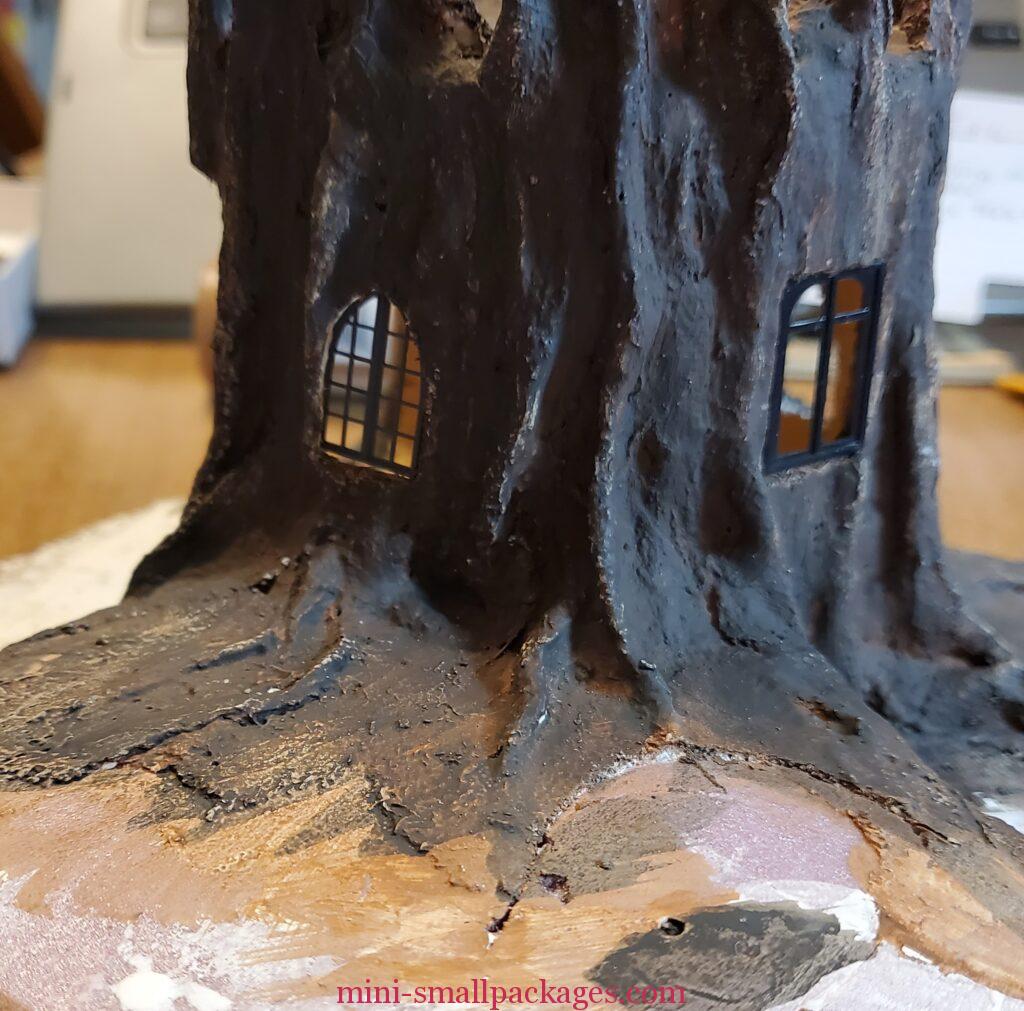
Now I tried the dirty water wash, this time with a walnut paint color. I was so pleased with it, I’m not sure how much more painting I will need to do. It transformed the white into a perfect color. I must remember this process.
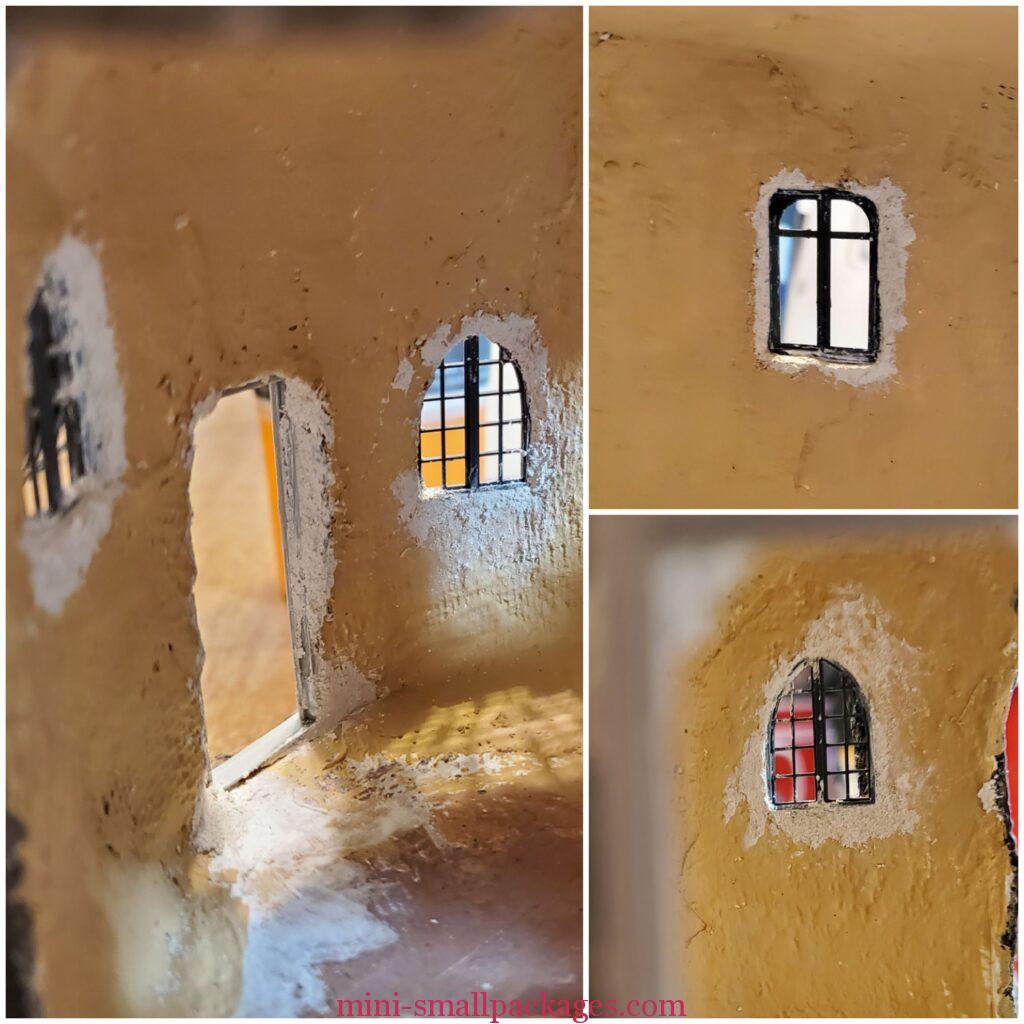
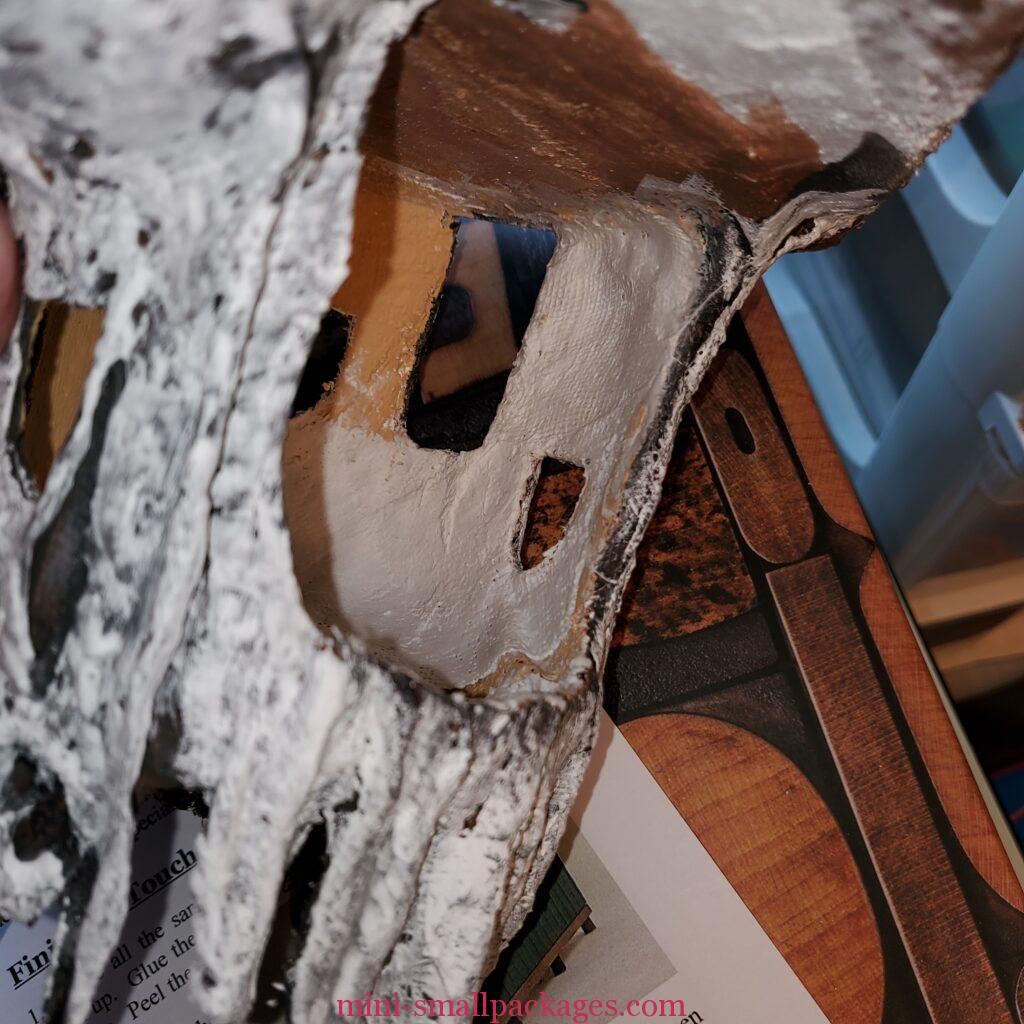
I decided to try using wood filler around the windows. I’m so excited using this. It is most excellent for it and I don’t know why I never tried this before.

The outside of the windows were filled in too. On some of the windows I was quick to use a wet paint brush to smooth the filler in with the Plaster cloth. I really prefer this. It just blended nicely. For a different project I might would paint over the filler but for this one I was pleased with the off white.
Floor of Stump and Apples
I have three brown ground cover options. Fine brown ballast, extra fine brown ballast and used and dried tea leaves. The fine is lighter than the extra fine. Just for kicks I decided to try each one to see what I preferred. I think I have never done this before. I’m just not used to dealing with so much brown. I poured it in, took a photo and then poured it back into the bag, just so I can compare.
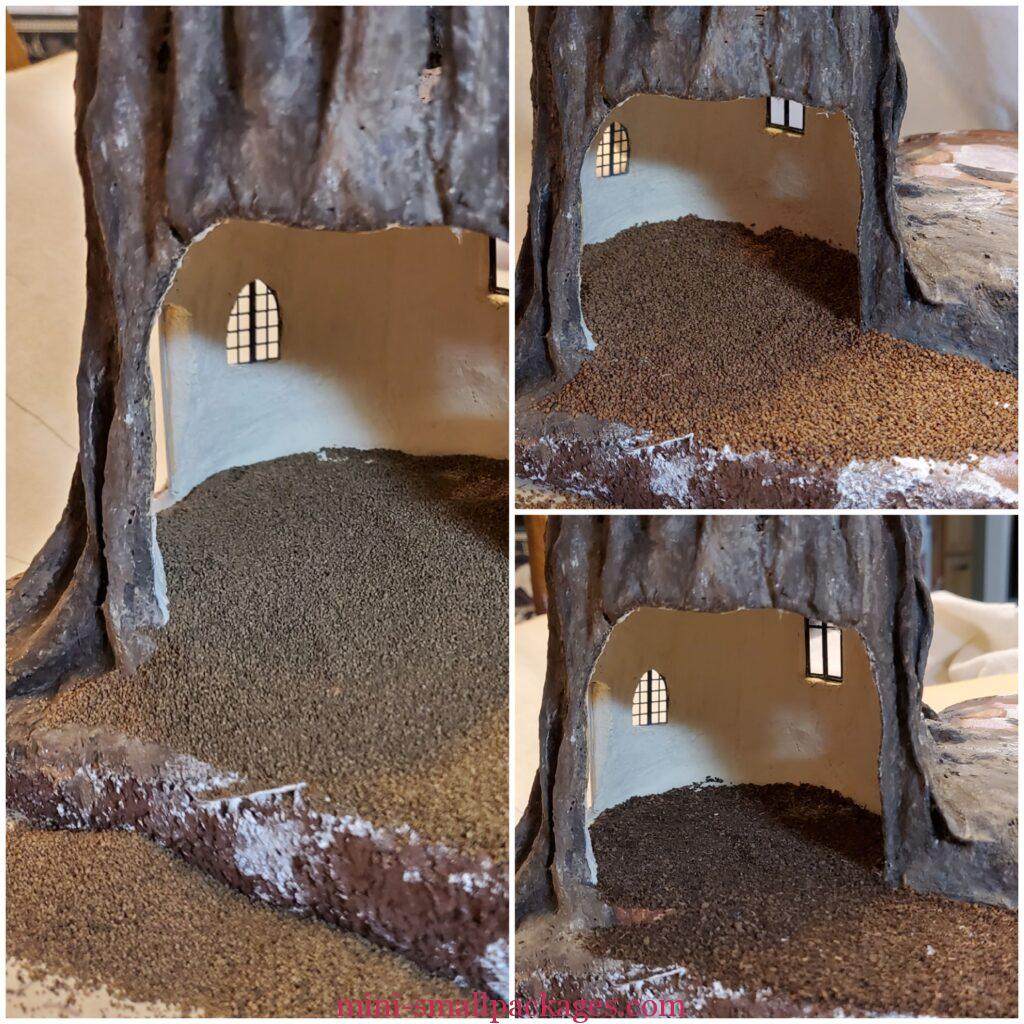
I choose the extra fine for the stump and the fine for the apples.
Meanwhile, How is the lower Apple going to stay in place?
I queried the other challengers. They suggested silicone chaulk (I don’t have), E6000 (I’m afraid that won’t glue the foam), and tacky glue which I don’t trust without some support. So I consider adding Plaster cloth to make the area uneven and making a spot for the apple bottom. Then it occurs to me the wood filler might work. I had a tube I didn’t like and decided it would be worth experimenting with.
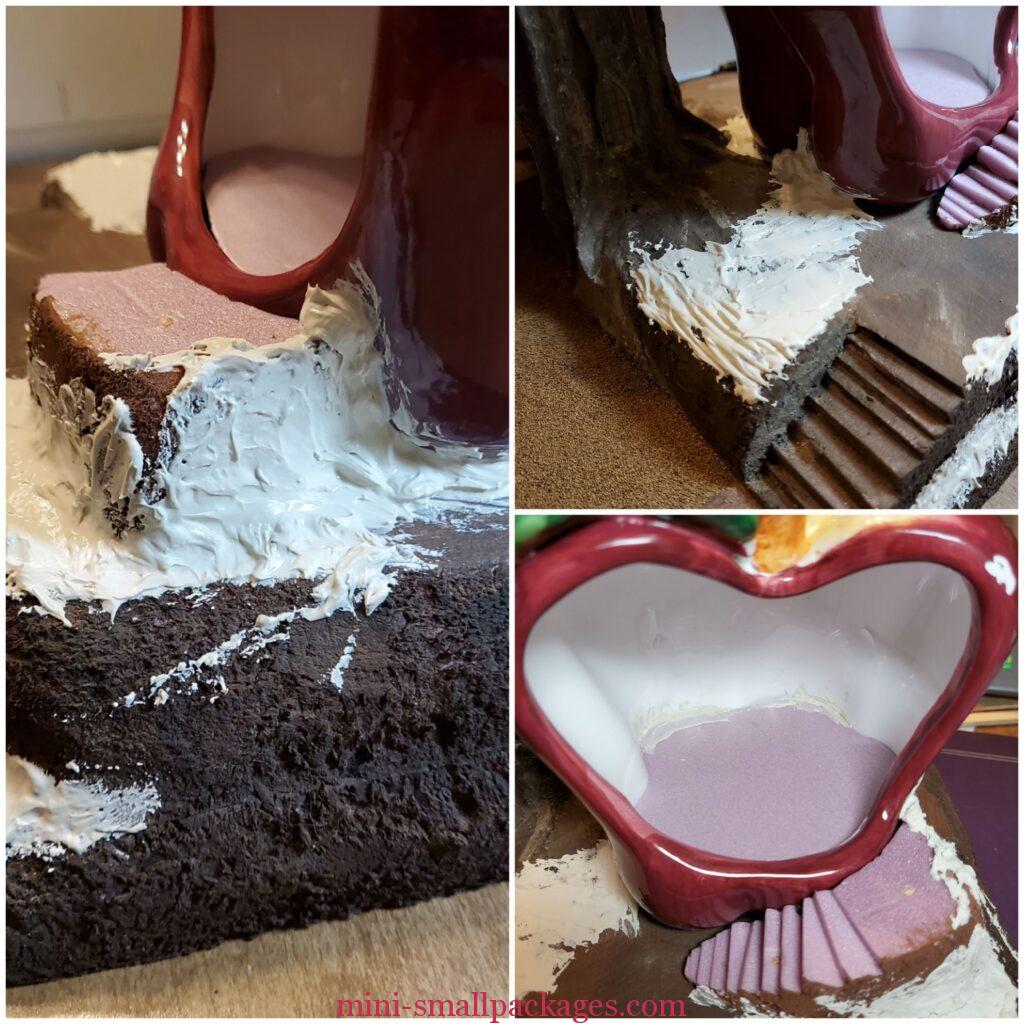
It works so well I used it to fill in the floor of the apples around the edges. OK, this wasn’t as easy as I thought. Harder to do on an apple already “glued” to the base with wood filler.
It paints up really well.
Landscaping
I forgot to take pictures step by step. But this was really simple.
- Paint ground. Let dry.
- Apply dabs of glue. While wet, sprinkle the loose material on.
- Once dry, shake off excess.
- Add dabs of glue to green bits and put in place.
- Lastly add bits of dried moss in random spots.
Finishing Line
I know my deadline is fast approaching so I started adding the swaps.
The swing made by Cindy Bottasso already had a planned location. I left an open area for it.
The Glass apple in front of the swing was given to me by Pamela Teal.

The mailbox by Bonnie Helterhoff needed a level spot. Only problem after putting down the landscaping, I no longer had one. So I added one. I cut a small piece of pink foam to the location so it would be level.

Notice the branches added to the stump? Those were 3d printed. They were some first things printed in the making of the swap I sent.
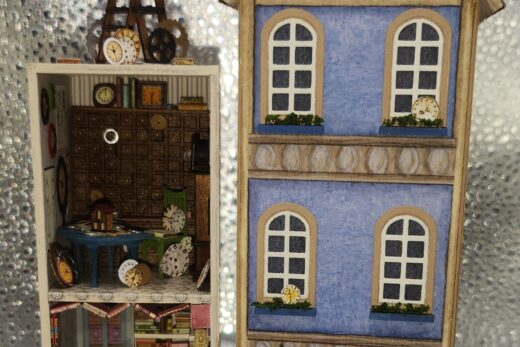
I was playing with the swaps and I wasn’t sure where to put was the dresser. I got to thinking about how I might attach the mirror to the dresser. A light bulb moment was too think of those branches. I painted one and glued a spacer between the branch and mirror.
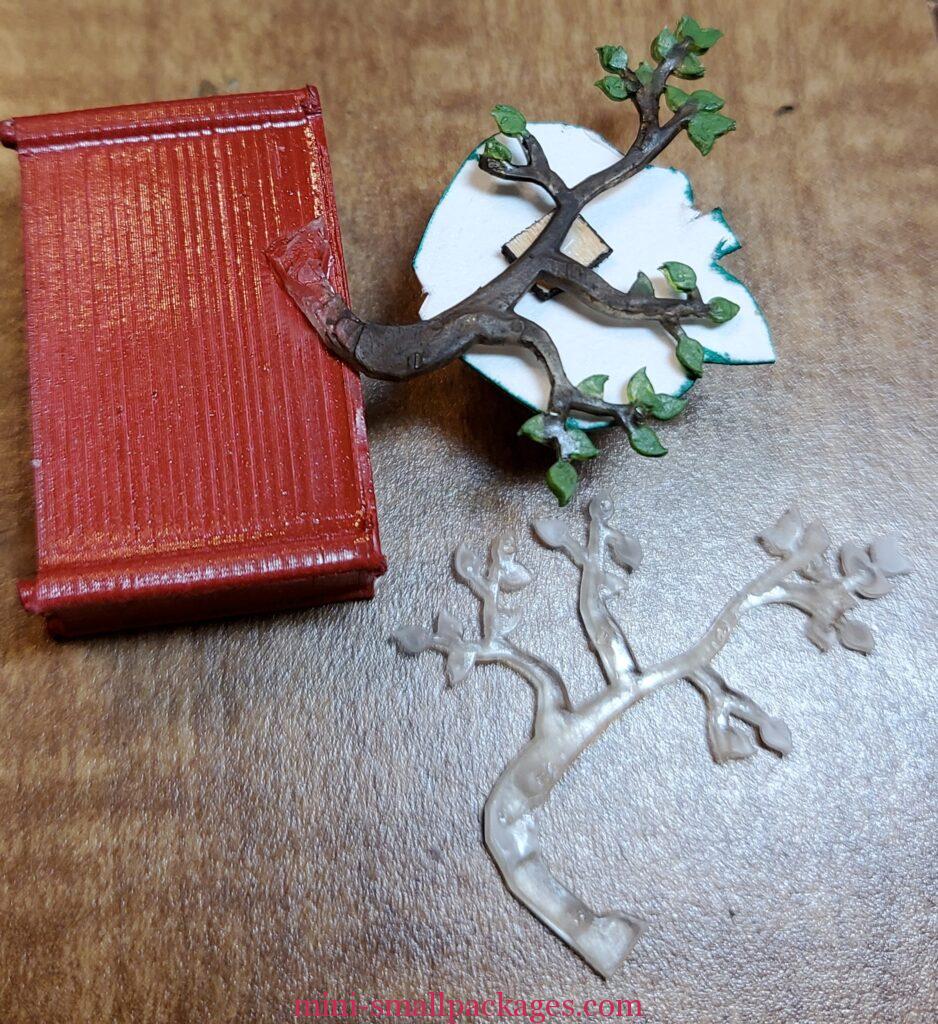
These branches were printed in clear resin. My husband was experimenting with different resins.
I loved using this branch so I decided to add a few to the stump.
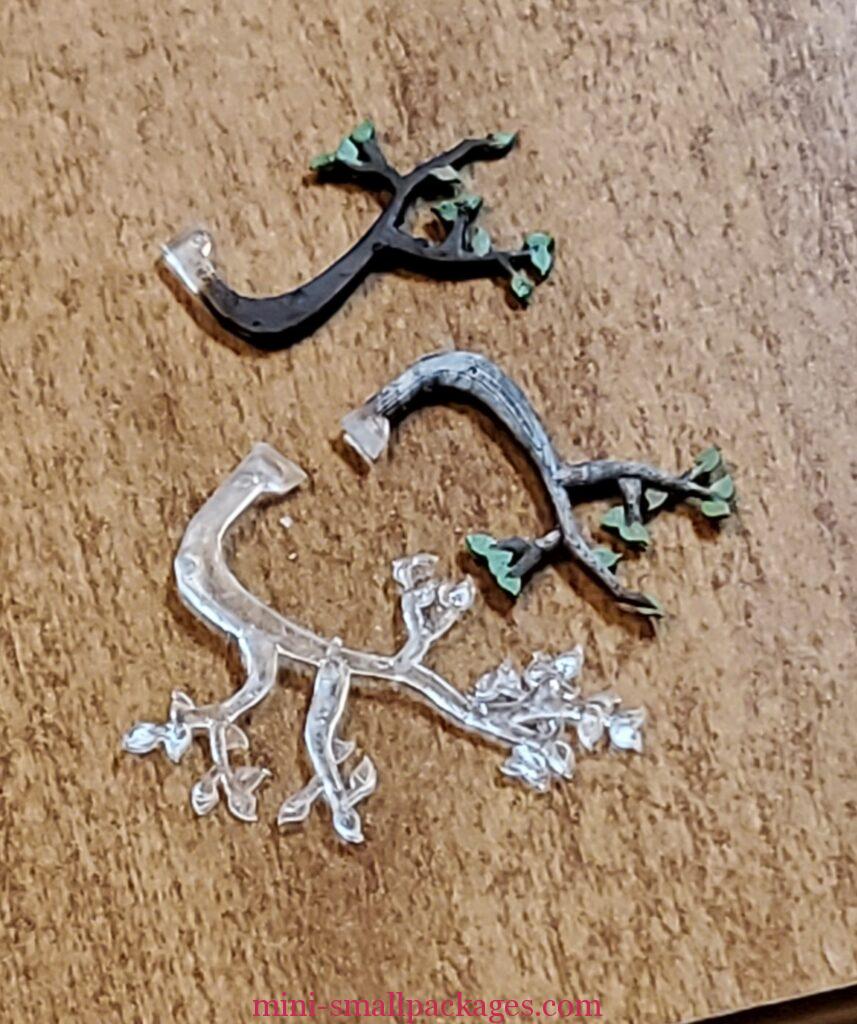
Painting tthe brown was easy but the green needed better magnification. The gray on top gives it age.
Kitchen
I had two measuring cups. This is a 2 cup size and it just fit the space better. I added a foam core floor and painted it same color as the stump and base. Walnut was getting a lot of use on this project. I intentionally left the floor streaked because I felt it fit perfectly with the outdoor idea.
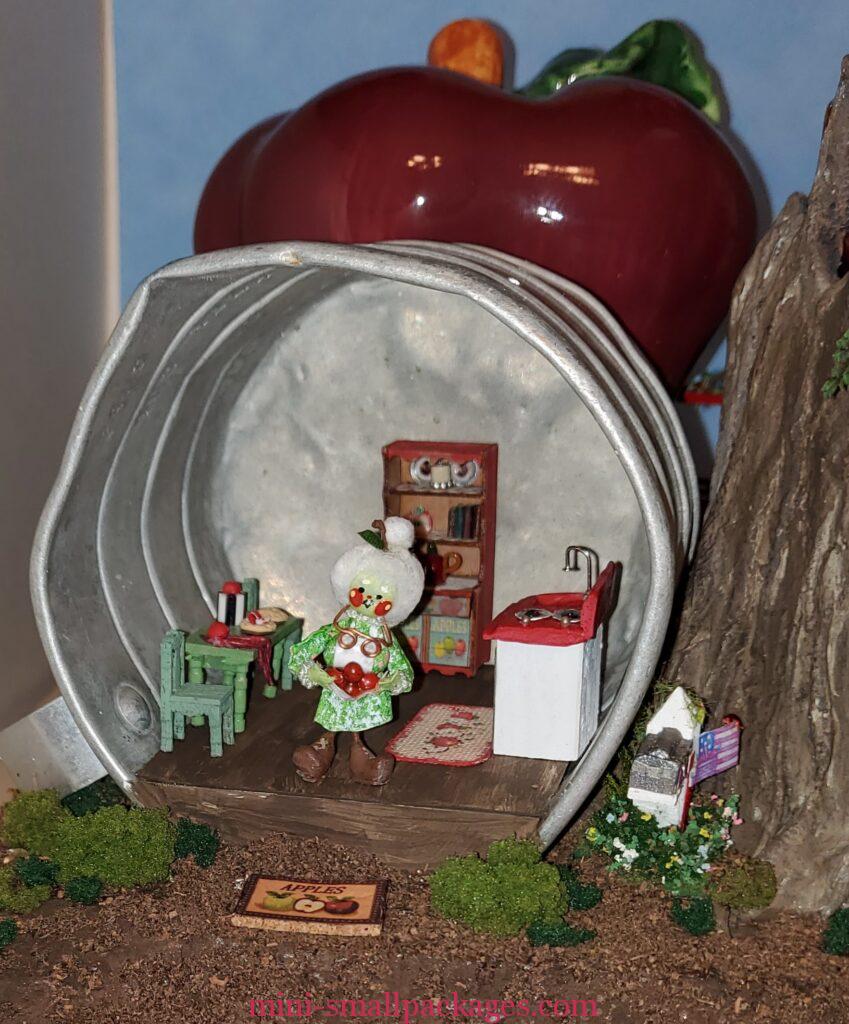
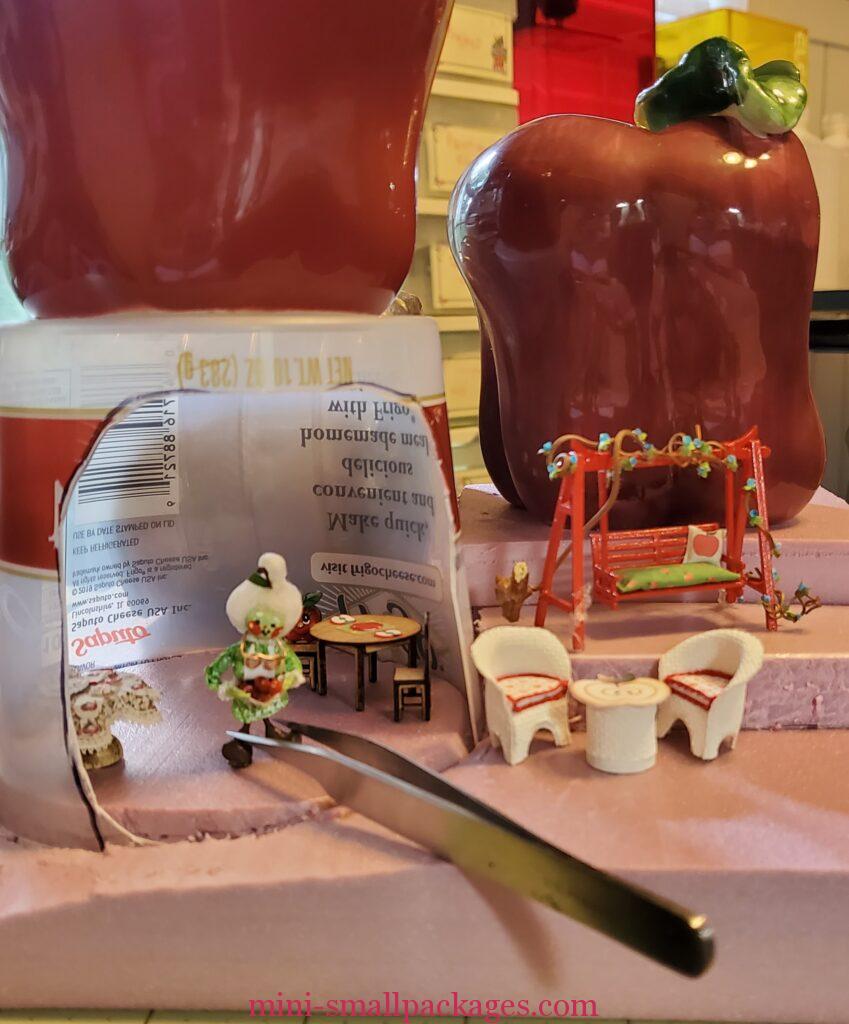
On the left are two green chairs I had in my stash. They are kits by Jean Day. I painted them green for this project. The lovely table with pie in the making is by Chrissie Clapp. In the back is fabulous filled hutch by Mary EJ who also supplied two rugs. I believe one is in front of the kitchenette. That’s Grannie Apple sent by Susie Newell. Miss Greene hired her to run the kitchen and Cafe.
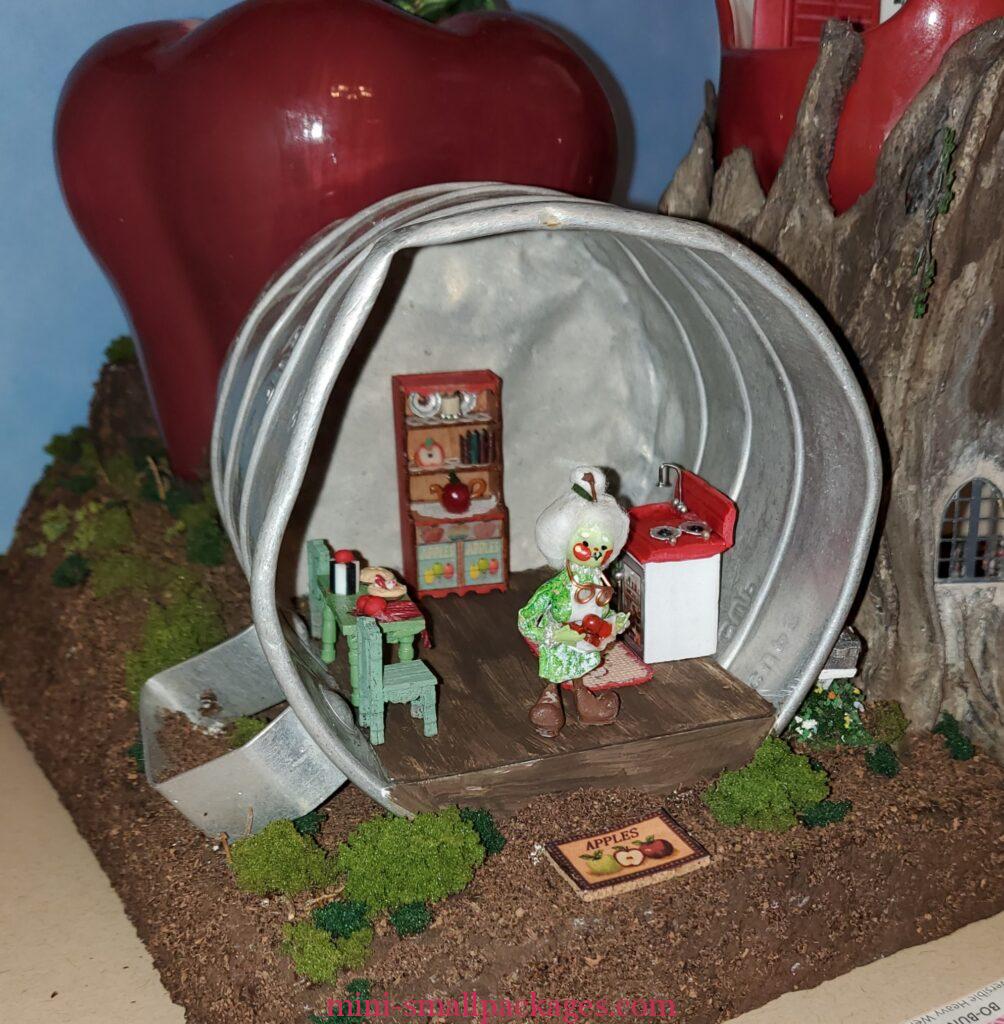
The kitchenette is from Kim Hood. She also sent the cork rug in front of the kitchen.
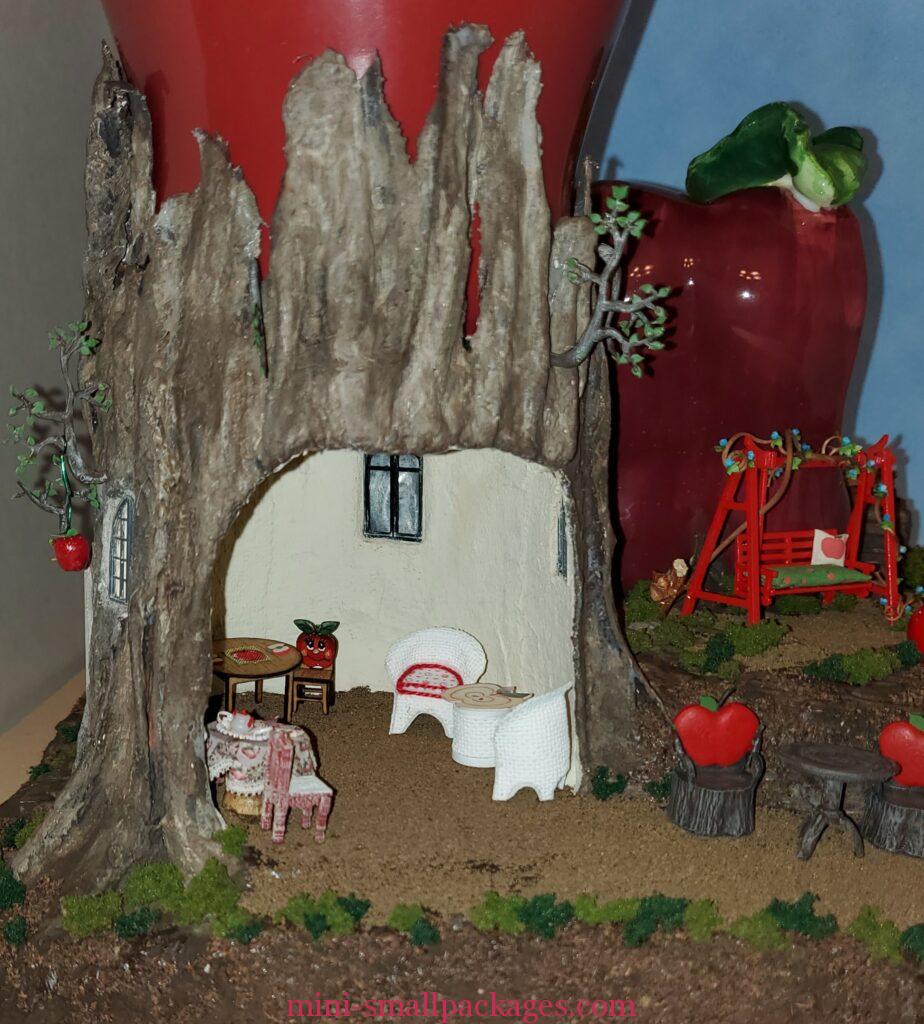
The cafe is in the stump. It is furnished with several swaps.
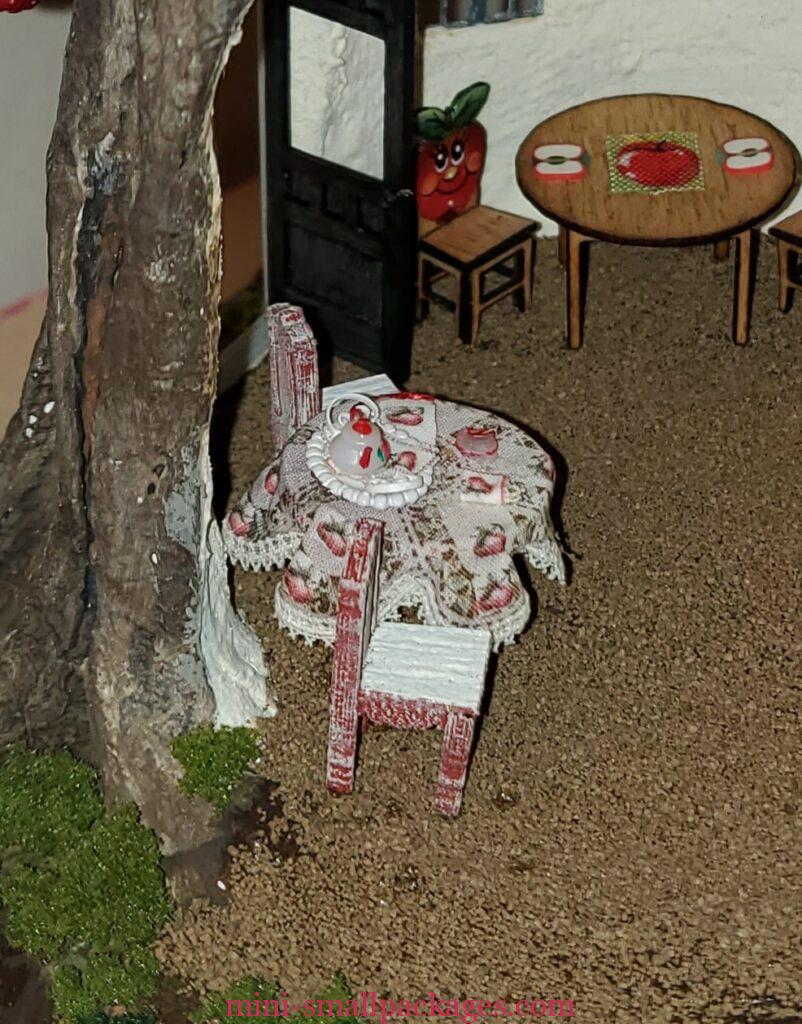
The left side is a table by Leah Bird Cotton. She included a table cloth with lace edges and a teapot on a tray plus napkins. The two red chairs were from my stash. From a kit made by Jean Day. I painted red, then dry-brushed with a cream color.
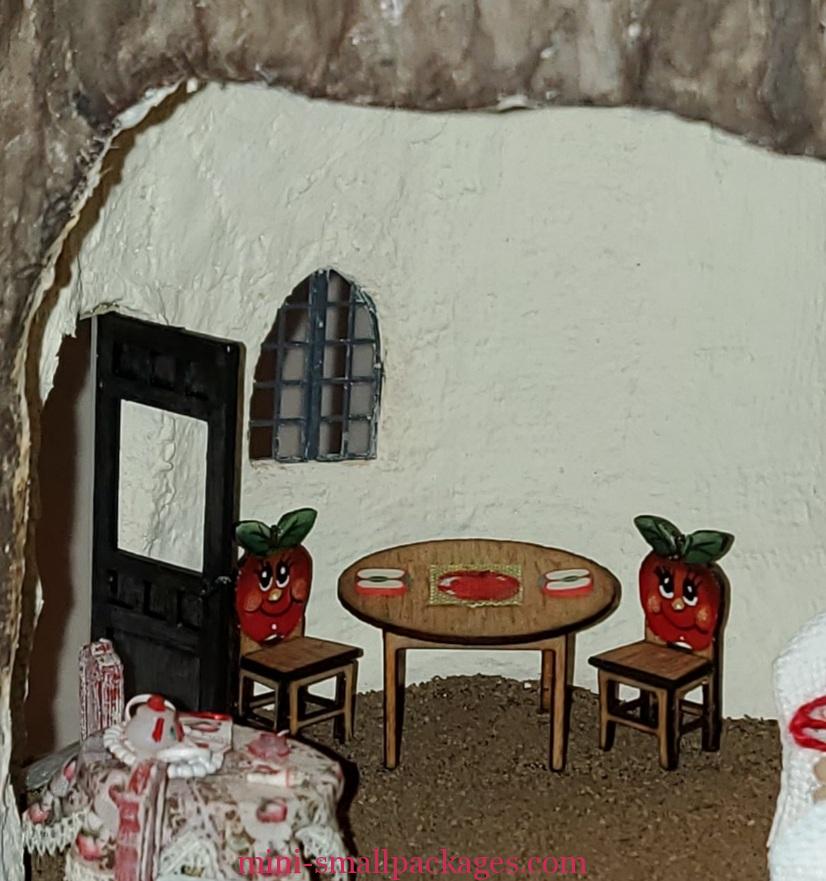
In the back is a table and chairs set by Carol Pittman.
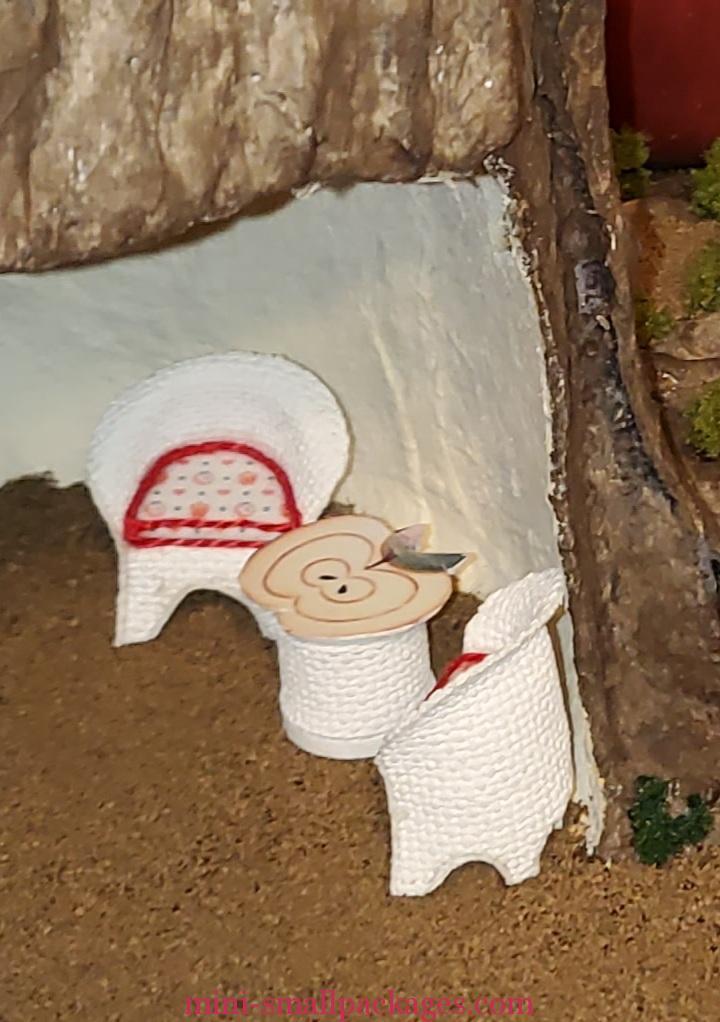
This wicker set by Barbara Hall is wonderful. I love the apple table top.
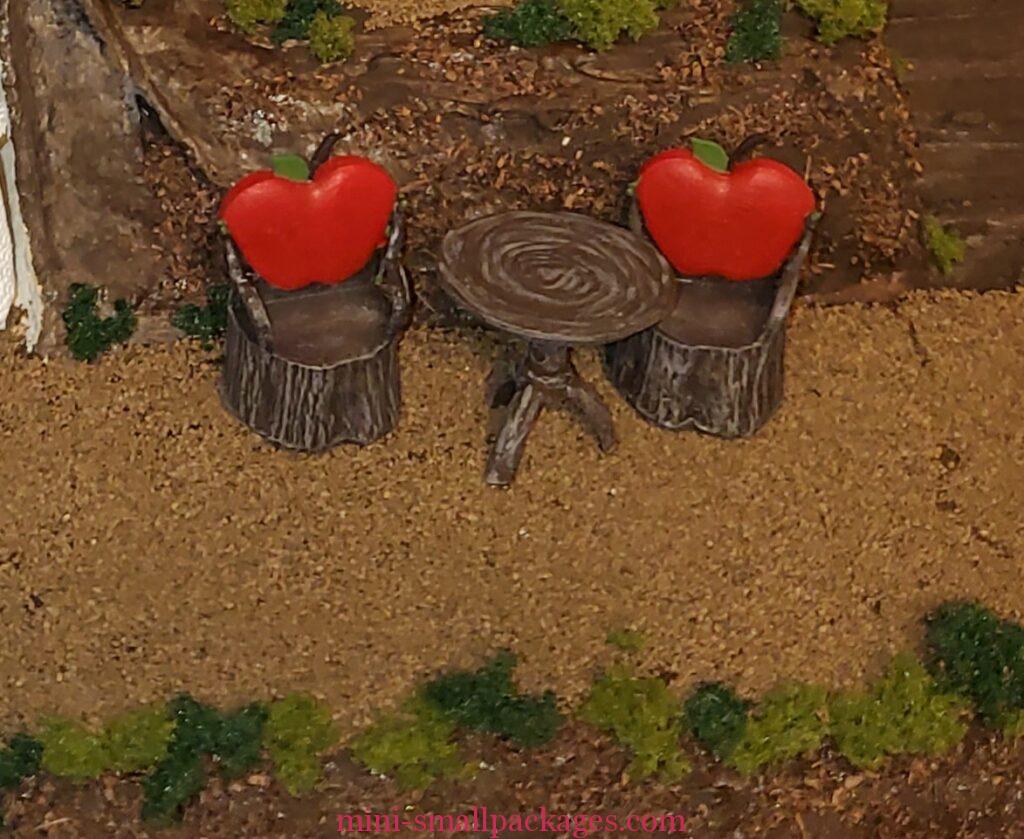
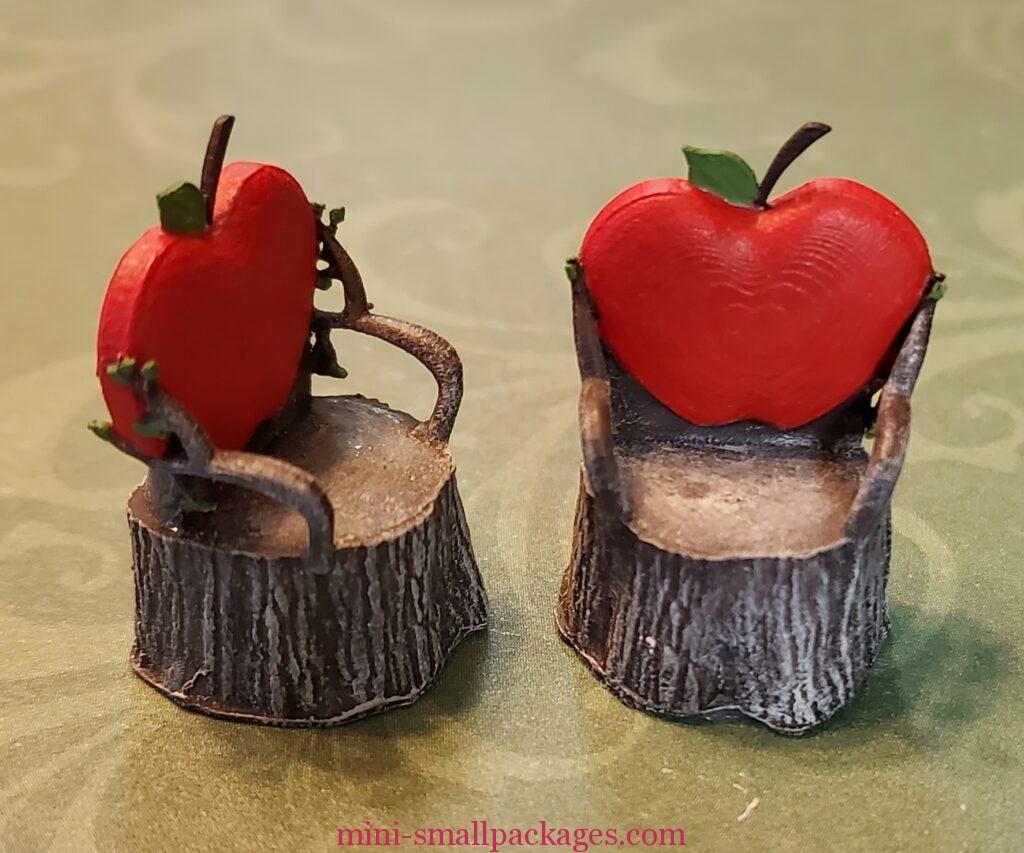
Outside the stump is my swaps. Two apple chairs. I added a BPF table that l painted similar to my chairs.

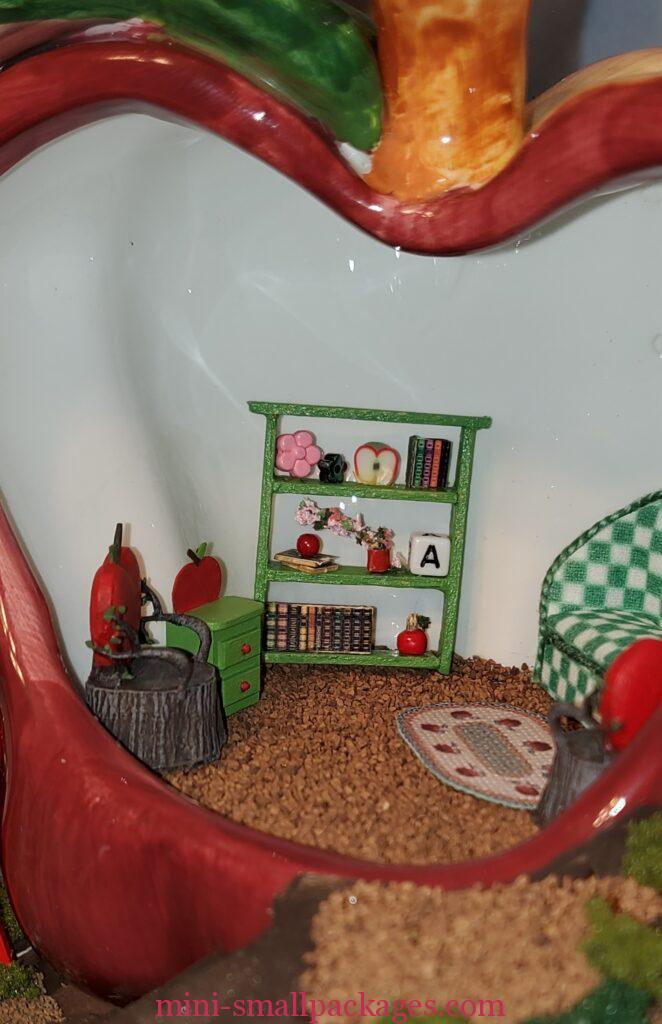
Inside this apple is the living room. On the left is an apple chair I made. Next to it is a nightstand I’m using as a side table. It was given to me by Pam Junk. The filled shelf was a swap by Catherine Wojewoda. It has so many delightful treasures for Miss Greene to enjoy.

This side is a comfy sofa by Cindy McDaniel. The rug in front by Mary EJ. Next to it is another of the stump chairs I made. I had made extra for myself.
My husband printed these chairs using his 3d printer an ELEGOO MARS P. We designed them together.
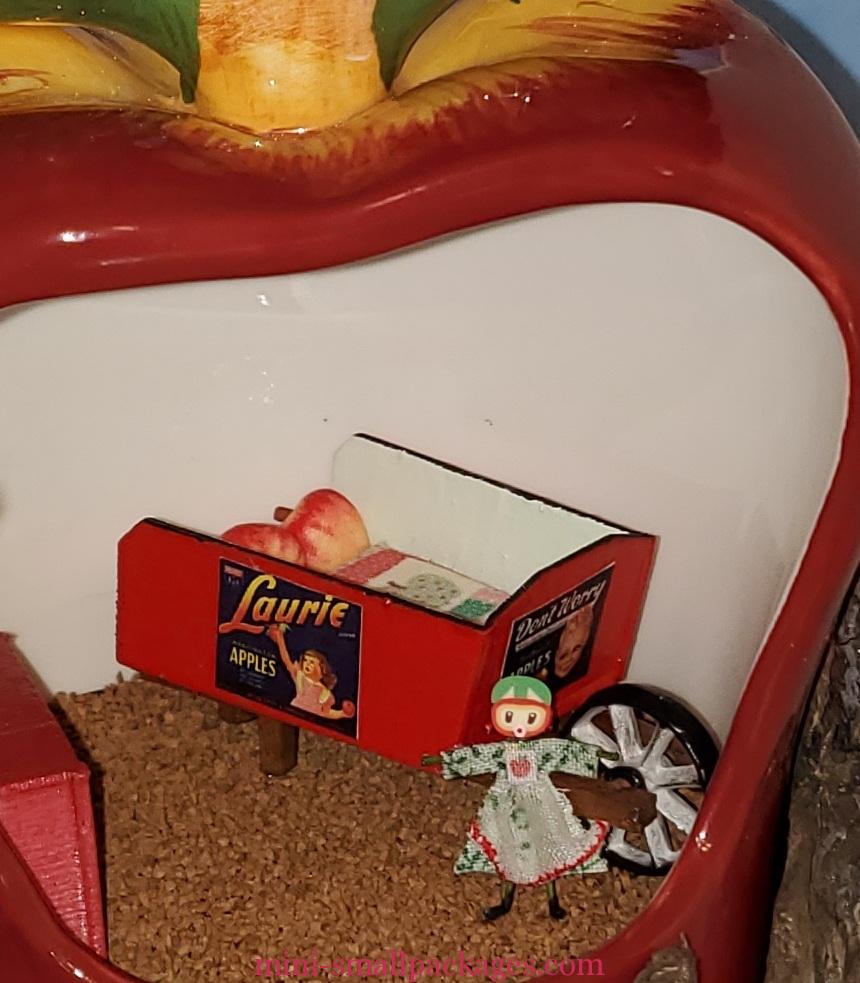
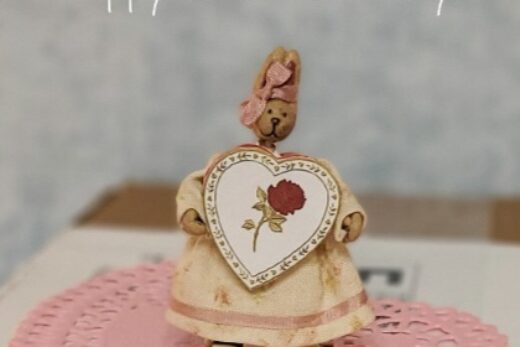
Finally above the cafe is the apple scrubby I already had. I decided it would make a nice bedroom for Miss Greene. Inside is the dresser and the wonderful wheelbarrow bed by Cheryl Hollis. It came with apple pillows and an adorable little girl doll.
Finally here are all the sides together
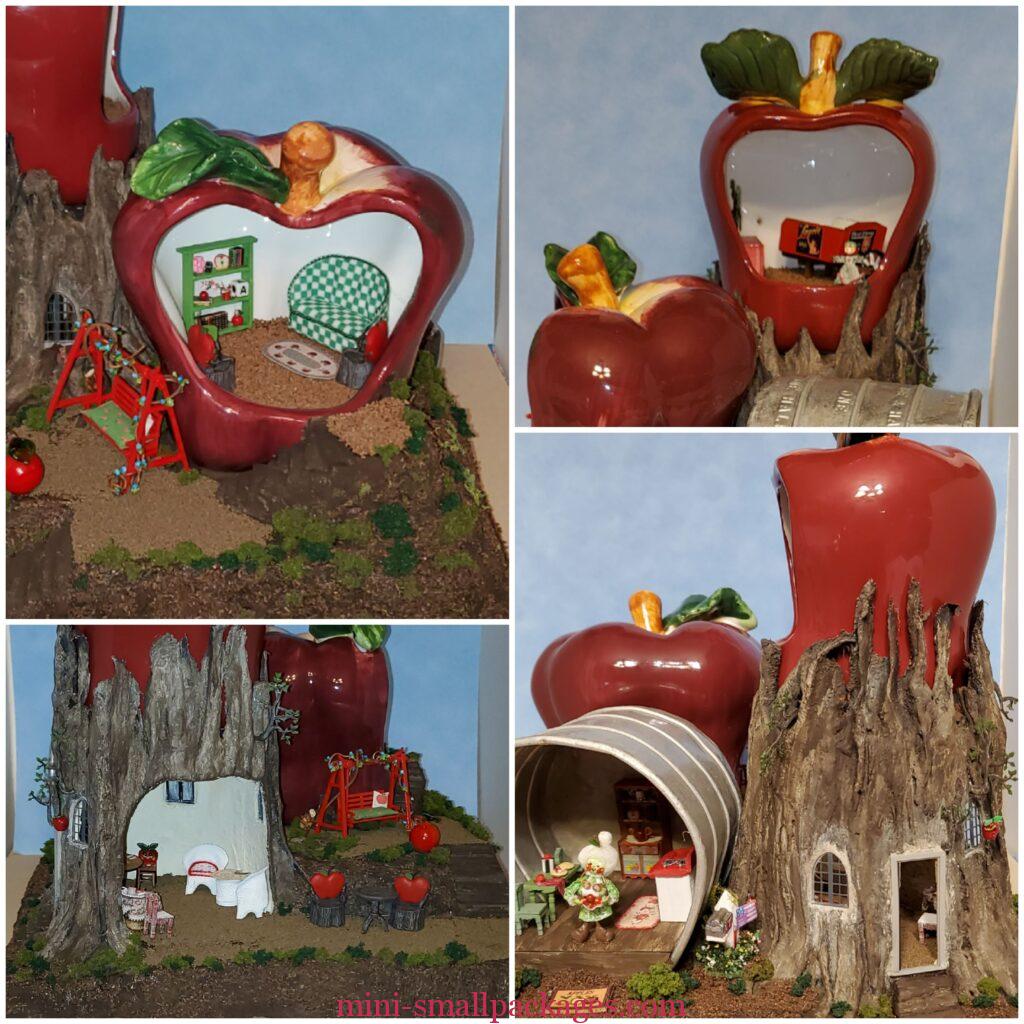
Happy miniaturing!

Wonderful!!! Thank you so much for sharing your techniques too. Love it!