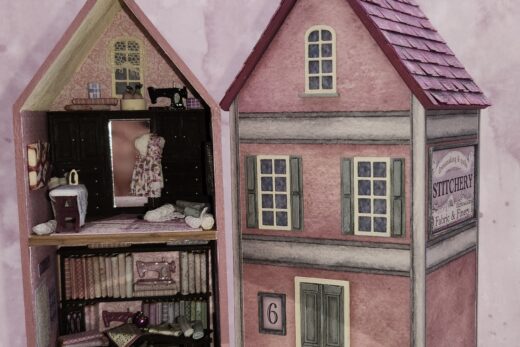
On Quarter Connection they are talking about Unusual Containers, my favorite project type. They started with the Bunny shaped Ferro Roche box. I have one of these containers that I got second hand. I have thought about adding clear plastic shelves and making it a display box, but never got around to doing so. Instead QC people inspired me to make it a house like many of them were doing.
I decided it would be a ‘use what I have’ sort of project.
Box
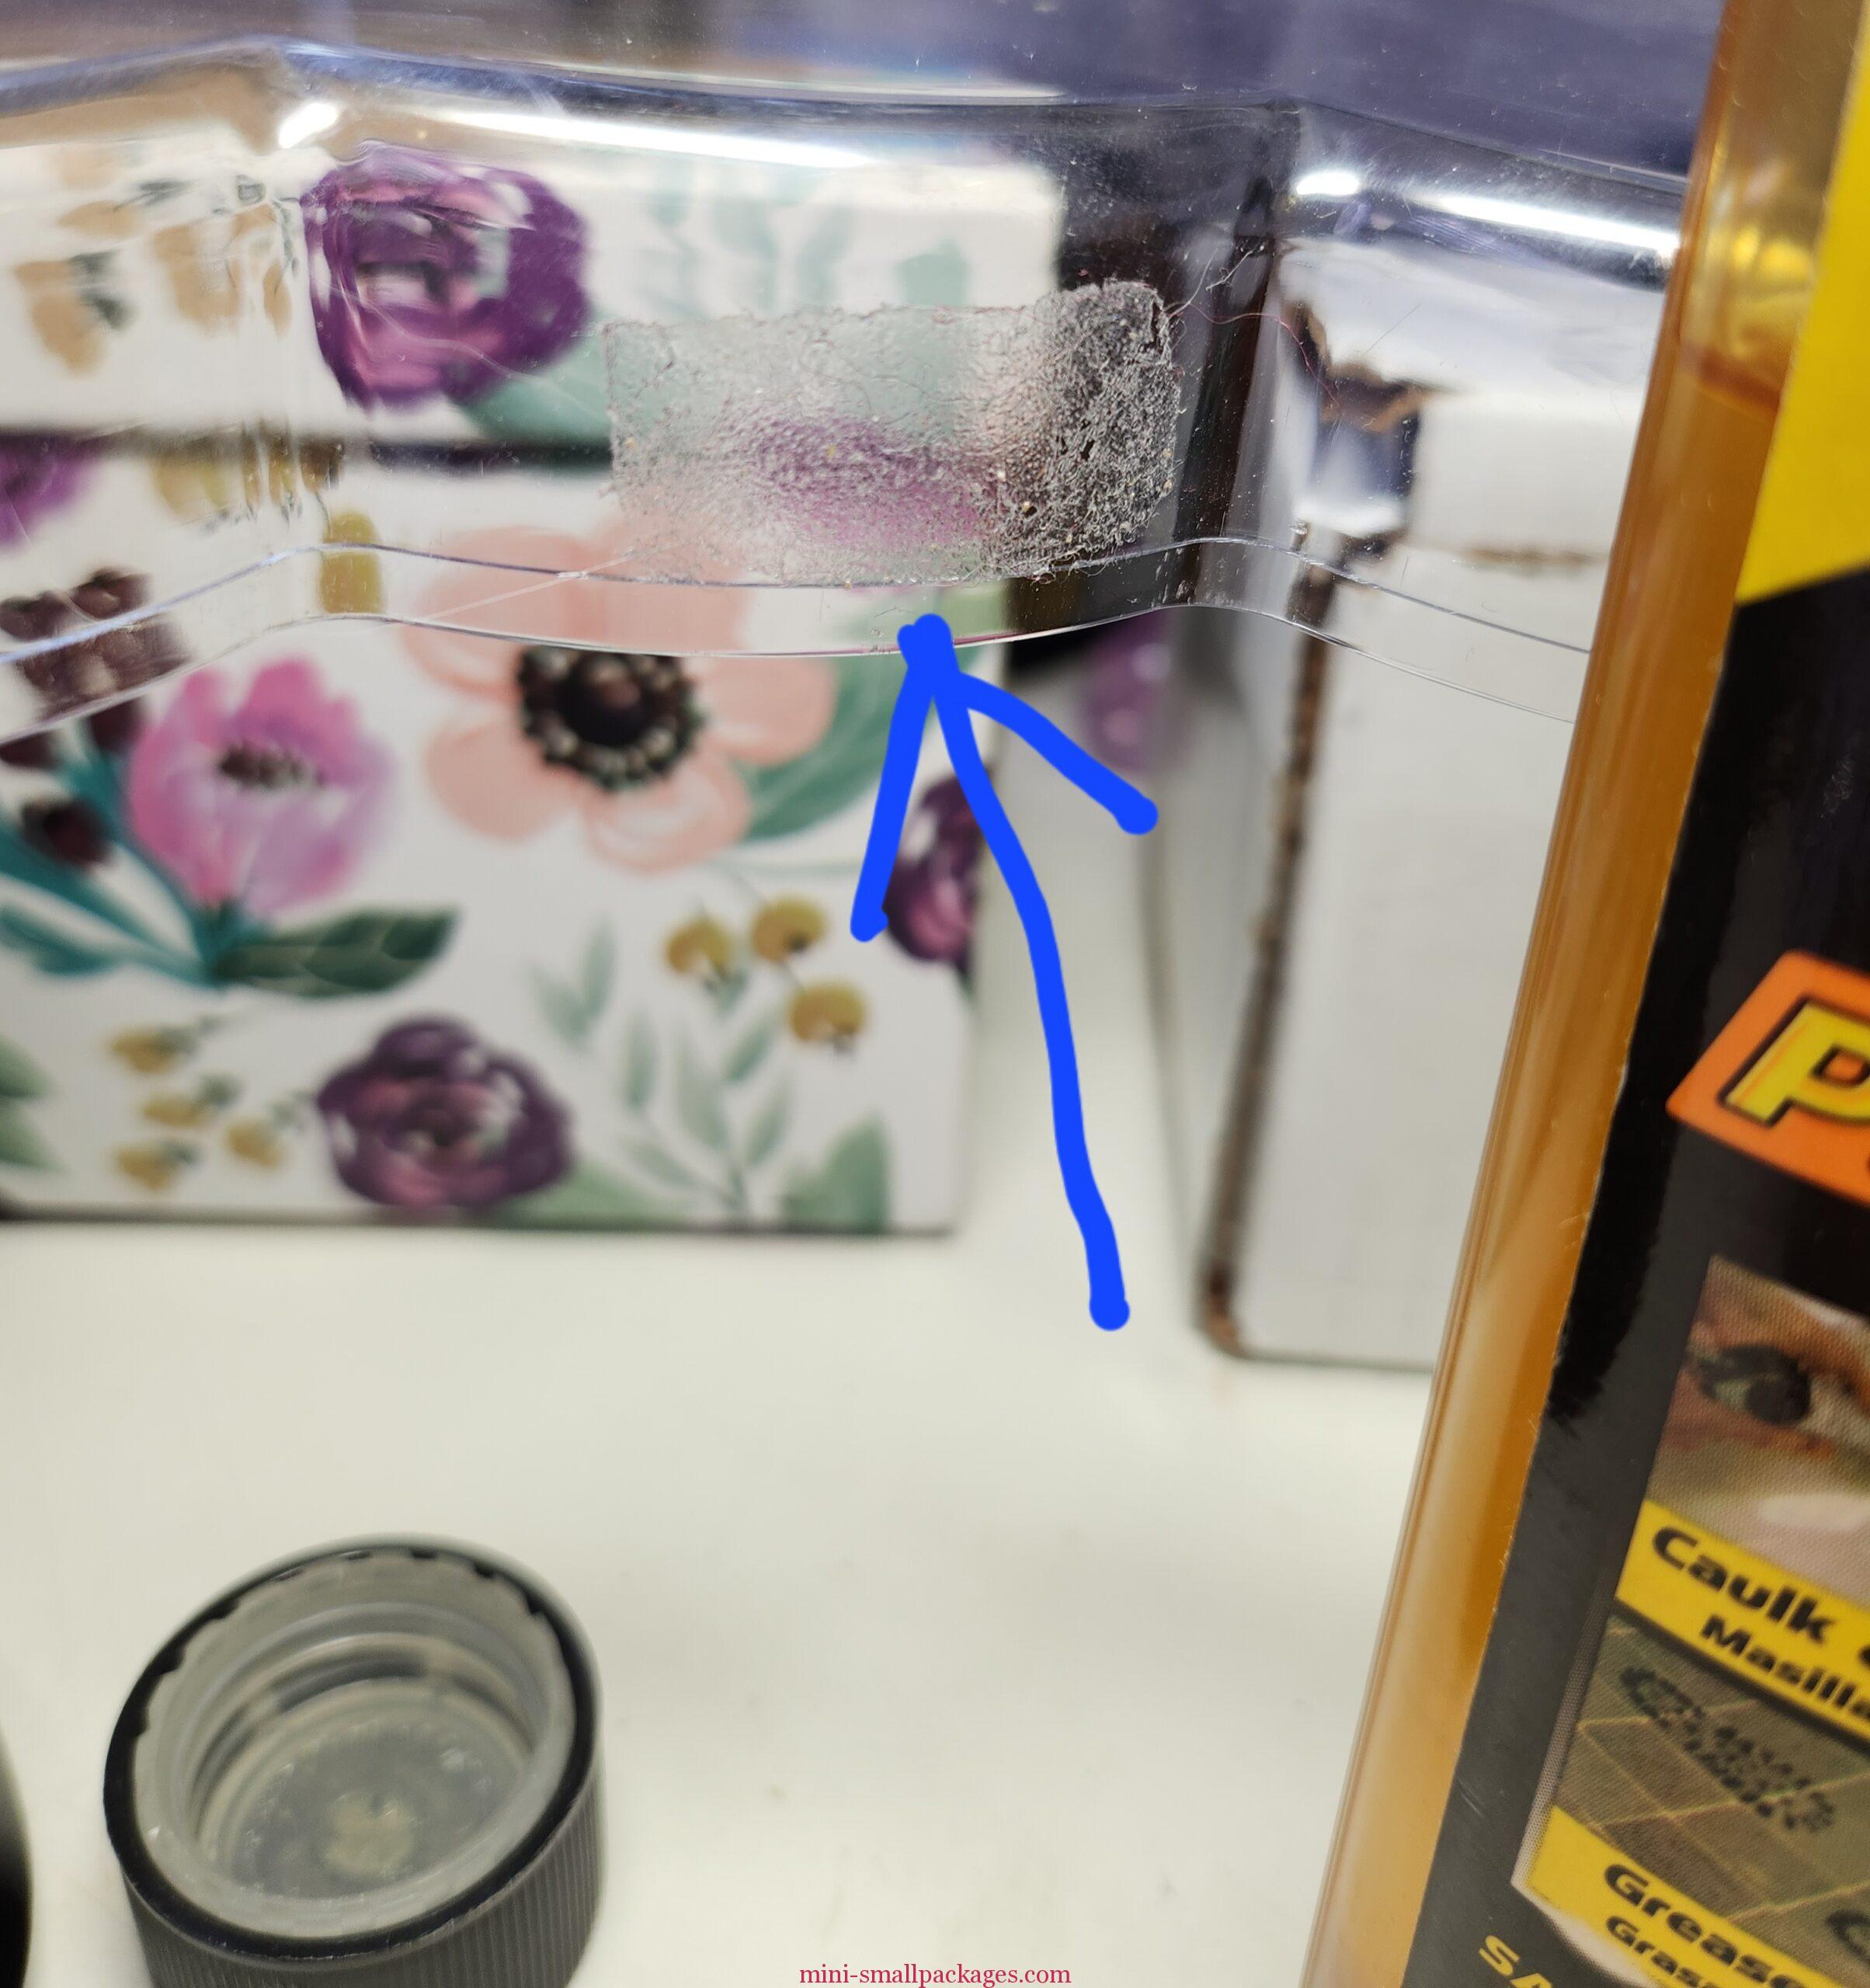
I needed to clean mine up. It had some sticker residue. I used the orange smelling stuff.
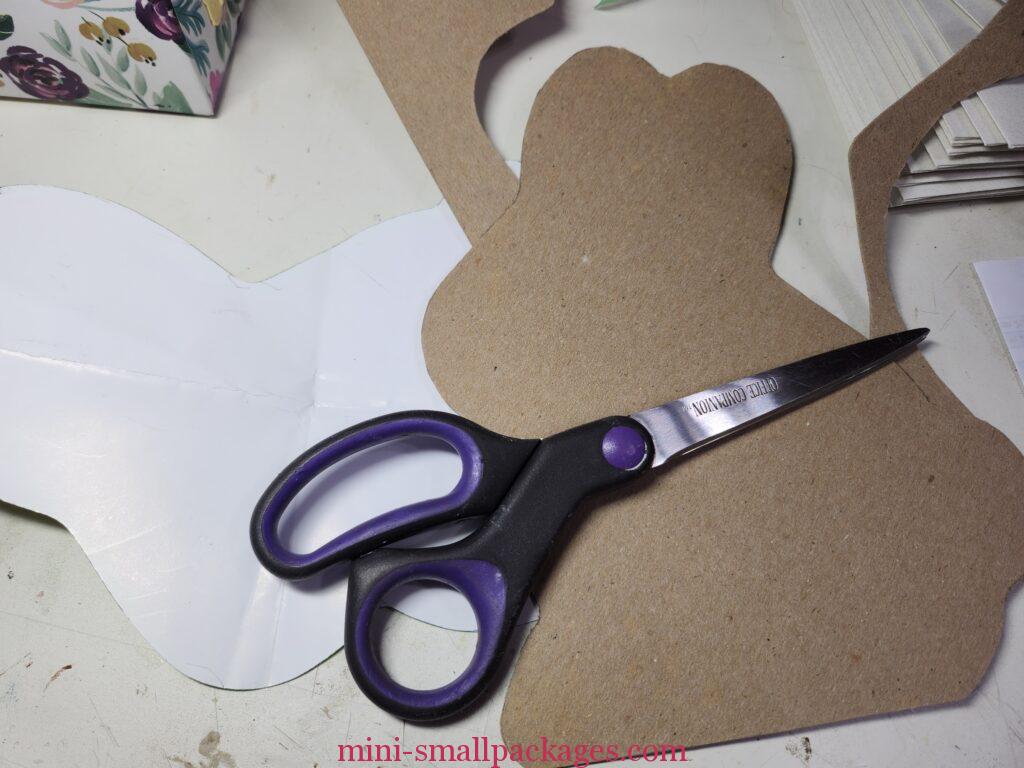
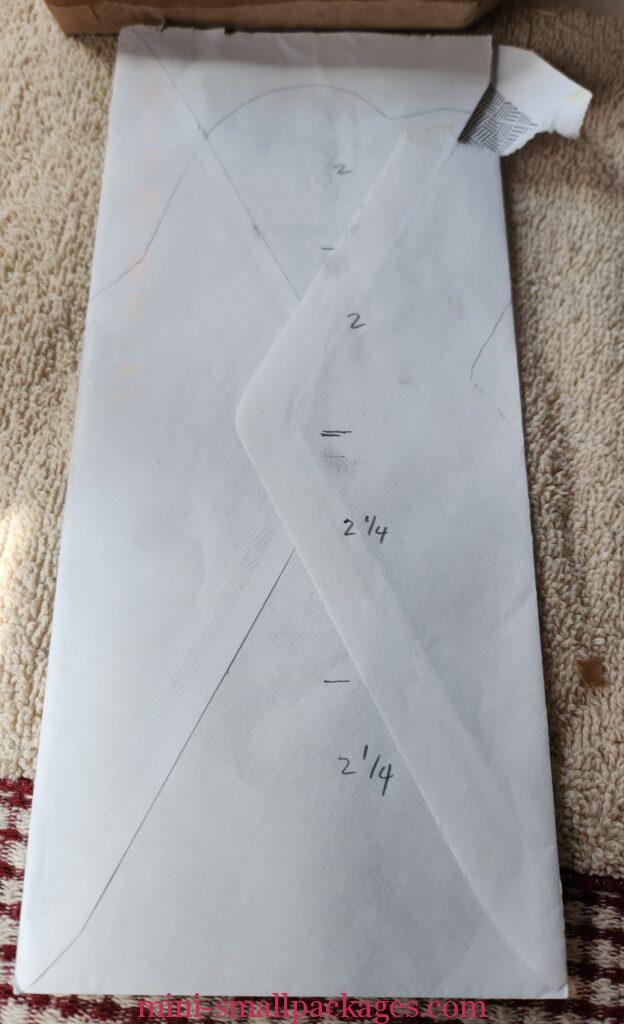
A fellow bunny box enthusiast and enabler, Jackie Williams sent me the insert to use as a pattern for the back. (I sent it on to another in the UK as she didn’t have the interior packaging either.) I cut my back from a thin cardboard.
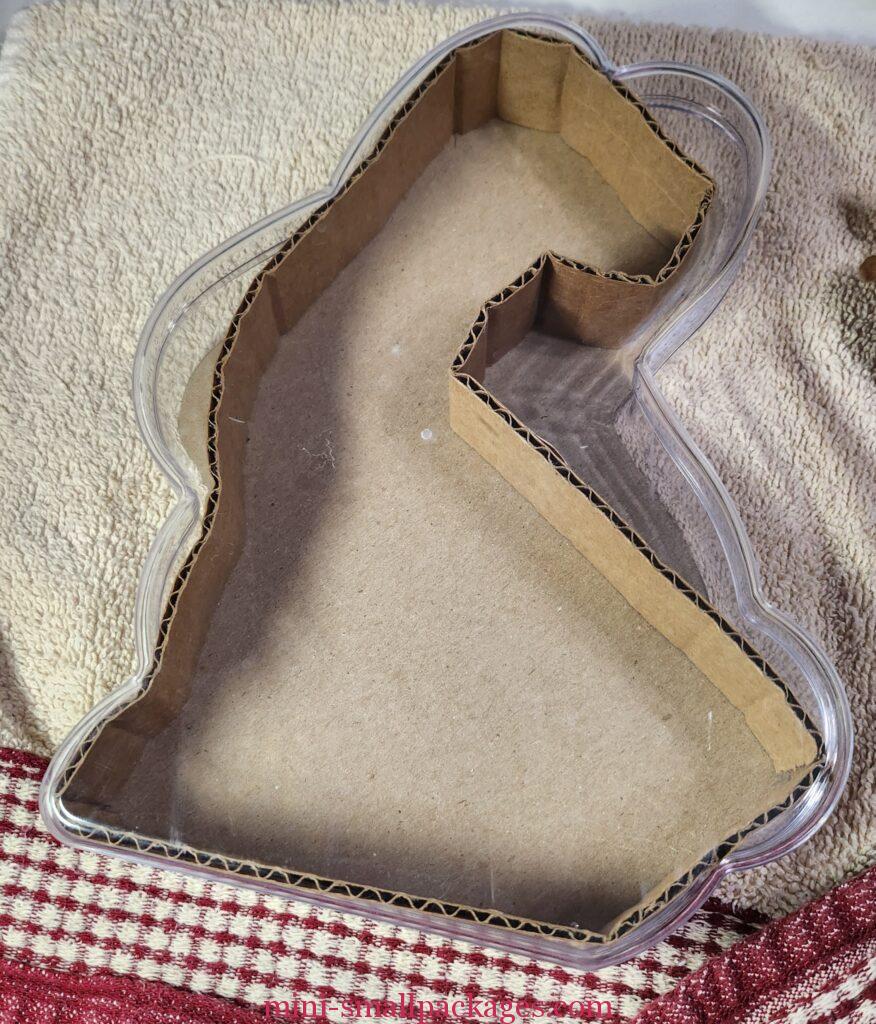
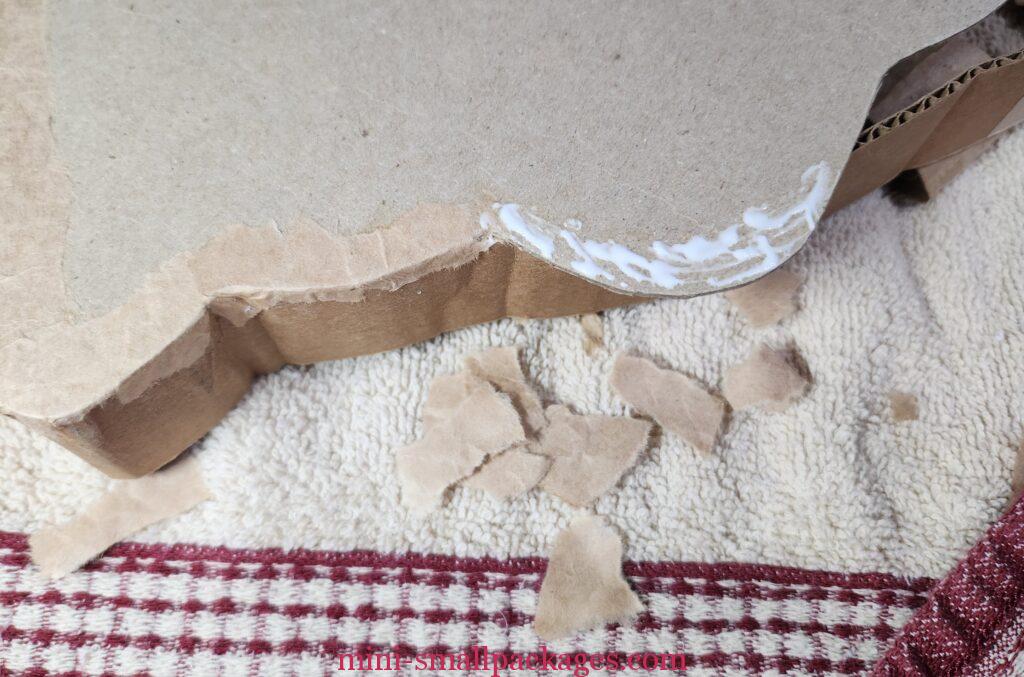
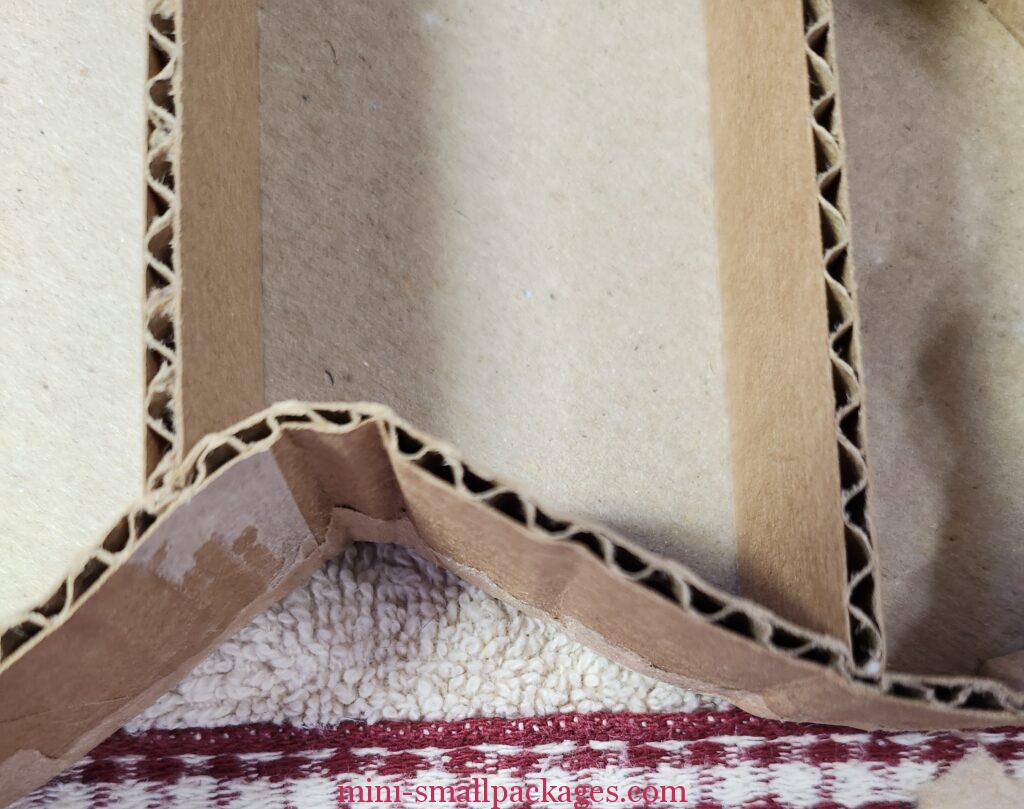
I cut the interior edges from corrugated cardboard, literally a box. I had not heard about using corrugated border trim (like for bulletin boards back in school). When I did, I thought, well I didn’t buy any because I am using what I have so it doesn’t matter. But I mention it if one would prefer it. I used my craft knife to cut it evenly and not squished like scissors tend to do.
Next was testing the length to make sure it would fit in all the shape. Then I began gluing it to the back.
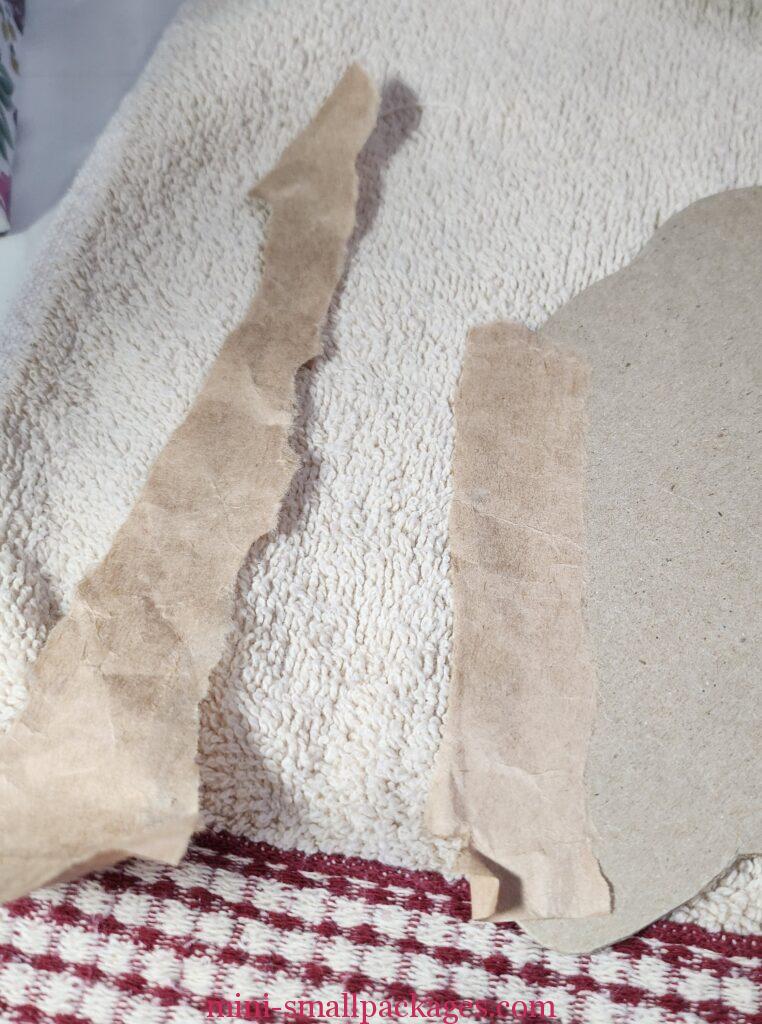
After gluing all around, I was concerned about gaps and possible failure of the wall not staying glued, so I added paper to the edges. This came from a paper packaging. I tear pieces and glue over the edge.

Floors
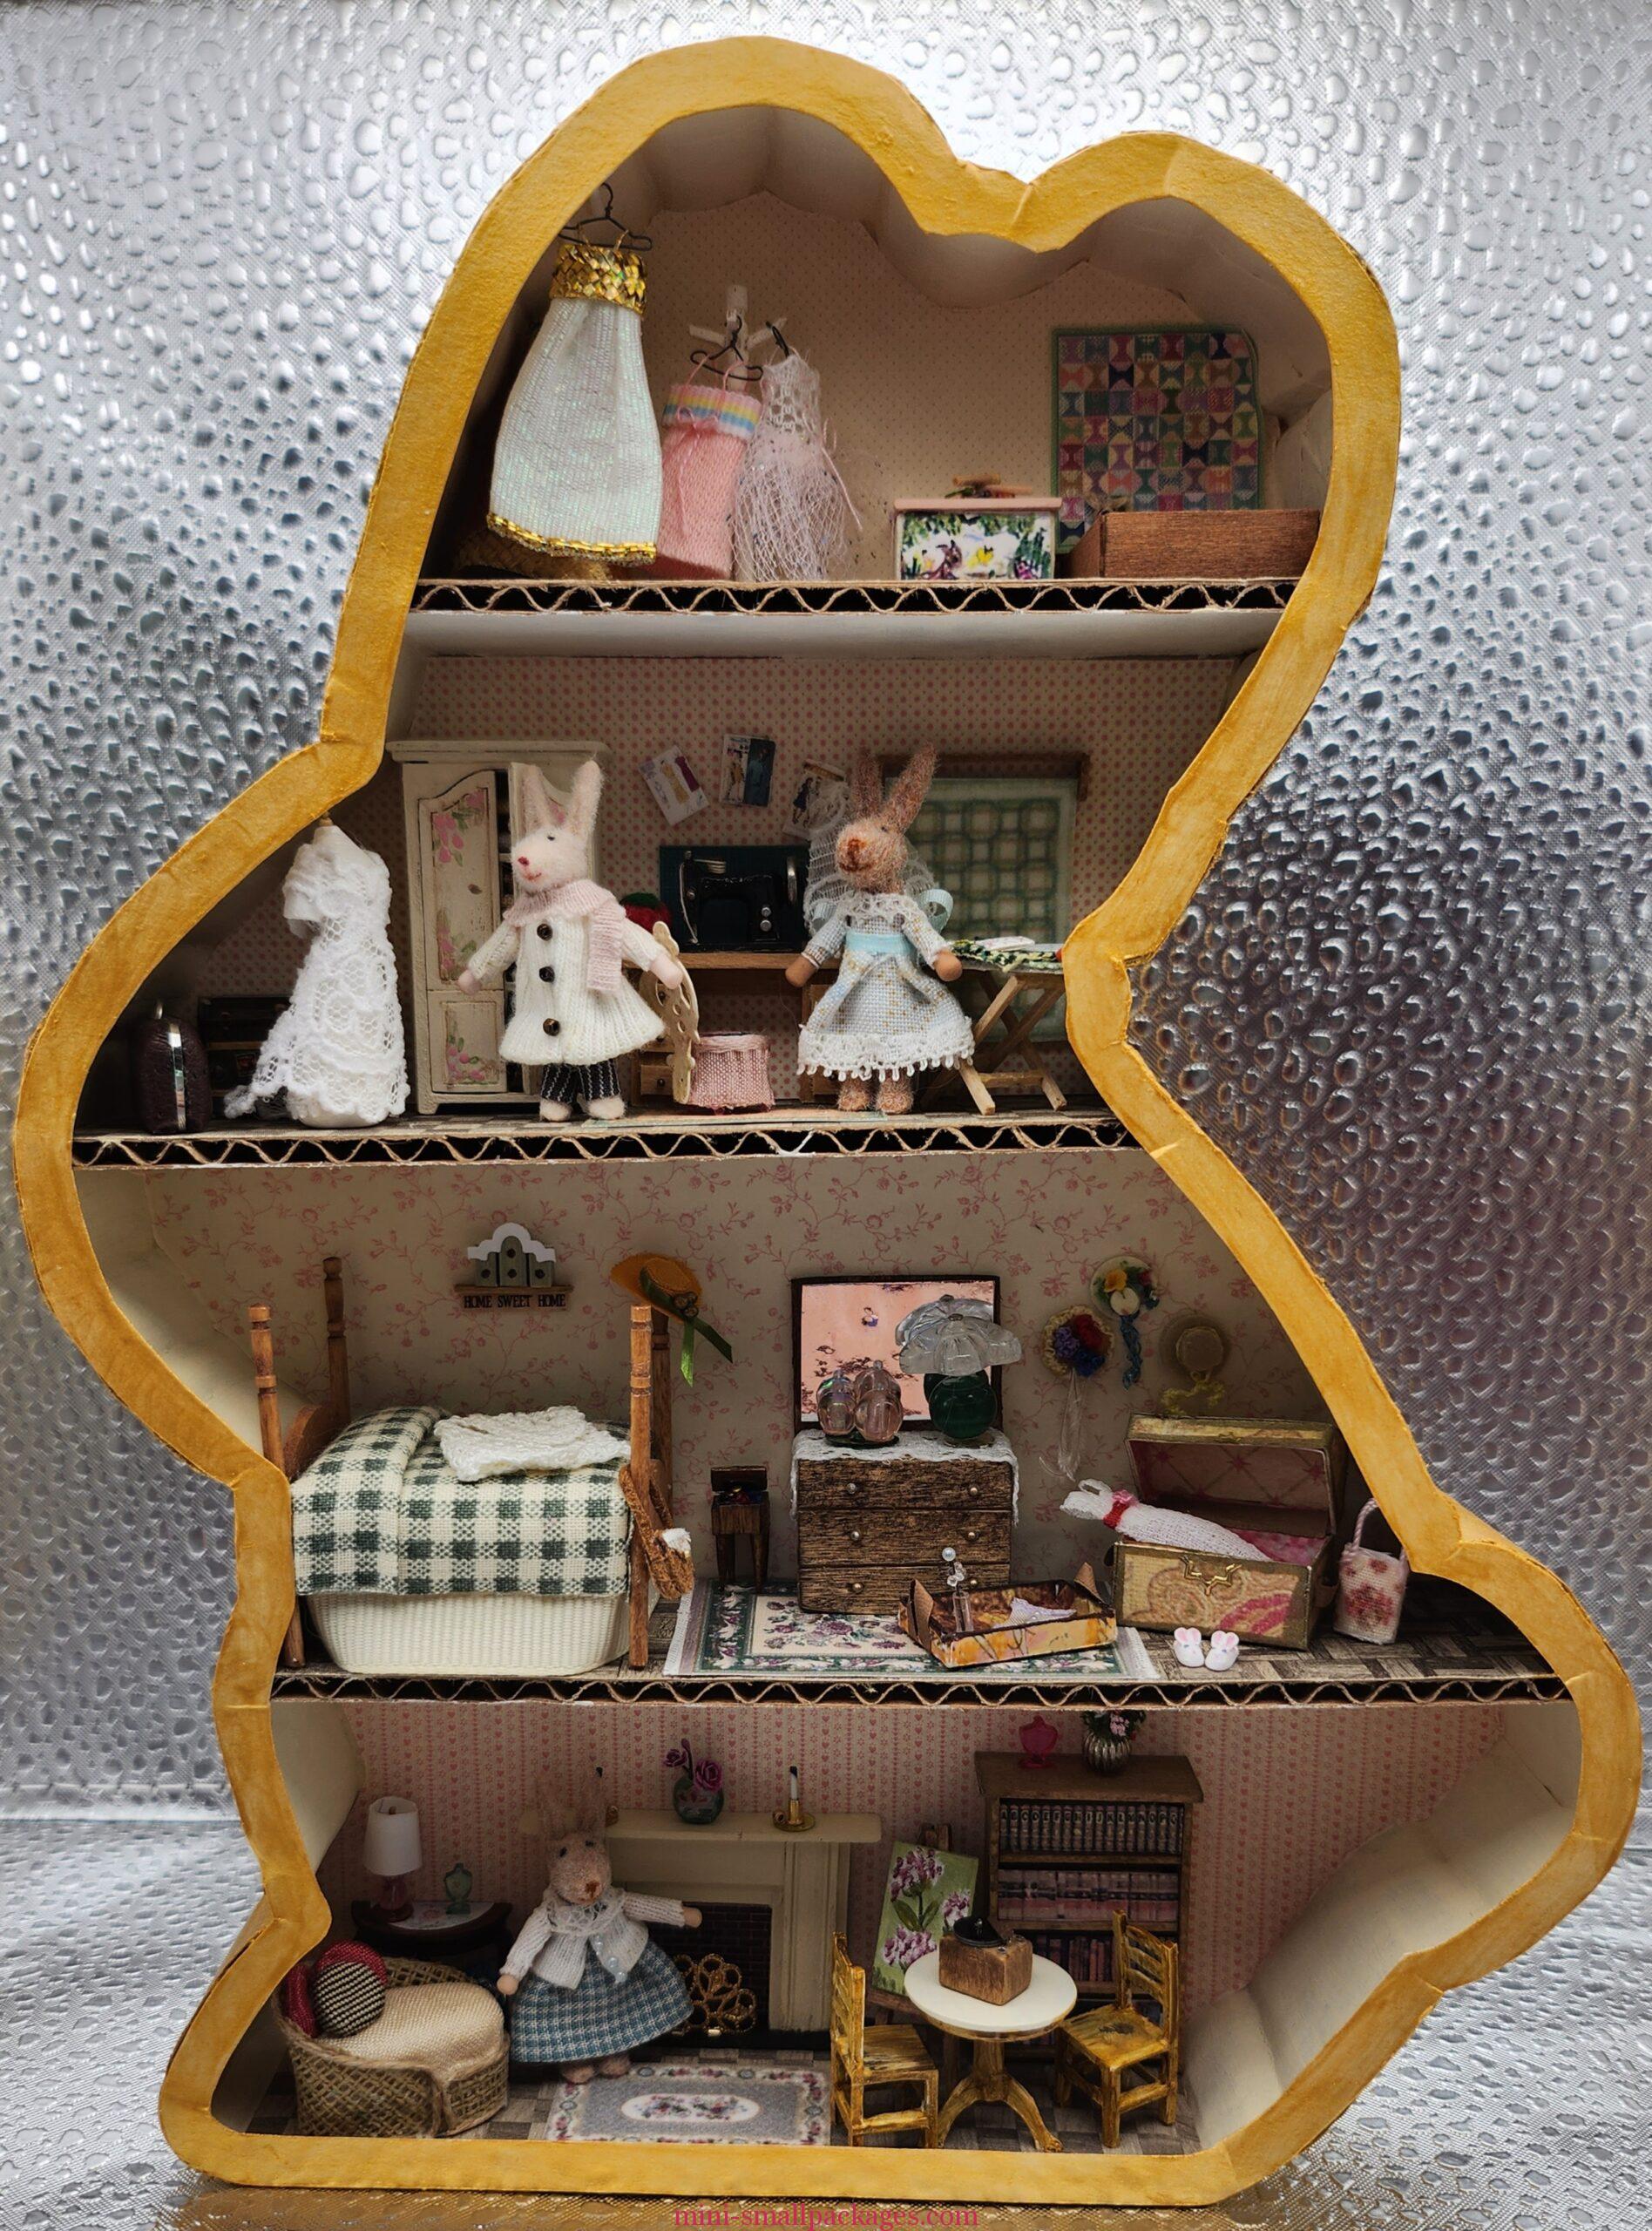
Next I added the floors. I had to decide how many and how tall each would be. I used this scrap envelope for sizing. The bottom 2 floors are 2 1/4 inch and the top 2 floors are 2 inch.
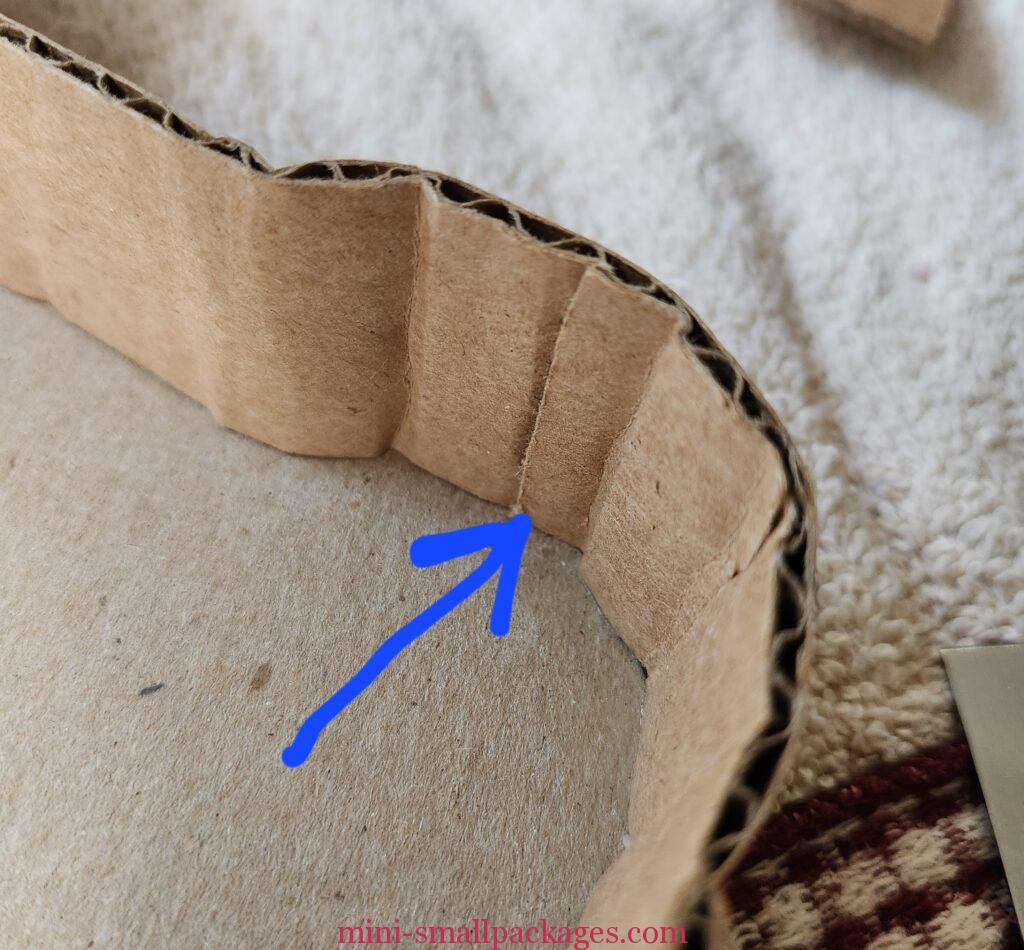
To help them stay in position, I cut into the corrugated cardboard to create a slot.
Paint or Wallpaper
I choose to paint the side walls and wallpaper the back.
Here is my final decision on what papers to use for which floor. These were from my stash. The second from bottom is half inch scale but the others are considered quarter inch scale.

I’ve added in three floors of wallpaper. Notice the paint is just on the curved side walls.
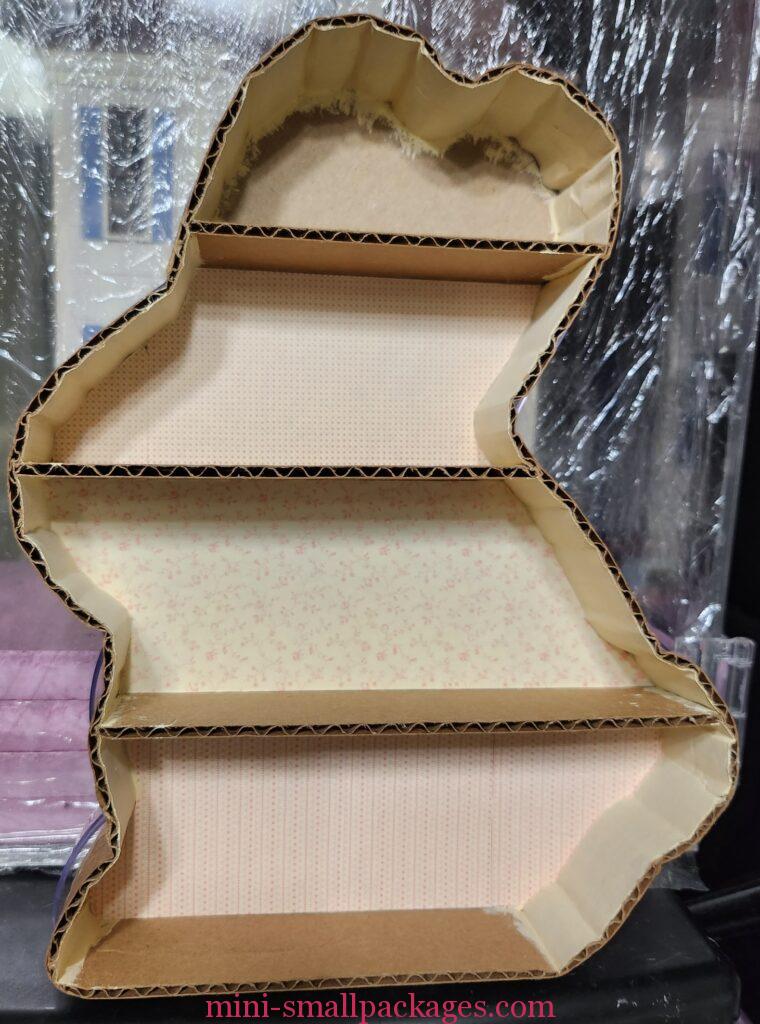
Flooring added is wood papers in half inch scale from my stash.
Finishing
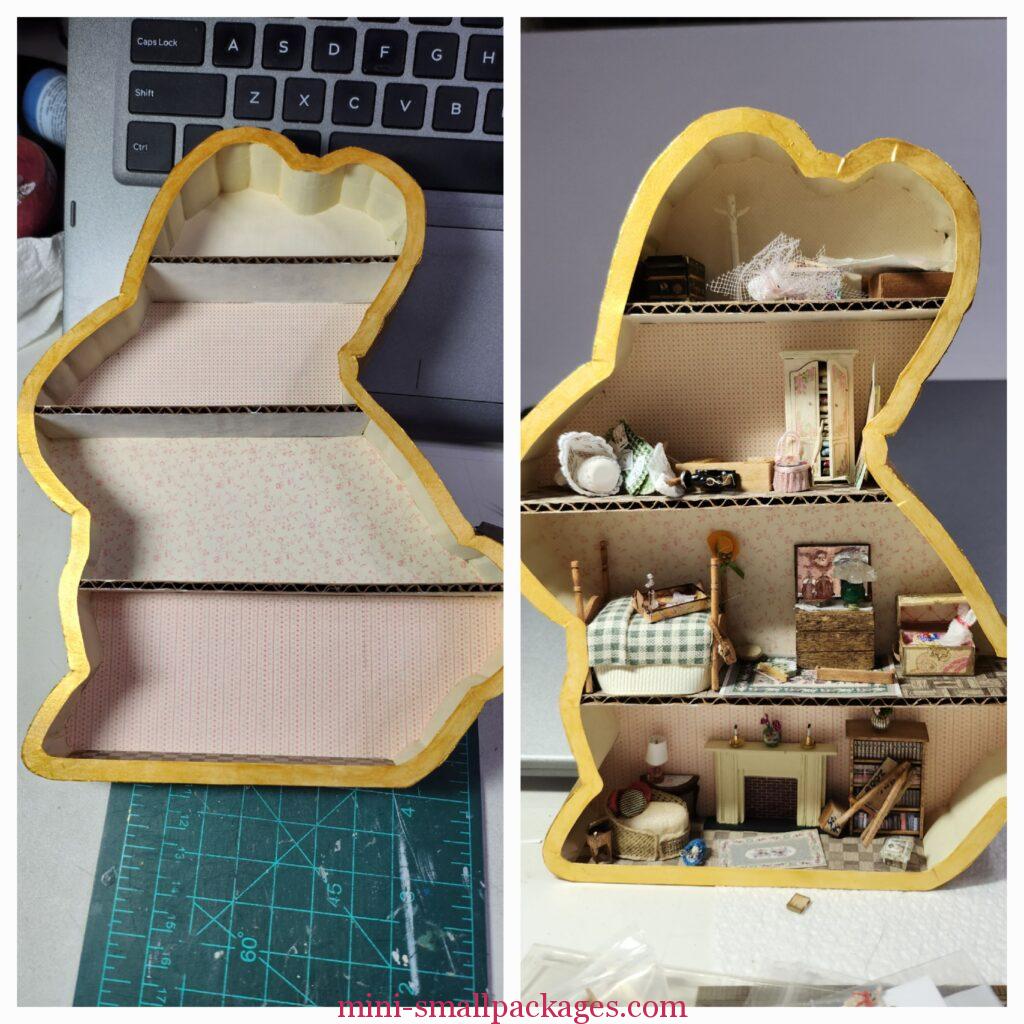
Another QCer had painted theirs gold. I really liked that. They also used some of the packaging to add a rim on the front. I didn’t have the packaging so I made my own.
Using the pattern I had, I cut another bunny shape from file folder. Then I used my drafting compass set to quarter inch and drew around the outer edge. My compass has the ability to add a pencil lead. Then I cut away the middle.
The entire outside was then painted gold including the front trim.

Shopping Swaps
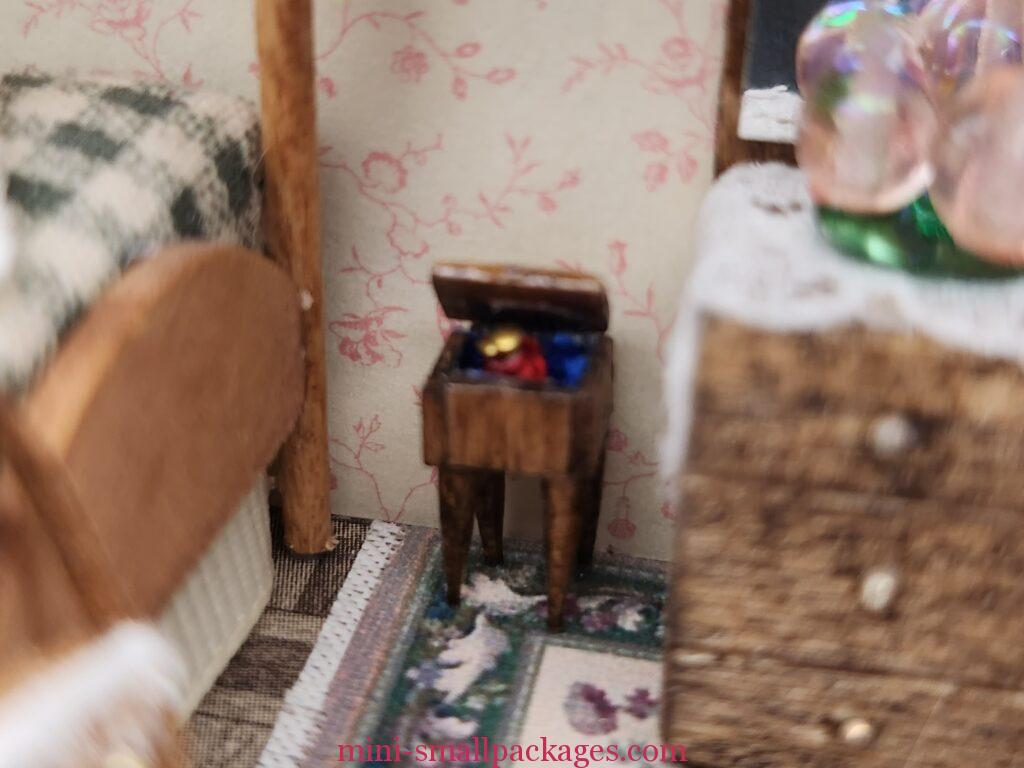
The box sat empty for a bit due to real life happenings. One evening I sat down and went shopping in my Swaps Mall. It was a bit like ‘Rooms to Go’ as I cleared out three spaces/rooms. I filled all 4 floors with anything I thought would go in it including four swaps made by me. Nothing is glued down or final, but most of them will be used. I’ve tried to note who made what, but my records are lacking.
Arranging the floors
I started with the second floor. I couldn’t decide which way to put things so I took pictures for me to compare. I also asked on a zoom what others thought and the final agreement was the trunk to the right.
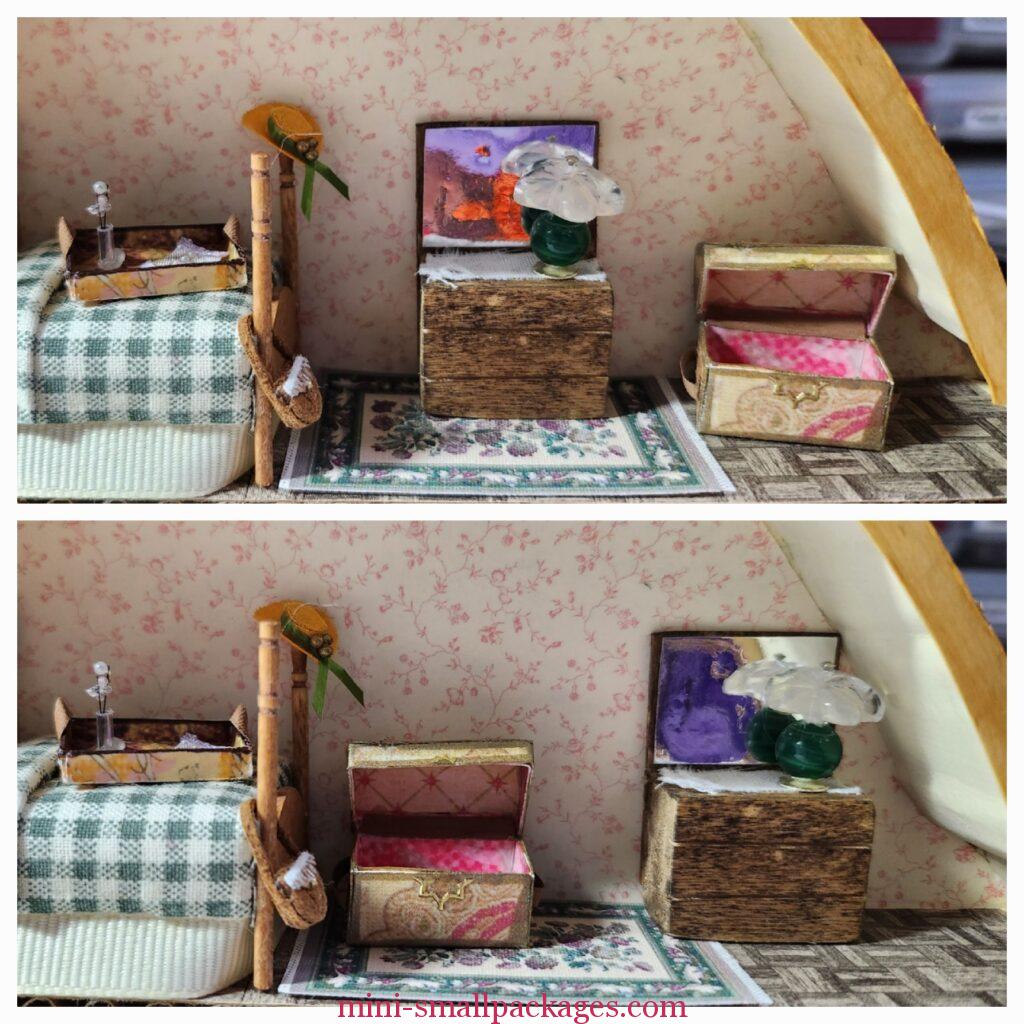
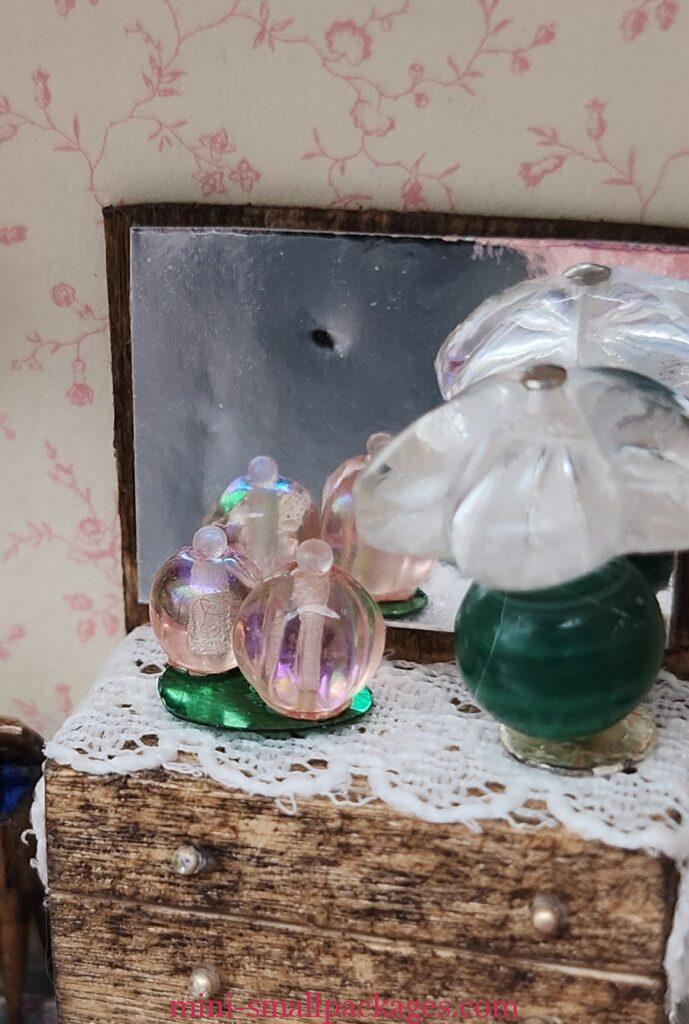
Dresser gets upgrade
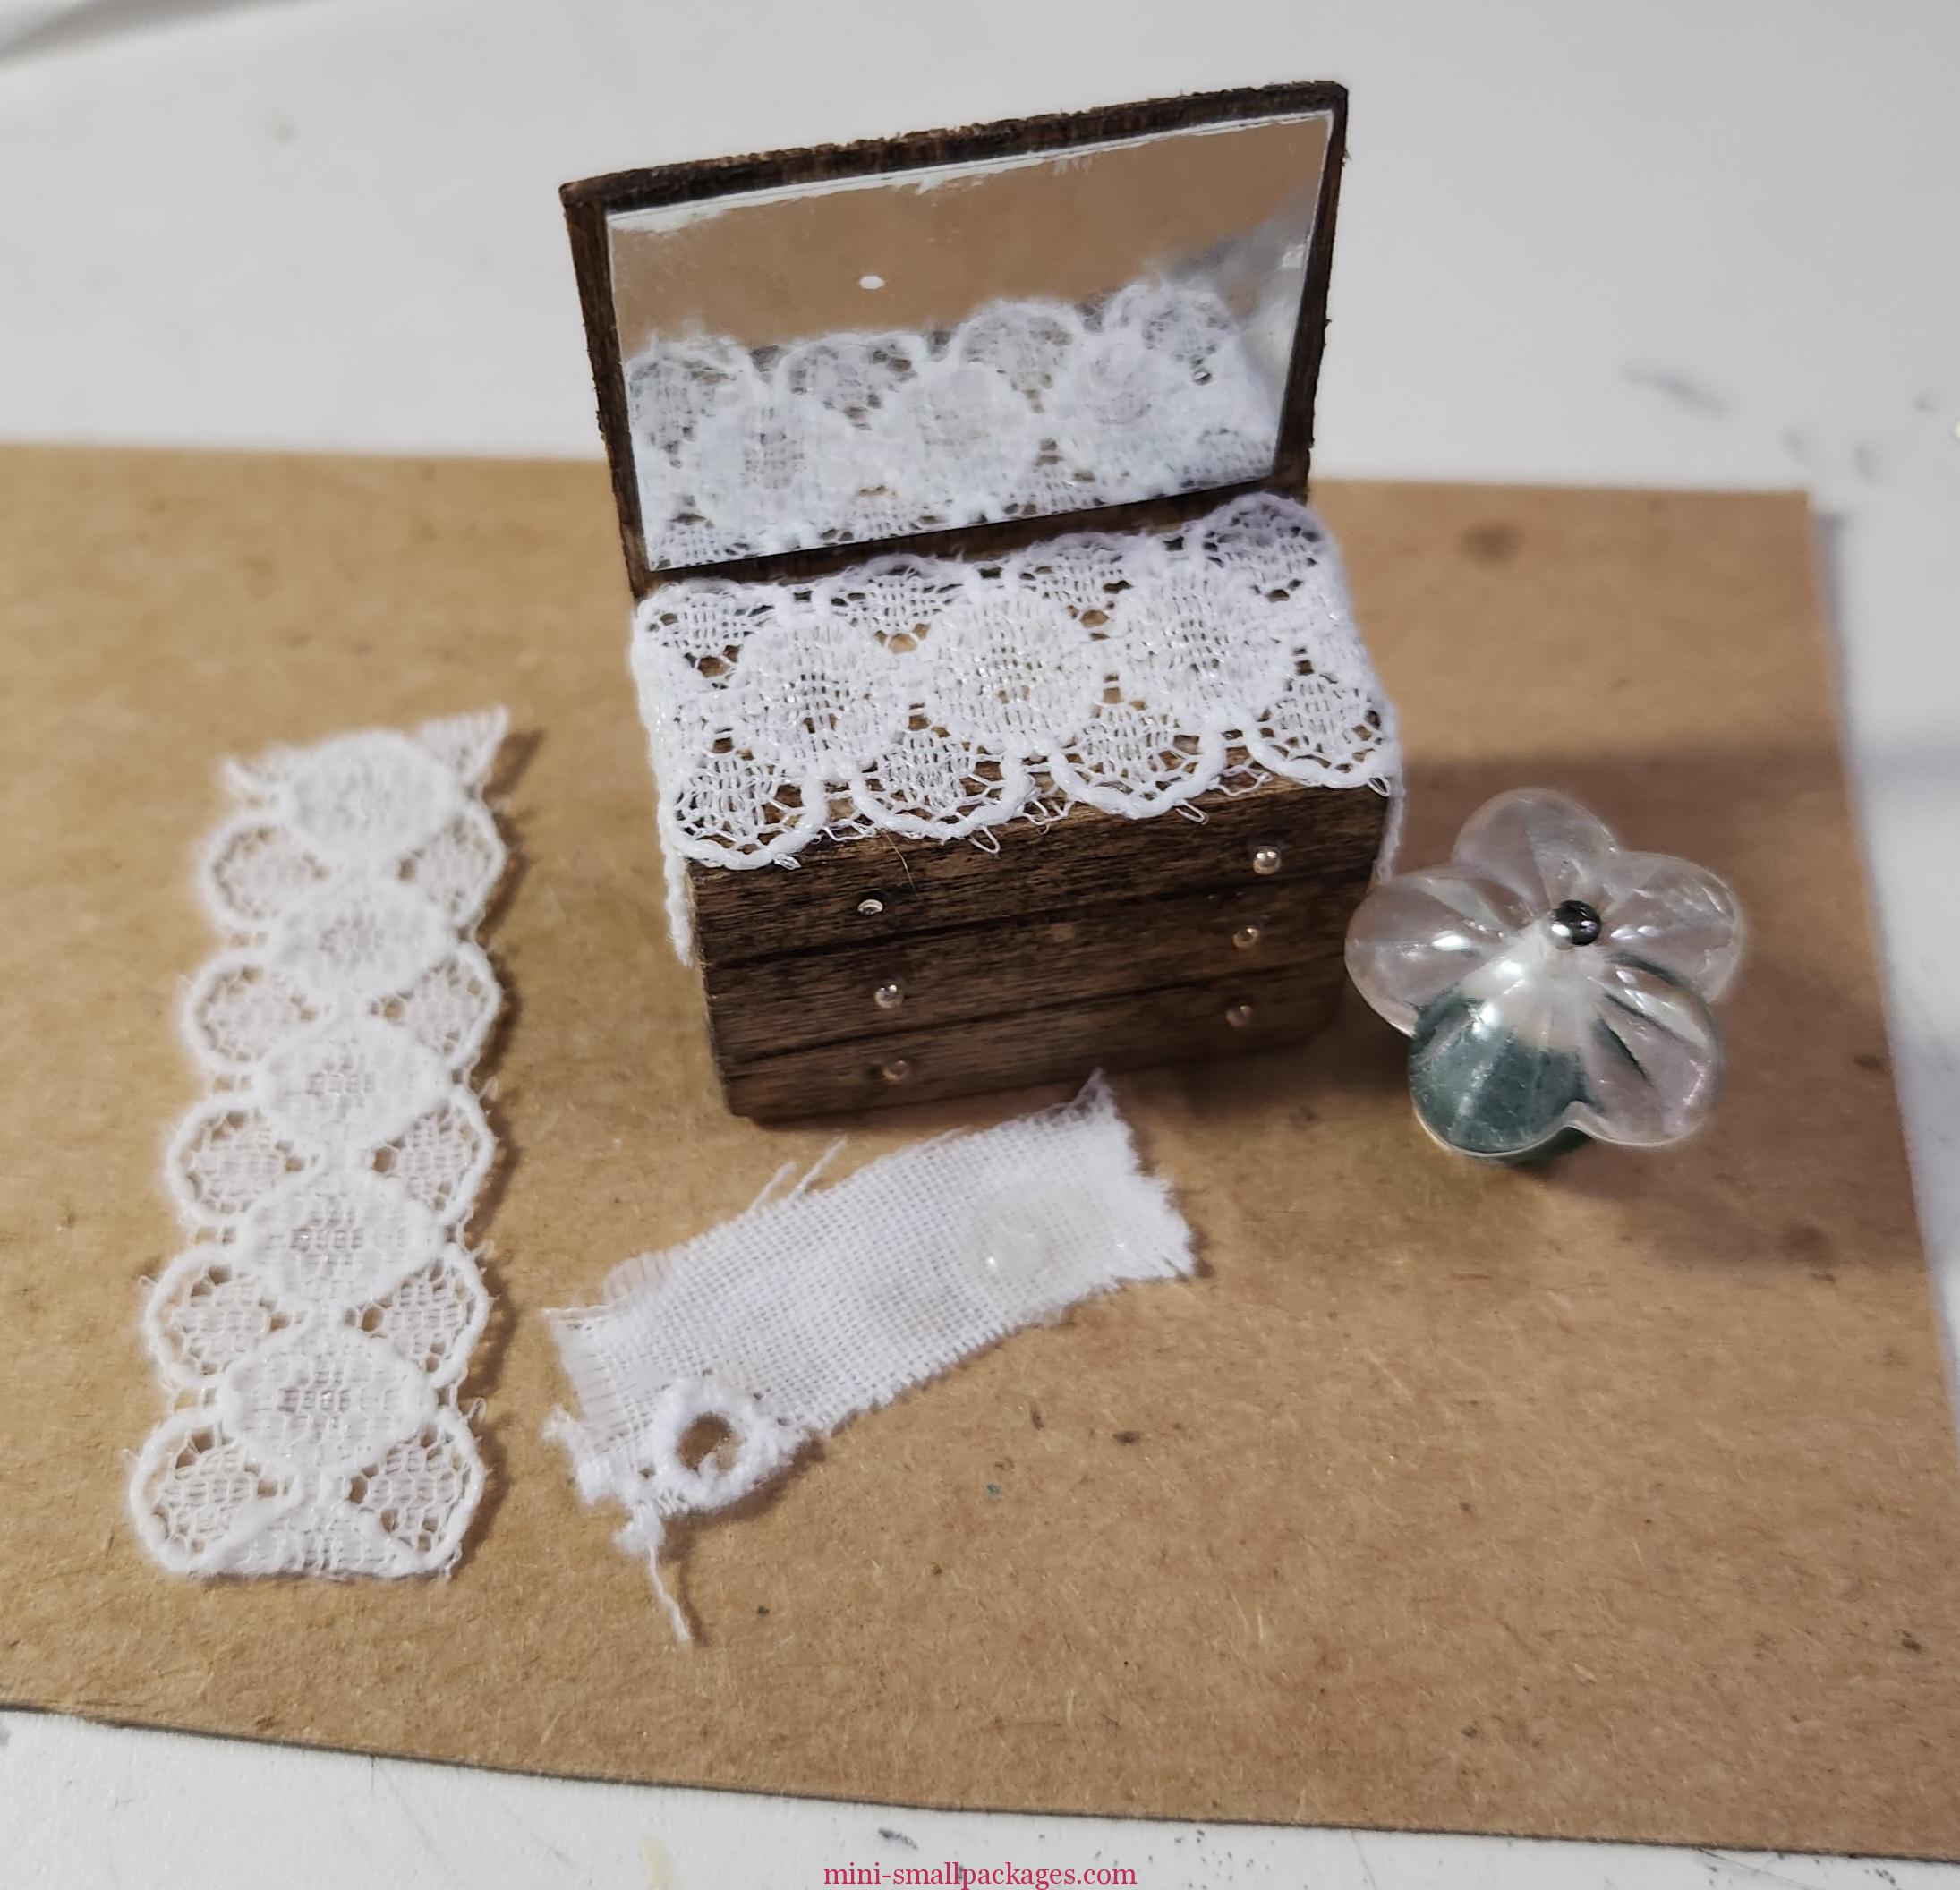
As a swap, this dresser with the white cloth is nice. But I decided on a few upgrades. The cloth peeled off nicely. I pulled out my stash of lace and trims and found this lovely angel lace. I glued the lamp back in place. Plus I added tiny marbles for drawer pulls.
The perfume bottles also were modified. They were on a red heart shape sequin. I pulled out a green circle sequin and cut this oval.
Second Floor Bedroom
Once I figured out where the dresser was going it was easy to do the rest. Well until it came to the bunny slippers. I tried them in several places.
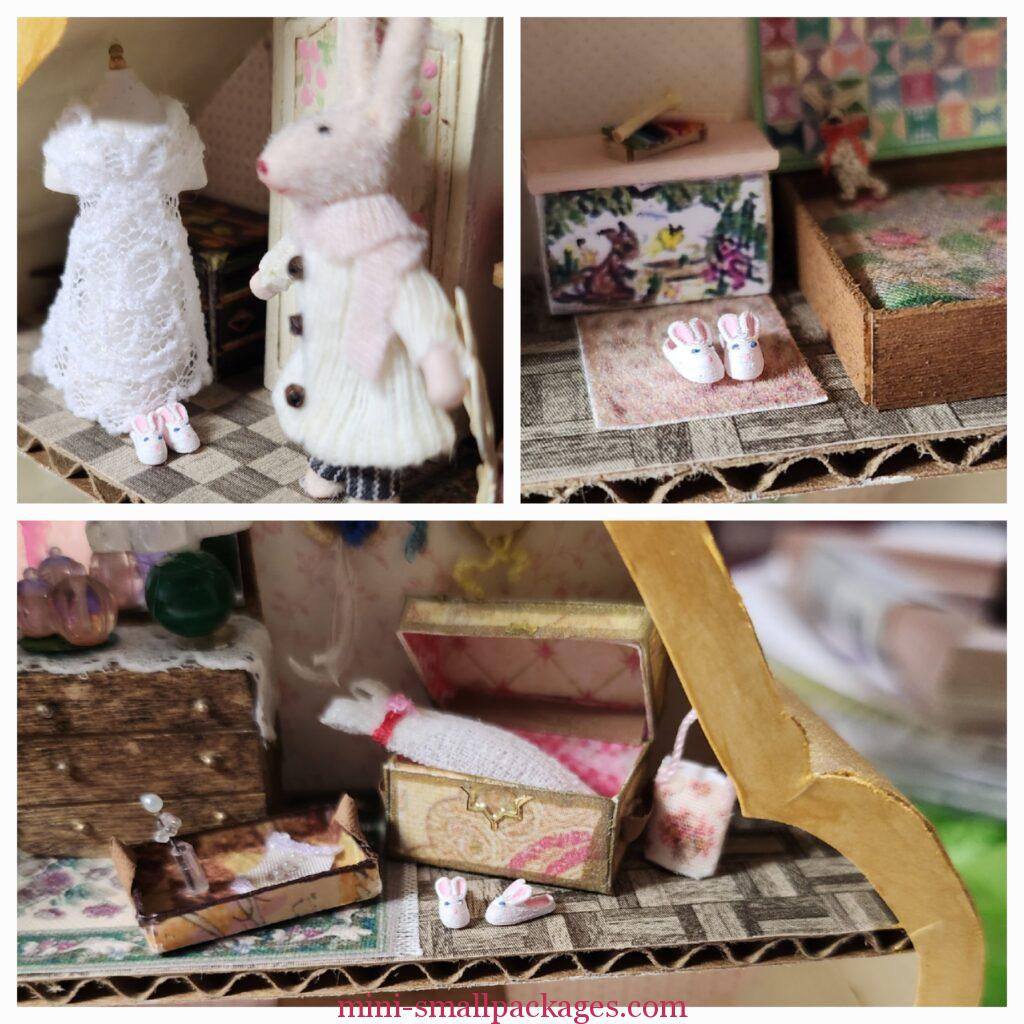
This is how it all turned out.
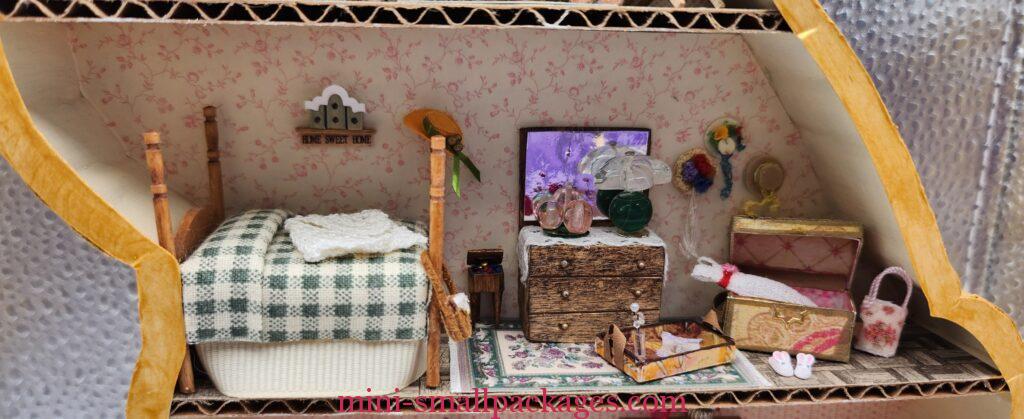
Swaps for the second floor: bed (Bobbie Ezzell), white crochet shawl, brown suede purse (JoAnn Toledo), yellow hat (Julia Gross), home sweet home sign (Pat Holstrom), knitting cabinet, dresser (Fern Rouleau), pink perfume bottles, green lamp, trunk with tray (ohdonnah), white dress with red sash (Betty Turmon), pink floral bag (JoAnn Jacot), hats on wall (Ruth Goodger, Deb Randolph).
Made or modified by Preble: Bunny slippers (Kathy Abdinoor) painted by Preble. As mentioned above change to dresser and perfume set.
First Floor Living Area
Fireplace Screen
I had this lovely fireplace and wanted a screen. I pulled out my findings and found the one pictured in the upper right corner. I cut it away with my dremel tool the bottom two heart shapes. The other one was also considered but out of scale.
In hindsight, I might could have cut it so I could bend the pieces instead. To make it stand up in the fireplace, I added two cardboard folded pieces glued to hold. Look closely and can see them. These are shiny mirror cardboard from my stash.
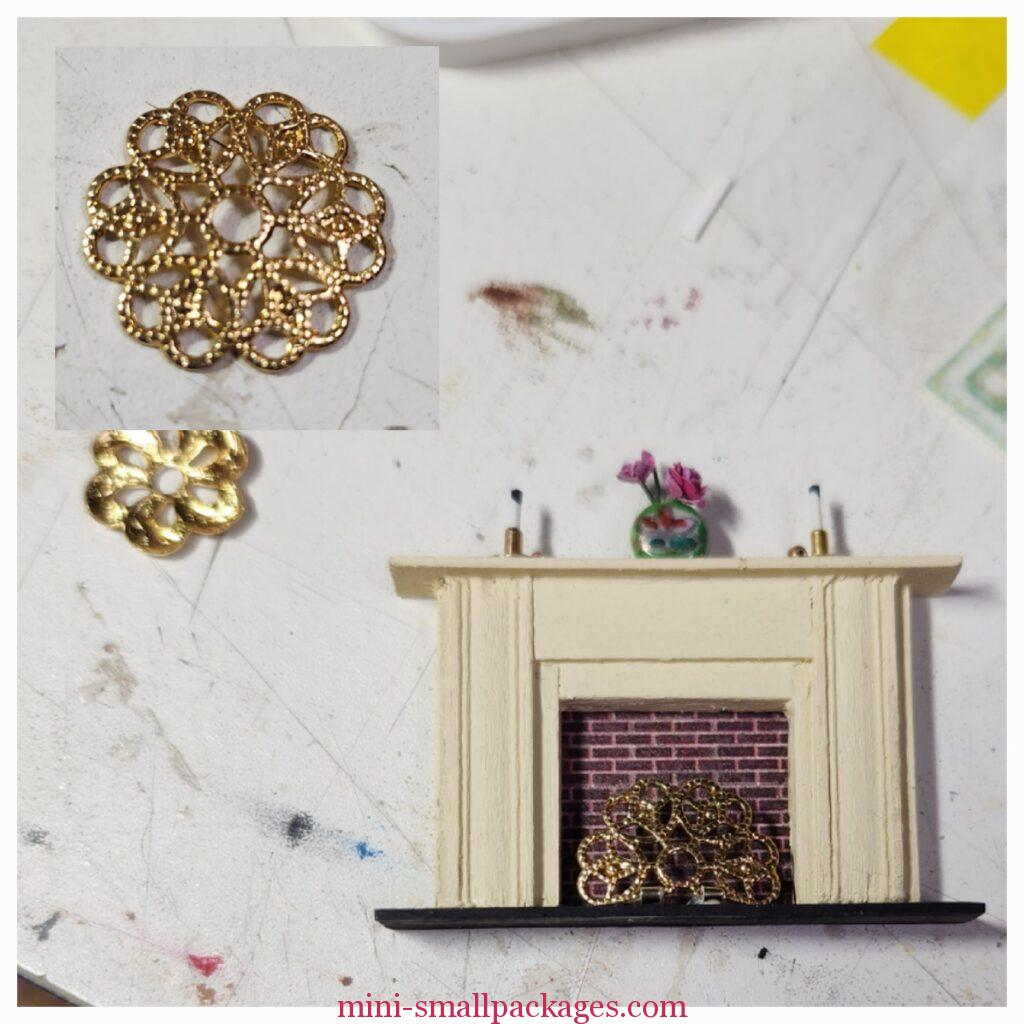
Before I glued this lovely swap in place, I just had to get a good picture.
Transforming BPF
BPF or brown plastic furniture is what I had for table and chairs. I don’t like the plastic look, so first I tried to paint a different shade of brown only it wasn’t right. Then I tried to match the fireplace. It was already glued into the box so not so easy to compare colors. I went with Butter Cream and maybe should have used Ivory instead. To change the color, I decided to use stain. I used Early American which I have never used before. This is because I only purchased several new colors along with refill cans for others. More on refilling a stain pen here.
Initially I tried just with pen tip but realized I needed a more delicate touch, so I switched to a old paintbrush. To get the stain from the pen, I pressed it into a plastic lid to create a puddle I could dip the brush in. I used an old brush in case I couldn’t get the stain out. I used nail polish remover to clean the brush.
The darker places were from the stain pen tip and also loosening it up with the paintbrush, so that the plastic sort of shows through. It gave it a very authentic worn painted wood look to me.

That’s Judith by the fireplace. She is just visiting. She was made by AnabelaMiniatures in Spain and purchased on Etsy.
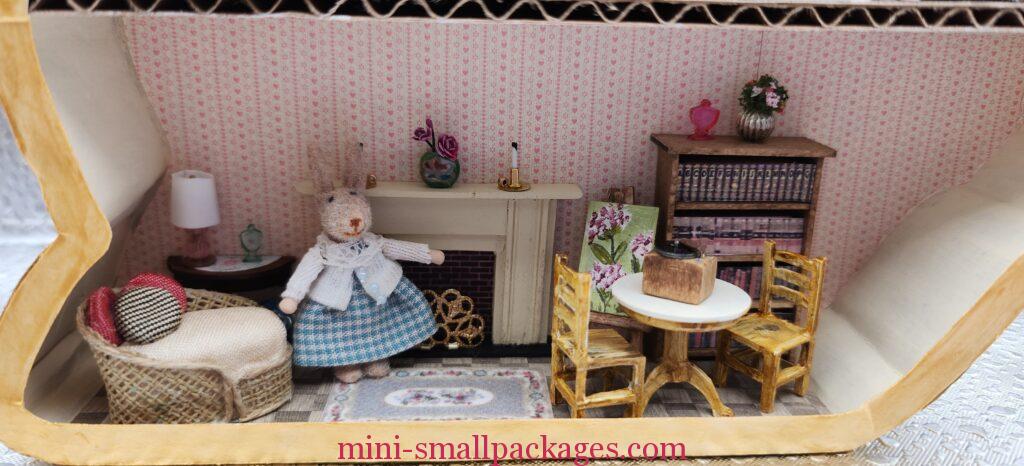
First floor Swaps: chaise, table and lamp(Michelle Miller), blue basket of knitting supplies mostly hidden by chaise, fireplace (Ann Cunningham), candle set (Rita Warwick), green vase with roses (Barbara Thorton-Hill), “ode to Spring” painting on easel (Leigh Hill), bookcase (Judith Dowden), silver vase with flowers (Maureen Fountain), rug (Gina Clark)
Made by Preble: Clear green and pink vases (Quarter Source) with alcohol marker coloring. Record player on table for a swap. BPF table and chairs painted/stained. Purchased: rabbit doll (ANABELAMINIATURES on etsy)
Third Floor Sewing Room
This is Lillian’s (on right) sewing room. She has finished up this wedding dress for Emily. Emily is so excited to try it on. Both rabbits are by ANABELAMINATURES on etsy.
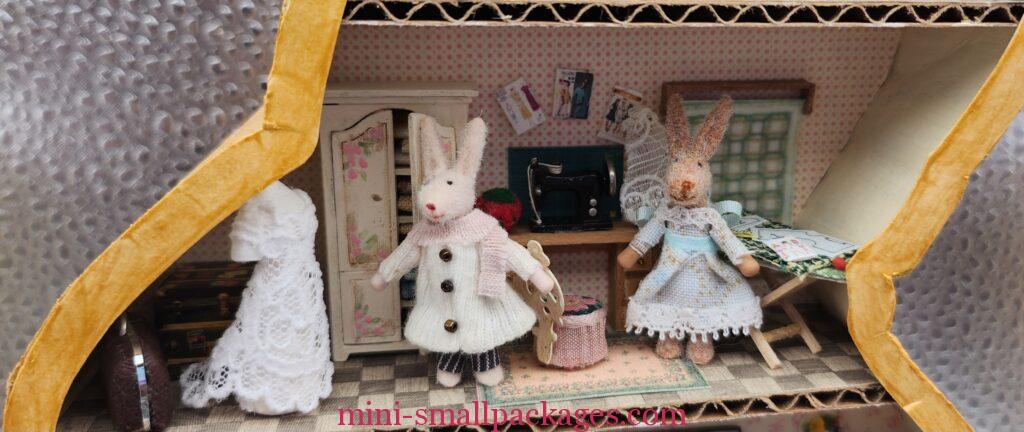
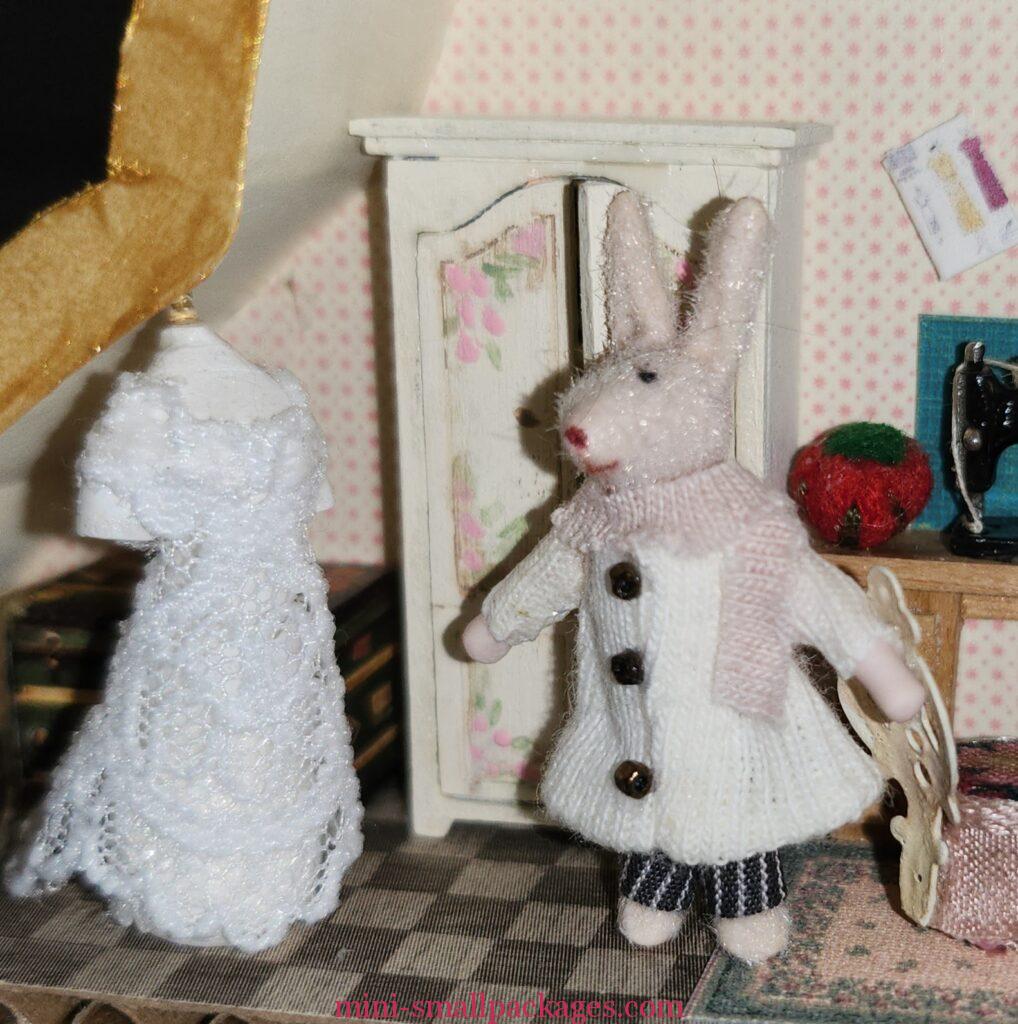
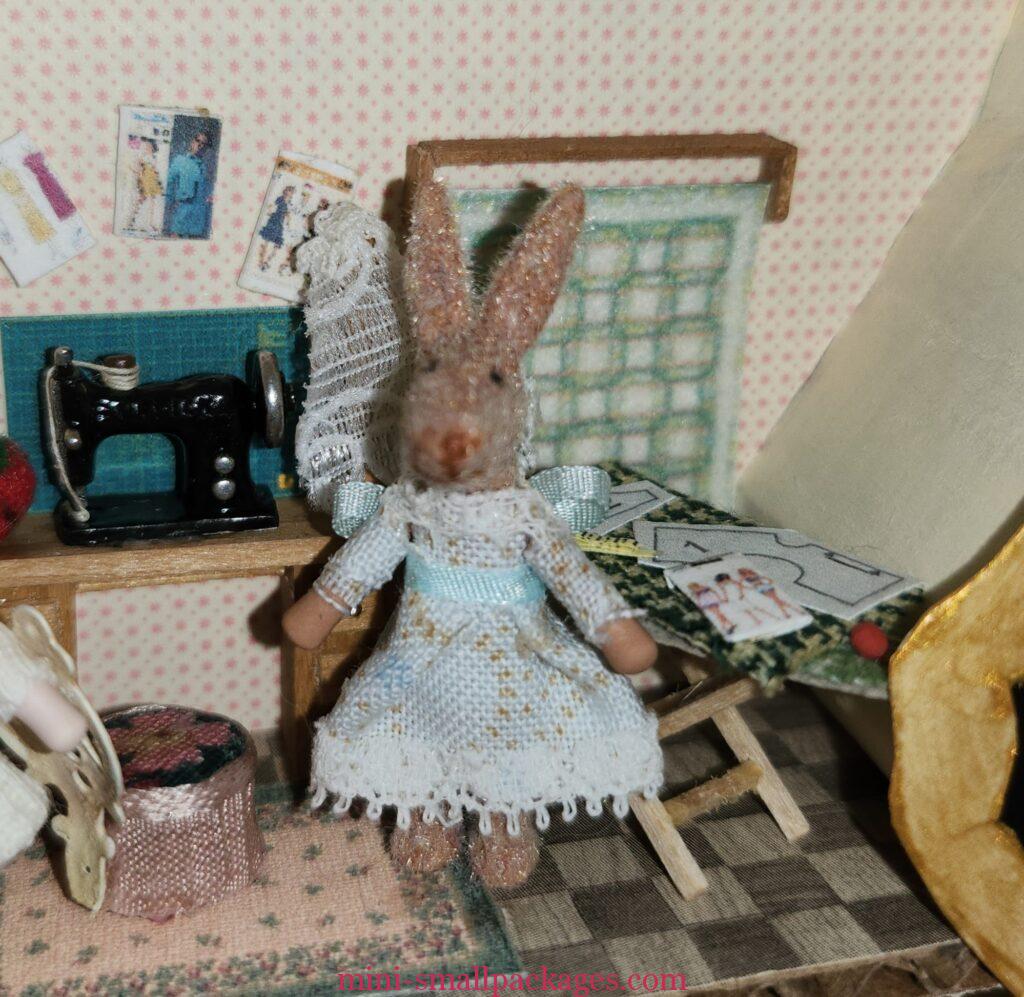
Swaps for third floor: green trunk (Bonnie Childress), wedding dress and veil (Laura Miller), sewing machine and table, chair (Wanna), wedding ring quilt, ironing board (Alice Anton), sewing items (Karen Potter, Beth Laverty), rug
Made by Preble: sewing items, Purchased: wardrobe, both rabbit dolls (ANABELAMINIATURES on etsy)
Attic
In the attic is a bedroom for when Lillian’s niece comes to stay. She also has a surprise for Emily with the white and gold evening gown and a gold cape.
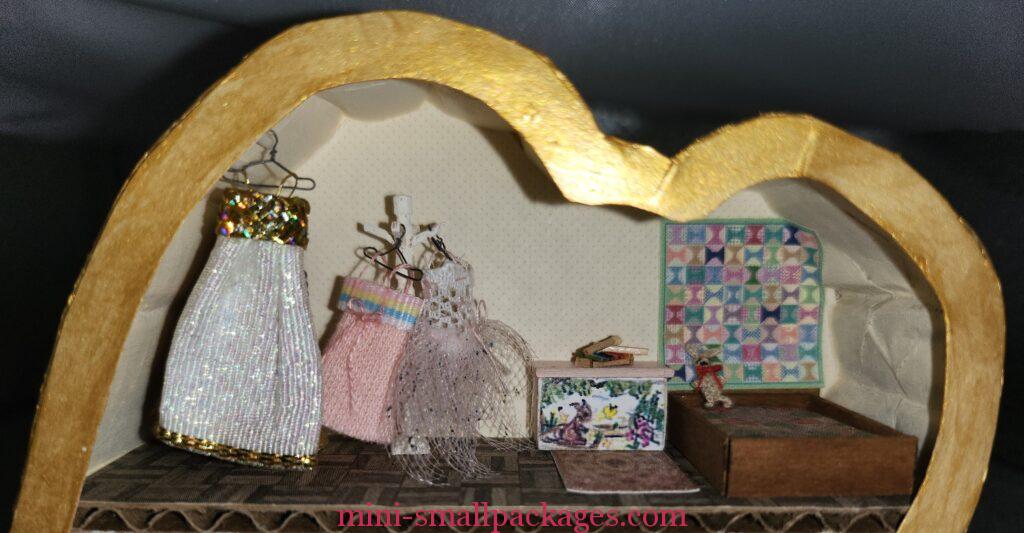
Swaps in the attic: white/gold evening gown (Kathy Grissom), gold cape (Jenn Price Jones), pink tennis dress (Kathy Grissom), pink tutu dress (Luba Barnes), white clothing rack (Jenn Price Jones), wire hangers (Barbara Thorton-Hill), toy chest (Mary Jean Emory), rug, bed (SJP), thimble quilt
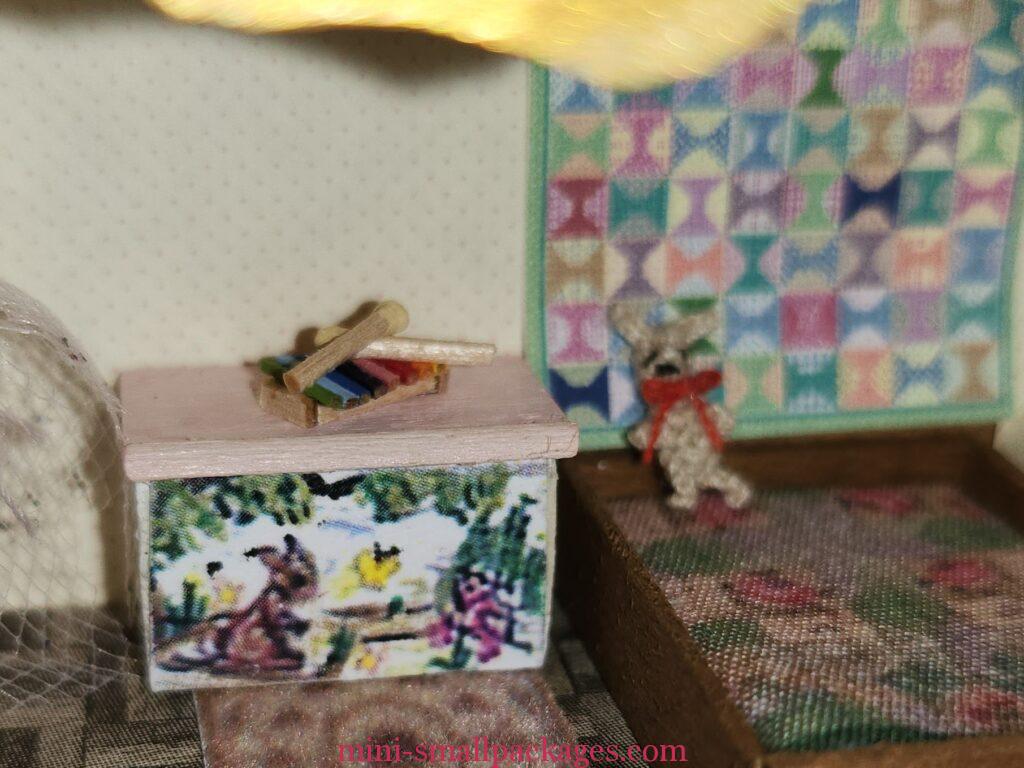
Made by Preble: brown suitcase pictured in 3rd floor, xylophone, Purchased: crochet bunny with red bow (Cheryl Polito)
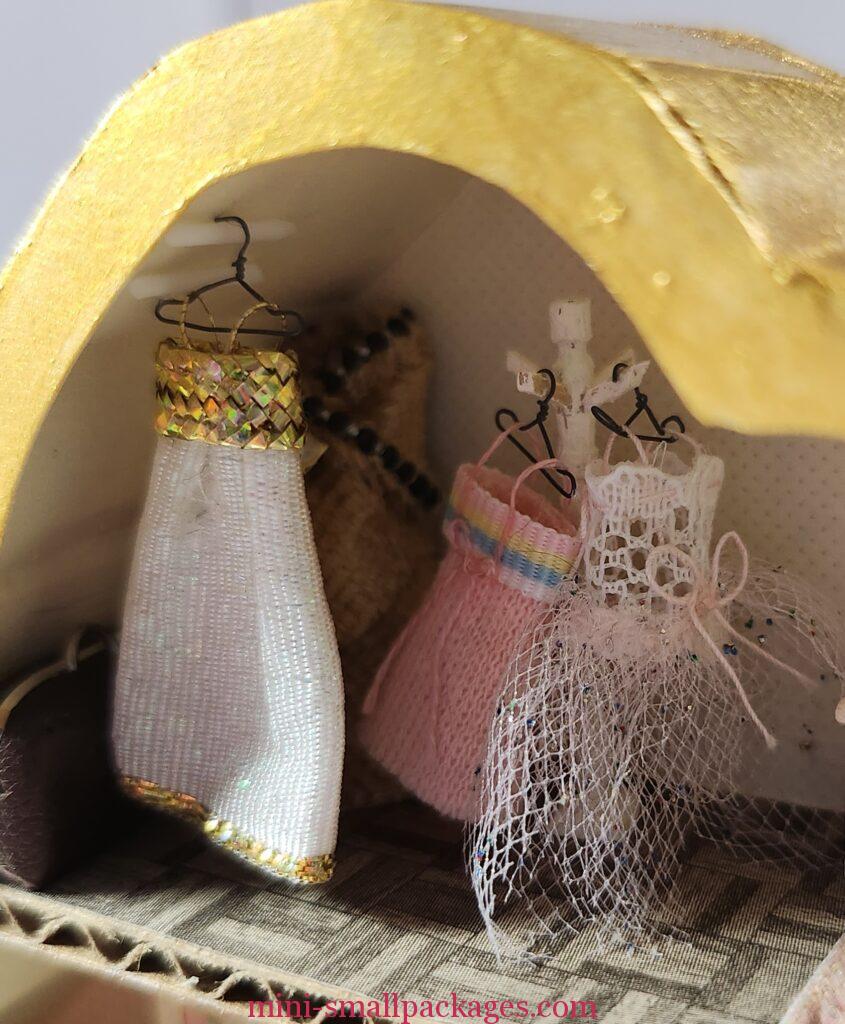
Since the gold/white evening gown was too long for the clothing rack, I added two bars for hanging items from the ceiling. Those are supports for 3D printed items simply glued to the ceiling. All three hangers were bent to hold on these strappy dresses.
Overall, I feel like I am nearly finished with the box. I am still not sure about leaving the corrugated cardboard exposed, especially with the gold trim. I also have the printies from QC that I made add. For now here is the nearly finished box.
Happy miniaturing!
Preble
If you enjoy my website, please consider making a small donation via PayPal.me/minismallpackages. Thank you!