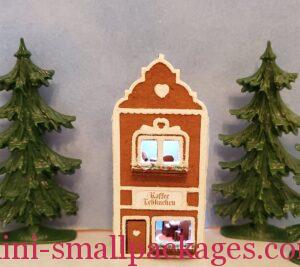
Finishing another kit by True2Scale. This time it is a combo kit. A pretzel stall and wurst (or sausage) cart.
Pretzels
I love that there are paper pretzels, however they were difficult to cut out. The laser cutting left them jagged. I didn’t look forward to cutting the edges.
Instead I decided to make my own from wire. I considered thread but figured I would try wire first. The key to this is the right size and hardness of the wire. I have some wire that is the right thickness or gauge but it is really difficult to bend. That is what I mean by hardness.
The second important thing was making a jig. A simple jig of 3 pins is all I needed.

Making a Jig
The right materials are important to make a simple jig. I used a block of wood I already had made a jig on. However a thinner piece will work for a limited time.
I drilled holes for placement of my pins. I am using sewing/straight pins. If my wood was thinner I could just push them in. The thinner wood does have a risk of splitting the more the jig is used. Pushing them is more likely to split than drilled.
Once I have the pins in place I am able to wrap the wire around. Then I remove and trim the wires. Then I painted them.
Initially I painted a darker color, but then repainted a light color and then brushed a different brown on the front to give the baked variation.
Here are the first batch inside.

Adding Lights
Once again I am adding a light to the building. For this one, the groove I cut was wider than the white trim so I needed to cover it. I painted the wire white, then added glue and more glitter.


I thought I was finished with it, but realized I forgot the sign.
Wurst Cart
This gap was not able to glue but the trim keeps it together.

To Light or Not?
When I started this I wasn’t sure if I would add a light. However when I noticed the wagon/cart is enclosed I decided it should be.
Initially, my plan was for the wire to go across the roof and then down the back. That is what I cut for. Then the question was where does the wire go to reach the groove. Instead I cut a notch in the side and trimmed a groove out along the upper edge under the eave.

This works fine. I just need to be careful with the leg.
White Trim Makes Wurst Worst
I was moving along with this cart and it was time to add the trim. Now after doing many of these, I prefer to remove the trim pieces from the motherboard after painting them. Apparently I flipped them over when moving them to the wax paper for adding glitter. I added the trim to the back and I just picked the one that fit based on the wheel placement.

There were two things wrong. I didn’t add the artwork. Secondly, this is the back but there was the extra trim that goes around the window. That’s how I figured it out. There was no need for this extra trim on the back.
I tried to remove the best I can to salvage what I can. But due to being paper and the walls being chipboard it was not very successful.
Thankfully, I always save the motherboard and was able to use it for a pattern of the outside shape. I used it for both the replacement front and the solid side I need to hand-cut. I removed the solid side trim due having used the wrong side which was unpainted. Meaning if I keep it on, it would look different color because the wrong side has laser burn.
The actual back and door side trim (that I hadn’t glued on yet), I scraped away as much glitter as I could to apply it the correct way.
The lesson is if you going to separate the white trim from the motherboard before adding glitter, add a mark to the back in pencil. This will help me to not apply glitter on the marked side.
Next I applied my hand-cut trim to the front. Only to realize that I have forgotten, yet again, to add the artwork. I trim the artwork best I can to fit. I added an extra piece of trim on top to cover.

Since I had to scrape away glitter due applying to the wrong side, I glued all the trim first. This way I could touch any spots with paint and add glitter later all at once.
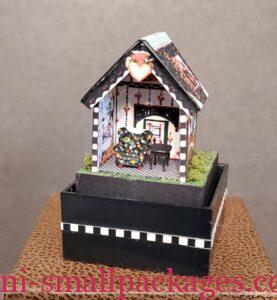
All Done


See all the GB buildings I have assembled from here.
Comments are welcome.
Happy miniaturing!
Preble