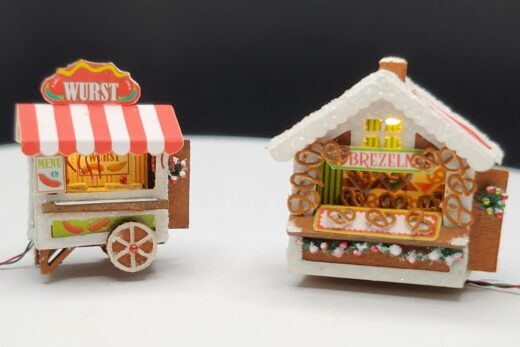
The recent OLHP provided the opportunity to win a finished centerpiece. Alas I was not a winner. I did have the forethought to buy a kit. Initially I was going to get in both 1:48 scale and 1:144 scale. But with everything else I decided I must add to my kit collection, I put back the 1:48 scale.
I mentioned it because I firmly believe it is okay and good for us to limit ourselves. In my case, I knew it was time that was precious. I loved the design. I didn’t love how much time these things take me.
Lets talk about how it was to put this tiny big thing together.
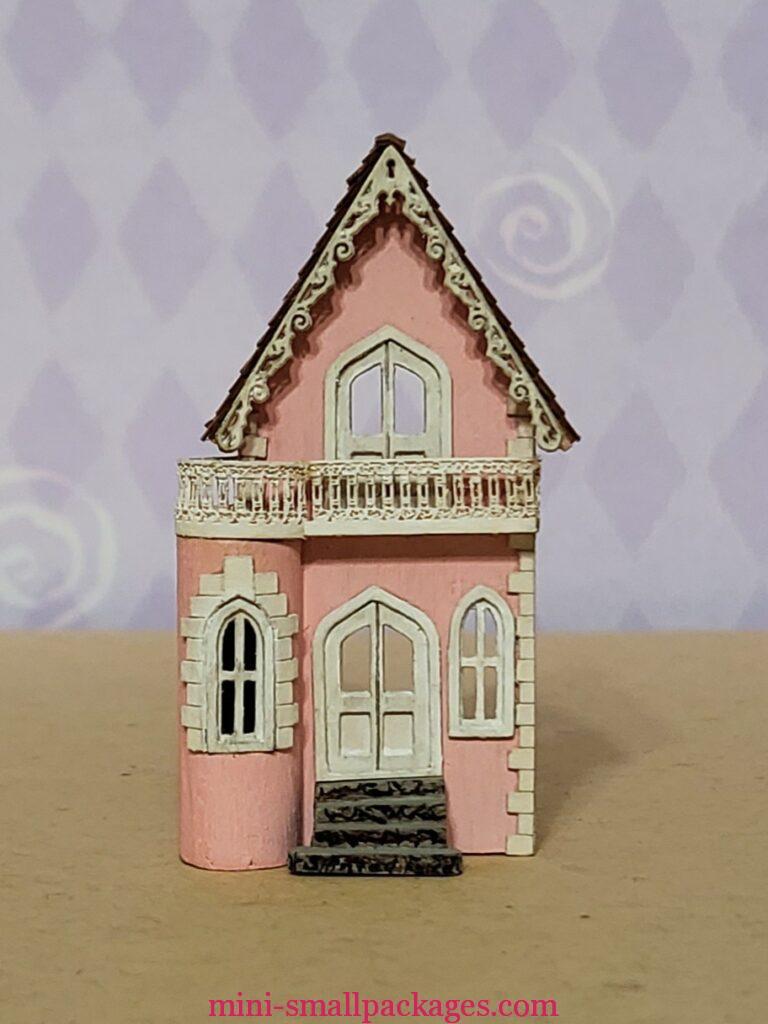
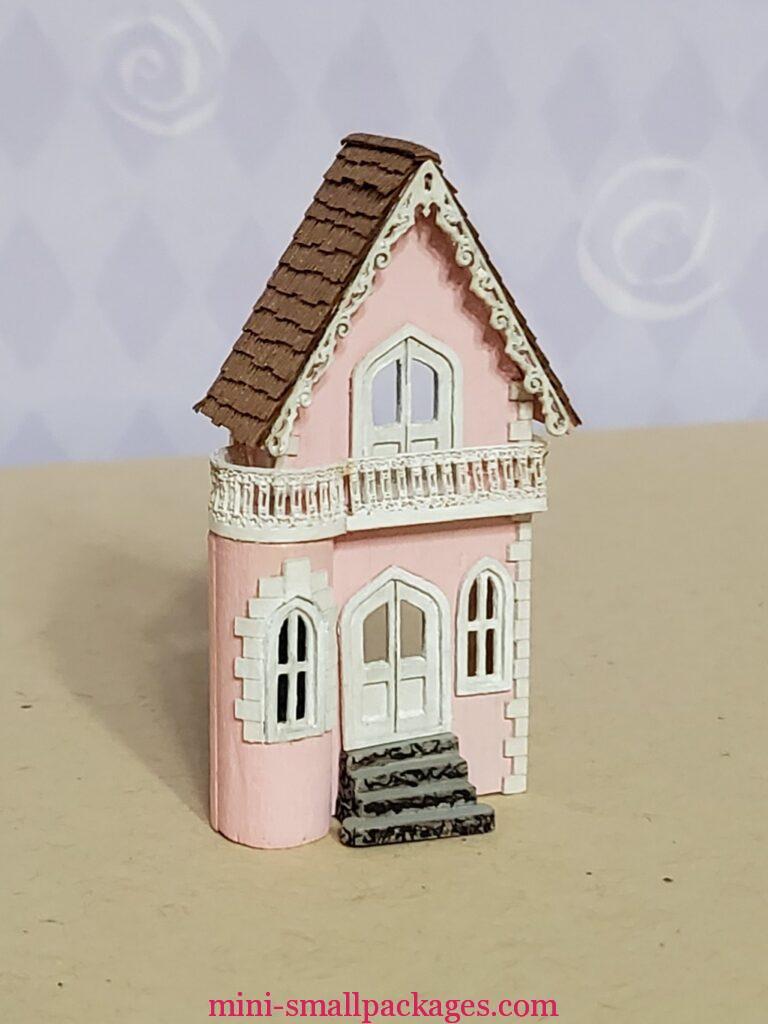
If it hadn’t been for Jackie W, sharing hers, I might have waited to assemble. But I loved her color choices and knew it was just darn cute in this size.
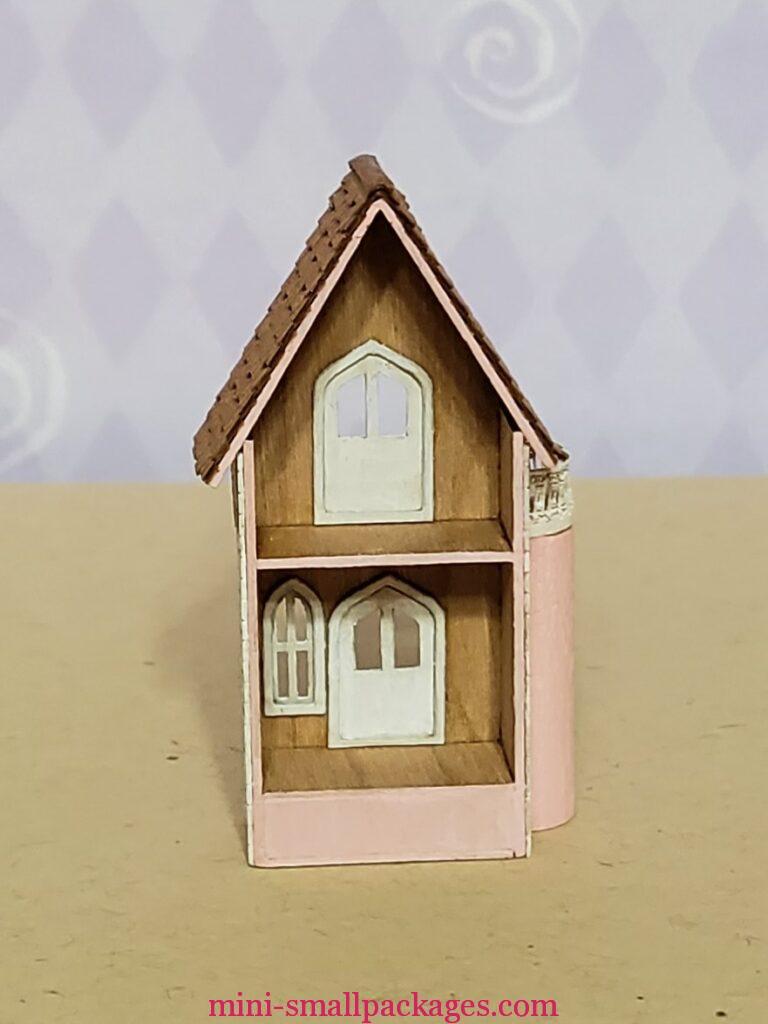
Size of doors and windows
I had to sand a bit in spots. I did as instructed and glued the two layers together since I was painting one color. Only on one door was that a problem which was they didn’t want to stick together.
I had a problem with the door trim below the door. I ended up trimming half using my craft knife. That is tricky so could sand it off instead. I don’t know what I did wrong that made the floors not fit to the trim. The instructions mentioned it but I wasn’t sure how to deal with it. I’m sure it was my mistake.
The steps
The mother board for the steps was thinner on one side. I didn’t realize that until after gluing them together. If I had noticed, I could have flipped every other step so not so obvious.
I painted them gray and then added stones (blobs and lines) with a darker color.
Colors
Jackie’s was obviously pink with a white trim. But the trim had an antique look. I used my lightest pink and light ivory. I didn’t get the same antique look which I suspect is the layers of paint used versus type (brand). I am still considering using a wax to add antiquing. Or less paint (or no) could be added to the edges. Those laser edges are hard to cover especially at this scale and with the details that are in the railings. Too much paint will change how they look.
Balcony
This is probably the hardest part. For one I made the mistake of adding the floor before I was supposed to according to the instructions. Secondly I cut my railings a bit short.
Turret
It is very clever and not hard to assemble. Only thing might be noticed is I didn’t sand it smooth enough at the joint. The window hole was inset so just painted dark grey. The quions covered the small gap between the trim and the inset.
Quions
The tricky part of the quions (little squares) is at the balcony. They are in strips so far easier to deal with than individually. Again I added the balcony floor too soon. This meant I had to work around it. Probably not as tricky without the railings in place. The balcony with railings don’t get glued on until the next to last step.
Roof
I didn’t have any issues. I only mention it because Debbie gives plenty of shingles to use. I have not painted it yet. Still unsure what color I want.
Trim
The lacey, curved trim for the roof just makes this house so delightful. I did follow instructions to paint against wax paper and then move before dry. I did not use Deft since I don’t have any. I was extra careful handling as getting it wet with paint made it more flimsy. However once I had a layer of paint, it wasn’t as flimsy but still being careful. Not using the sealer, I’m sure allowed more of the brown color from the laser bleed through but I’m actually okay with that.
Inside
Currently I have only added painted trim and nothing more. I have vision of a princess bed and maybe a living room. I am thinking I may look for a kit to bash or glam. It won’t take much to fill since it is not very deep.
Happy miniaturing!
Preble
If you enjoy my website, please consider making a small donation via PayPal.me/minismallpackages. Thank you!

Love your house. I need to build mine as well and i guess for once i will follow the directions.