The create team was asked to turn a plastic house into something nicer. Plastic is not our normal material for a house. I was initially resistant until I found an idea I could get behind.
I searched my boards and found a Gingerbread idea. Then I searched more to find the right style of piping decorating. I settled on using a bottle of white 3d paint I could use for the piping.
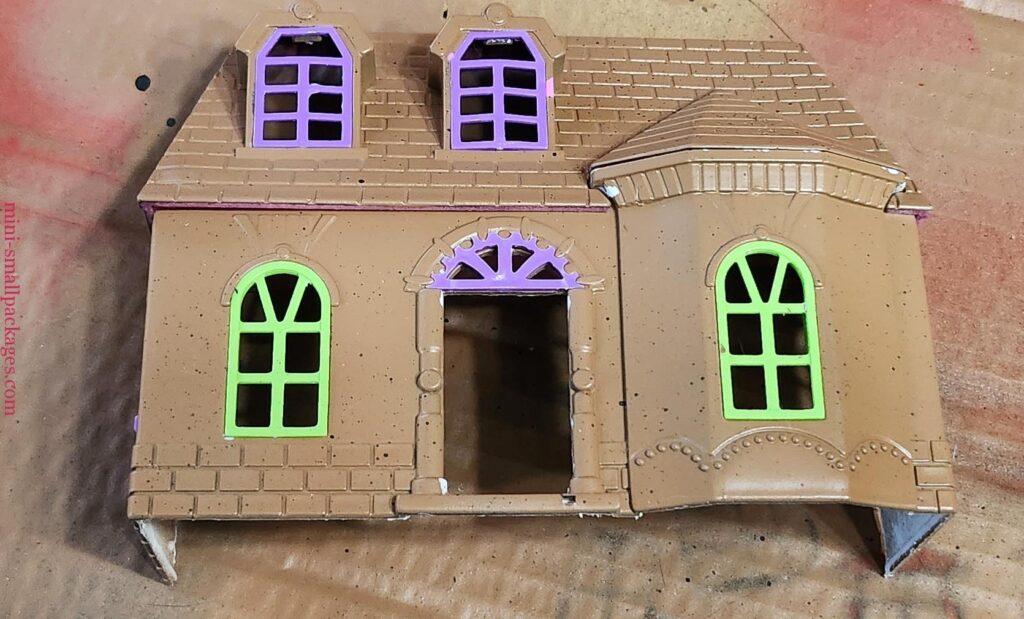
I went to my local hobby store and found brown spray paint. My husband was with me and tried to convince me to pick a different darker color but I stuck to what I liked of the choices. It wasn’t exactly what I wanted but I felt this one was better suited.
I waited for a day when it wasn’t too humid (as that is a factor for spray painting in my area). I removed the windows thinking they needed to be white not brown. I was wrong and later had to clean them and spray them brown. I also was not sure about the furniture yet.
Prep
I do recommend before spraying to do any cutting or sanding. I used a Dremel Stylo+ to remove spots from the injection molding and to remove the floor. I used a cut off wheel and a round ball diamond bit to do this.
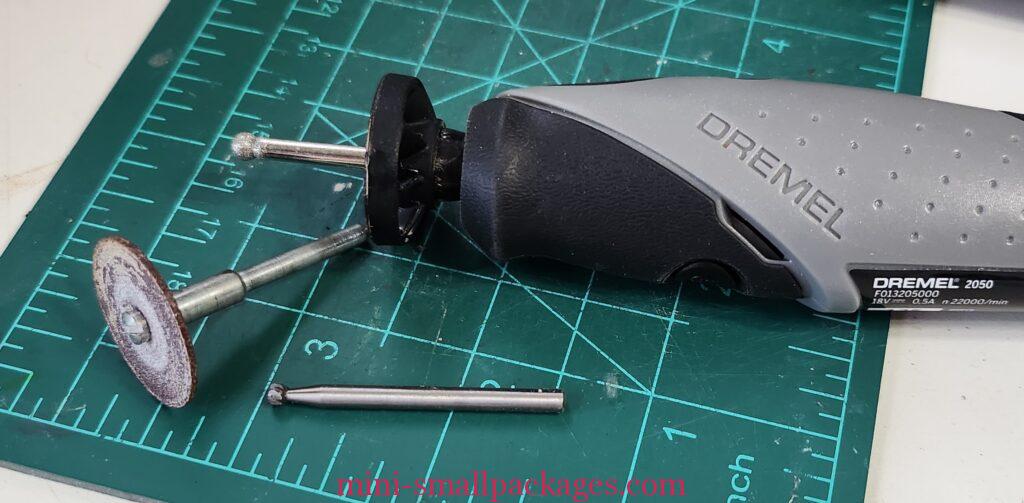
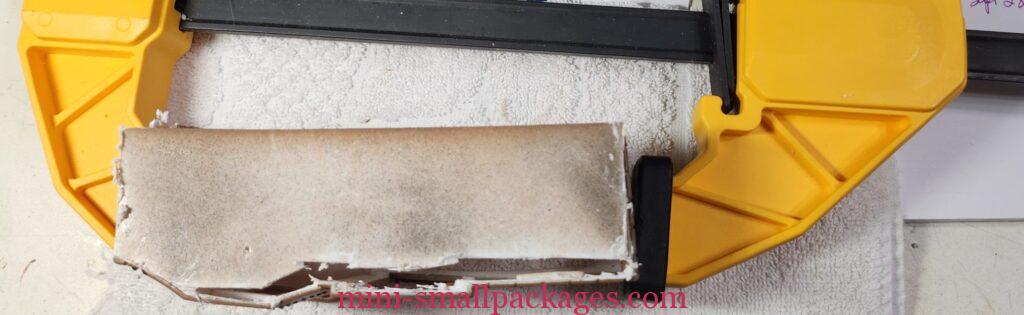
To hold the house better, I used a clamp at my husband’s suggestion. I agree with him it made it easier to hold.
It looks really rough, but once the floor was removed it was easy enough to sand away any spots I didn’t want. The dremel makes quick work of this but a craft knife could be used.
If will be wallpapering the interior (even if not planning to), take out the windows and draw a pattern of the windows, especially the dormers. I gave up trying to trim to fit the dormers because I didn’t do this. If you don’t end up putting wallpaper in, then you’ve only wasted a few minutes to draw that pattern.
For my house, I took it apart and took it outside to spray. Some people say to wash them and/or lightly sand. I only sanded the roof over the bay window. But that was because it was imprinted there. In my piping decoration that would not have showed.
If the house will be different colors inside and out, then mask off the inside and later the outside before spraying each color. Use caution about applying the tape on spray paint as it can pull the paint away.
Mistakes
- Overspray – I sprayed too much in one spot and the paint bubbled up. With all my piping decoration it isn’t noticeable. If you make this mistake, you can peel it back and re-spray.
- Removed the windows – for a gingerbread house I didn’t need to do this. I used the piping to make them white instead.
- Tried painting with acrylic. Honestly, if I were to do another and the windows, door or interior was going to be a different color – I would buy spray paint for each color. It is way faster. It will take some time to mask off if say painting the interior different, but not as long as trying to use brush on acrylic.
- I tried to line up my roof scallops to the size of the imprinted design. No one knows that those lines were there after I finished. If I was using a different size tip for the 3D paint I could have gone smaller, but I stuck with the tip that comes on the bottle vs trying to add tape to make it smaller.
Piping Designs
After deciding I wanted to make this into a gingerbread house, I searched for images of piping designs.
I used Scribbles 3D paint to do all the piping. I have experience with cake decorating and have used this product for snow before. However if this was my first time, I highly recommend the following:
- Print out or draw some designs on paper
- Cover those practice designs with clear plastic or wax paper and PRACTICE.
- Use a pin – a dressmaker’s pin or other tool – to draw/drag extra designs from the fresh piping.
- Keep the pin tool clean by wiping each time. Build up can do random things.
- Let dry between sections.
- Don’t try to do everything in same section at the same time. Add an element and move on to another area.
- Add dots, hearts, vines or whatever as extra later.
- Uneven lines? Go over them again. This look is fairly forgiving.
- Make a mistake – try to wipe it away quickly. Probably no one will notice anyway. Or add more designs.
Fan Design
To do the fan design on the roof, start with several scallops. Then use the pin mentioned above to drag lines from the scallop upward. I found I could do about 5-10 scallops at once and then do the dragging. Dry times vary so pay attention to how fast the 3D paint is drying. This will determine how many scallops to do at a time. The paint starts to set up but not be fully dry in under five minutes. Again this may vary. Go over the scallop again after dragging as it may have been thinned out too much.
In this photo can see the difference between using just the bottle tip for the dragging, first one on the left, versus using a pin – others. It is a personal preference on which to do.

S designs
These may take more practice. Draw an S and practice that first. Then add to the S with extra at the ends like a big dot or flares along the sides. Flourishes usually are longer. Start with one and then add to it.
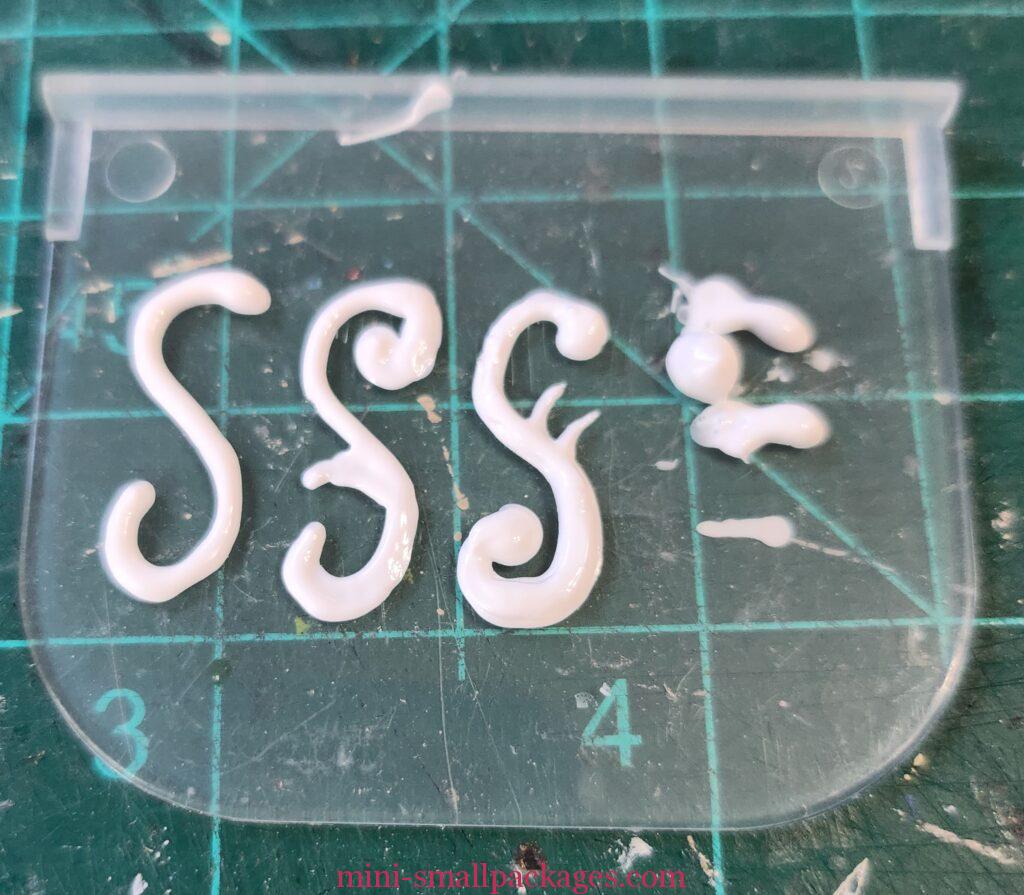
These examples show 1. Simple S. 2. S with extra in the middle using the bottle tip. 3. Using a pin and adding more over the initial S. To blend, I used the pin to combine. 4. Mistake due to my bottle being extremely low on product. But it can happen at any time.
When adding the dot at the end, it may come to a point. This can be blended back down with the pin.
Always make sure product is flowing. Then when it runs out, just be prepared it may pbst out. Do what you can to cover these with the pin pulling paint over it. Or if that doesn’t work, try wiping away while it is still wet. It may leave a white stain, but that could be touched up with the brown paint (acrylic with brush) later.
Exterior
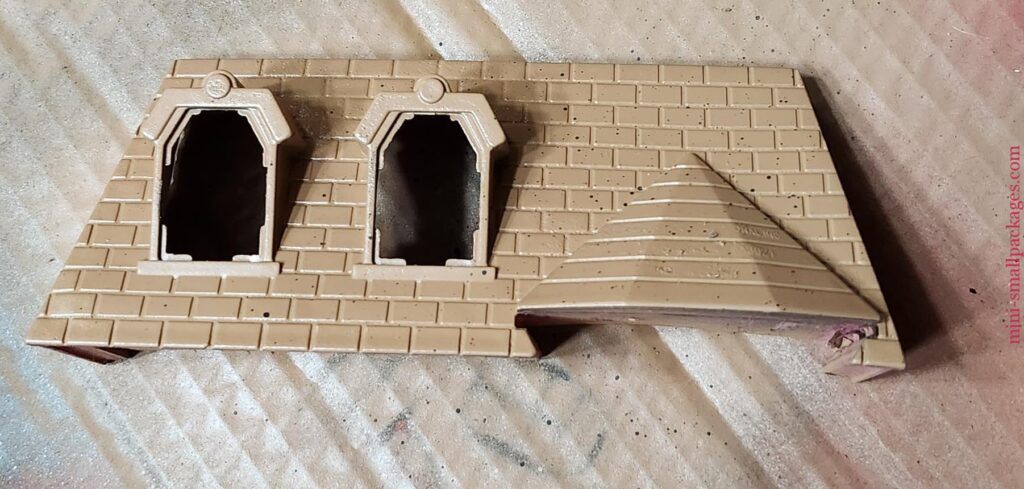
I spray painted the exterior with Krylon Decor Selects in Satin Brown Boots. I tried to add an element of spices using some black spray paint. I sprayed the black about 2 feet away so that only the mist was falling on it.
After I figured out I would be better off to spray paint the windows, I sprayed all over a second time. This is after trying to paint them white with acrylic and then washing that off. I put them back into the house and do another spray. This means I had 2 complete coats on all of the house and 2 extra in areas around the windows.
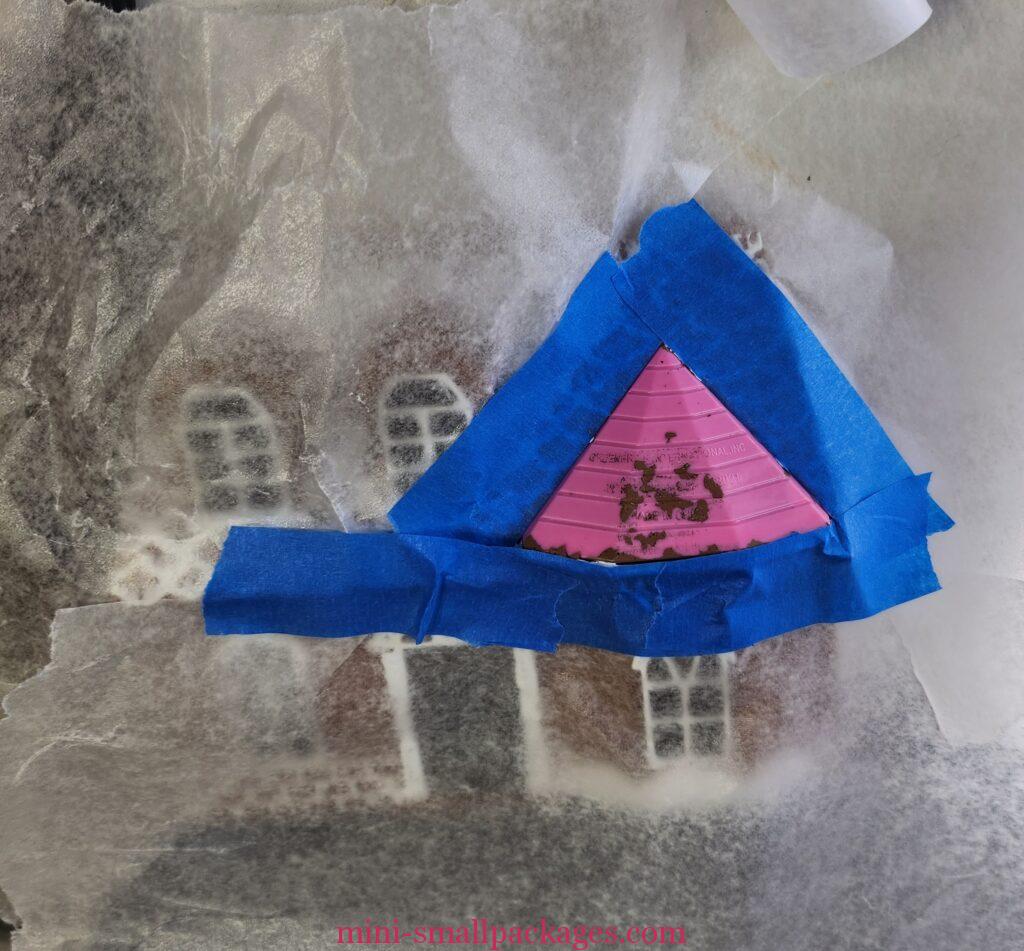
After putting the two parts of the house back together I noticed some spots that needed to be touched up. In trying to get everything painted, I sprayed too much in one spot. When it dried it was an interesting mess. I’m showing it because later you will see it isn’t noticeable at all because of the piping decoration. But also because I thought it might be an effect some people would want to use for the other themes – like old haunted houses. This would look cool accented with dry brushing.

After adding some of the piping scallops to the roof, I decided I didn’t like what I did on the gable roof. I carefully removed all the paint from this section which did include cutting along the edge using my craft knife so it didn’t rip away the design on the other part of the roof. Once removed, the areas to not be painted were covered with wax paper and I used the paper tape to mask it. A quick spray and once dry I was ready to apply the scallops again.
As I started adding the piping, I followed the design of the house and windows. Below one can see that I am starting to add more design. I used a pencil to sketch. It was very easy to erase. I think this was due to the Satin finish of the spray paint. Test before proceeding.
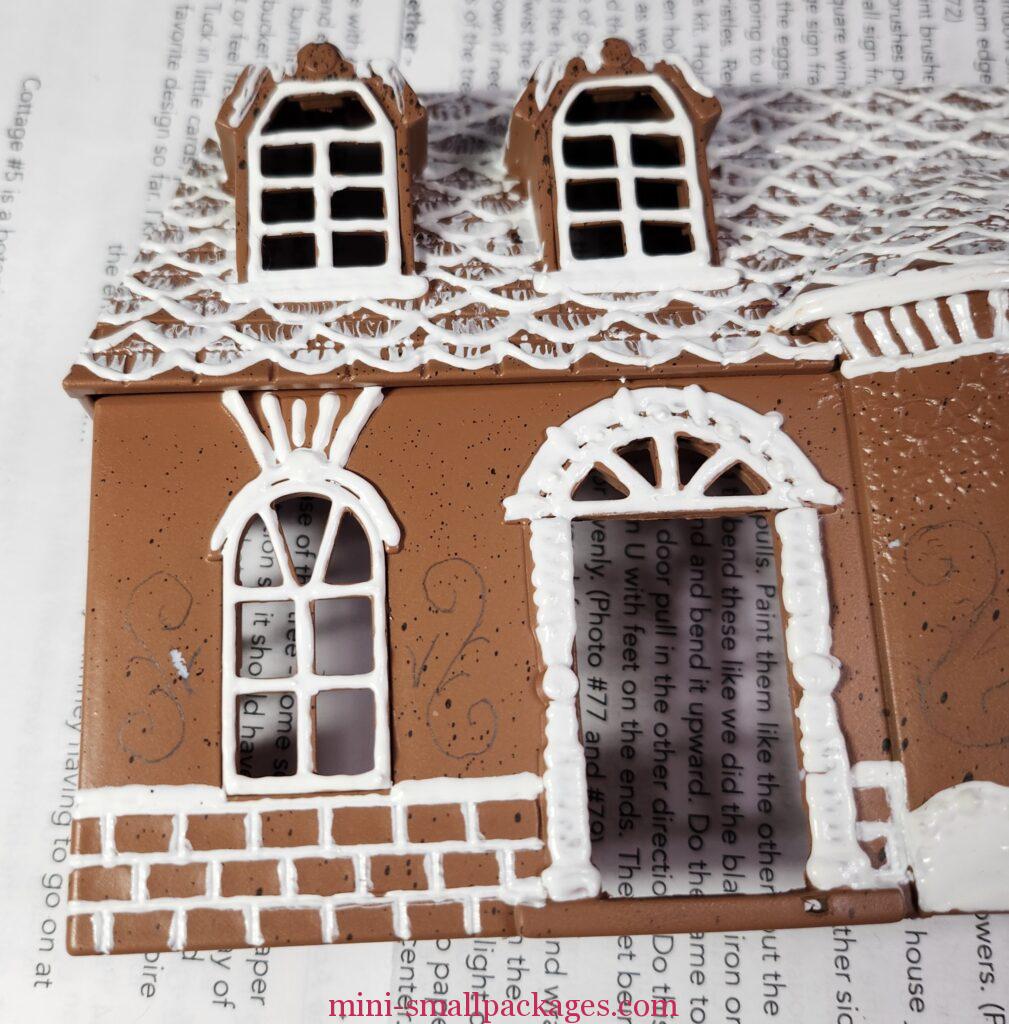
To get my final designs, I kept referring back to my original examples of piping. I added whatever looked good in various spots. This included accenting the designs already on the house.
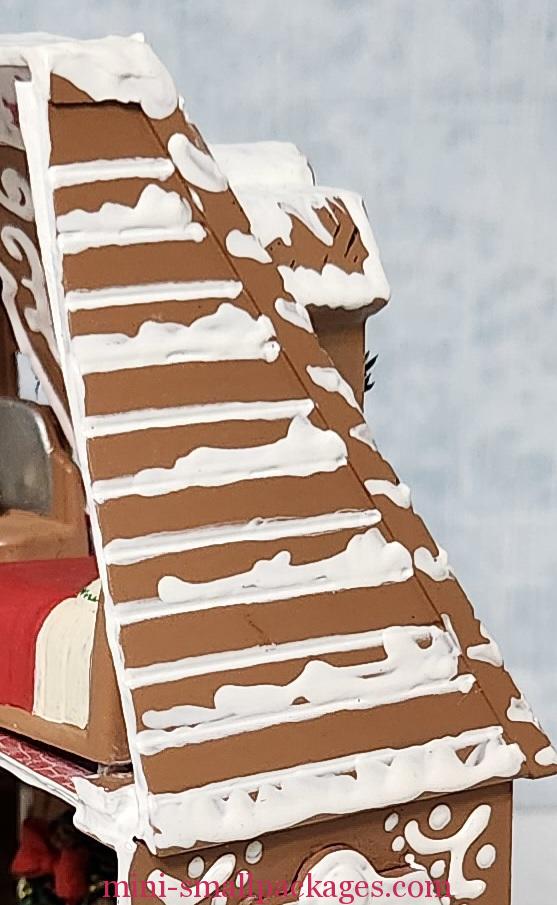
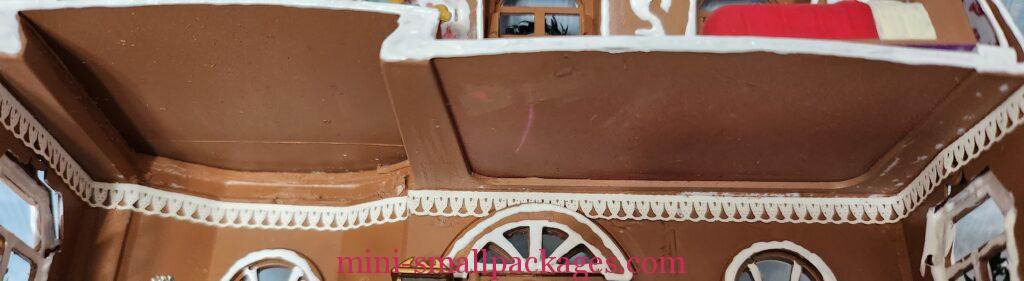
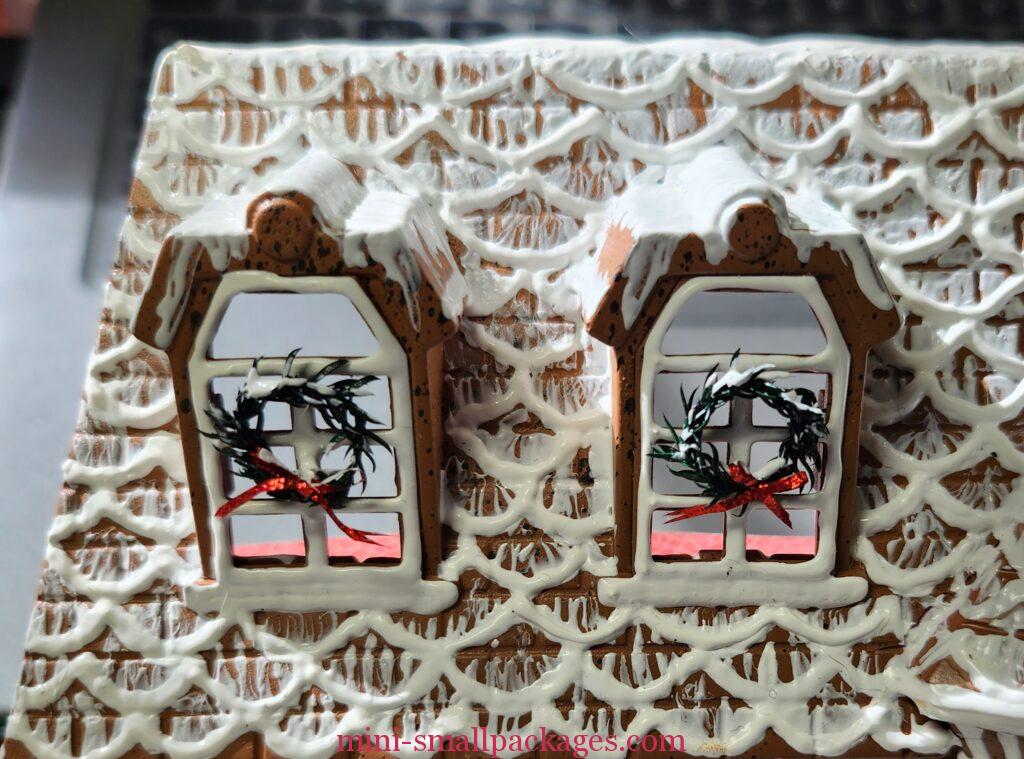
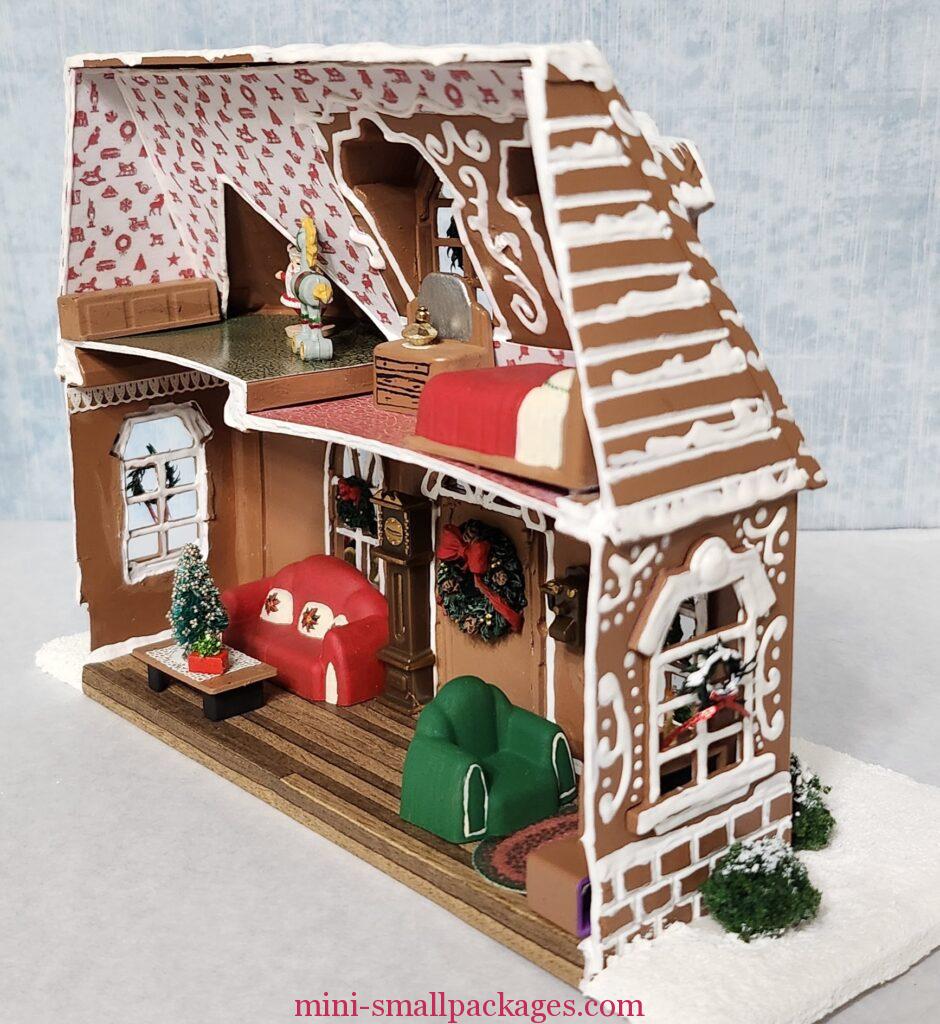
The top of the roof I add a full layer of 3D paint. The sides, I followed the lines but allowed some drip/overhang/build up of melting snow. The same for the dormer roofs.
Interior
When I started working on this, I didn’t know if I would do anything on the inside.
I removed the floor because I decided it was warped. I figured I could replace it if I decided to do the inside, which I did. I added a matt board floor to a foam core base. The new floor didn’t fit great and really didn’t totally solve the warp issue with the sides, but it works. I could have easily just glued to the foam core. To help the house sit – I did carve a slot for the house to sit into.
Sometimes I start doing something and realize I am getting ahead of myself. Case in point being the snow added to the base before the floor was in place.
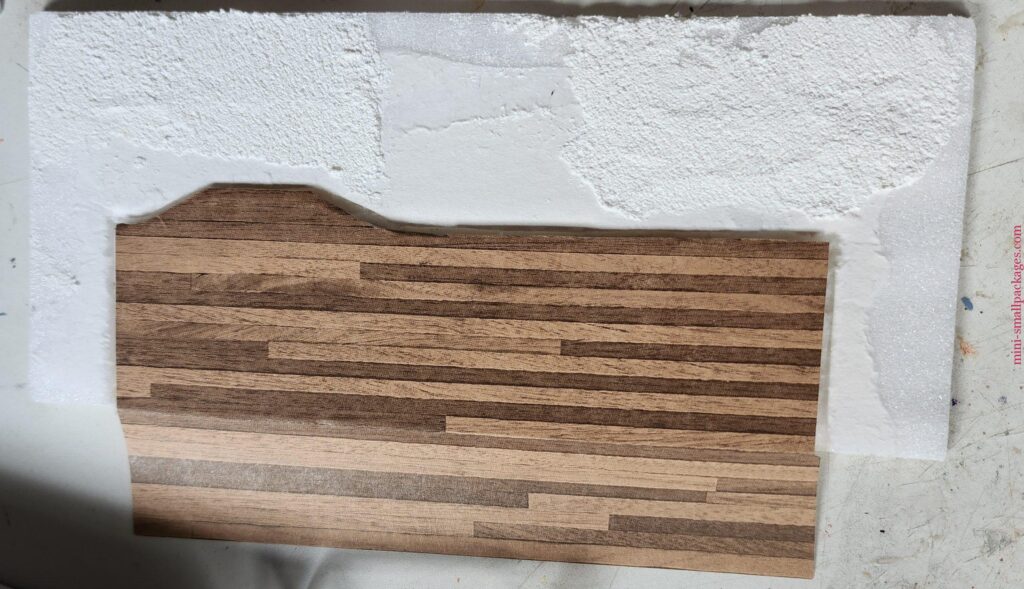
I installed print flooring before gluing the house in place. The flap of this flooring wraps to the bottom. The result looks like the flooring is two boards, but it is just paper.

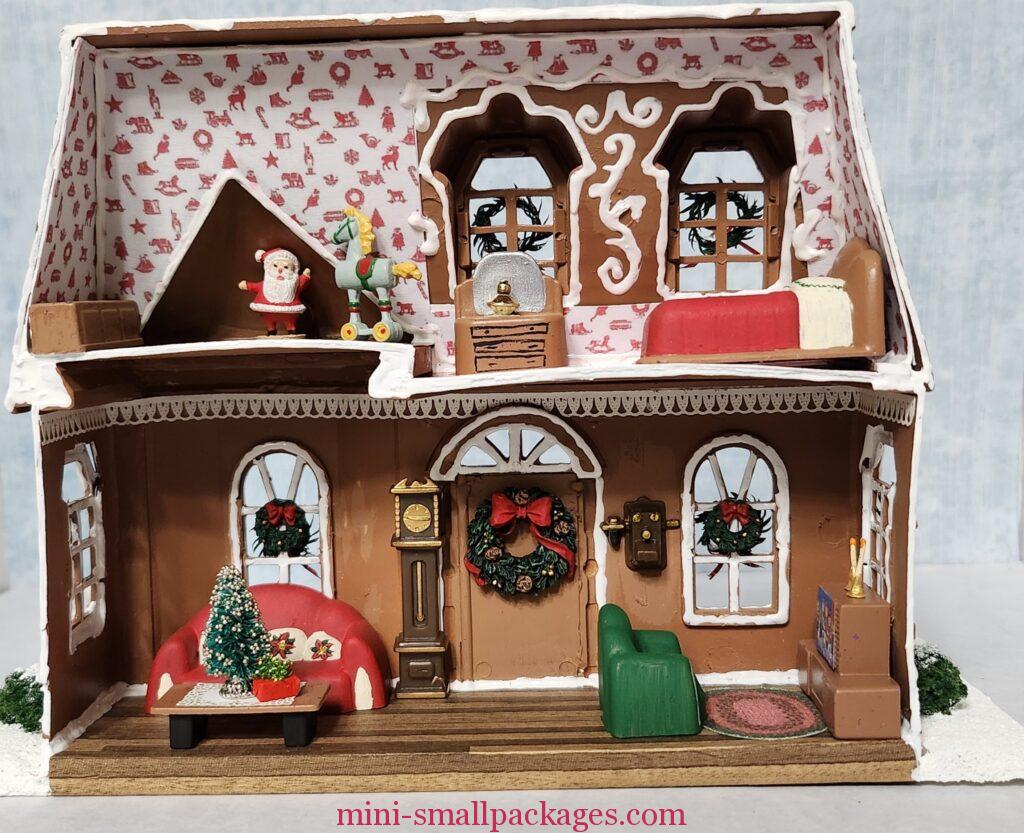
When I decided to do an interior – honestly inspired by Janet Smith’s wonderful under the sea theme – I painted the plastic furniture and the interior. I don’t have many colors of spray paint so sticking with the brown for the gingerbread was fine with me.
I was searching my stash for things to use and found this laser cut lace. I choose to add it near the top of the walls.
The door and window I outlined with the piping. But not as much as outside.
Upper Floor
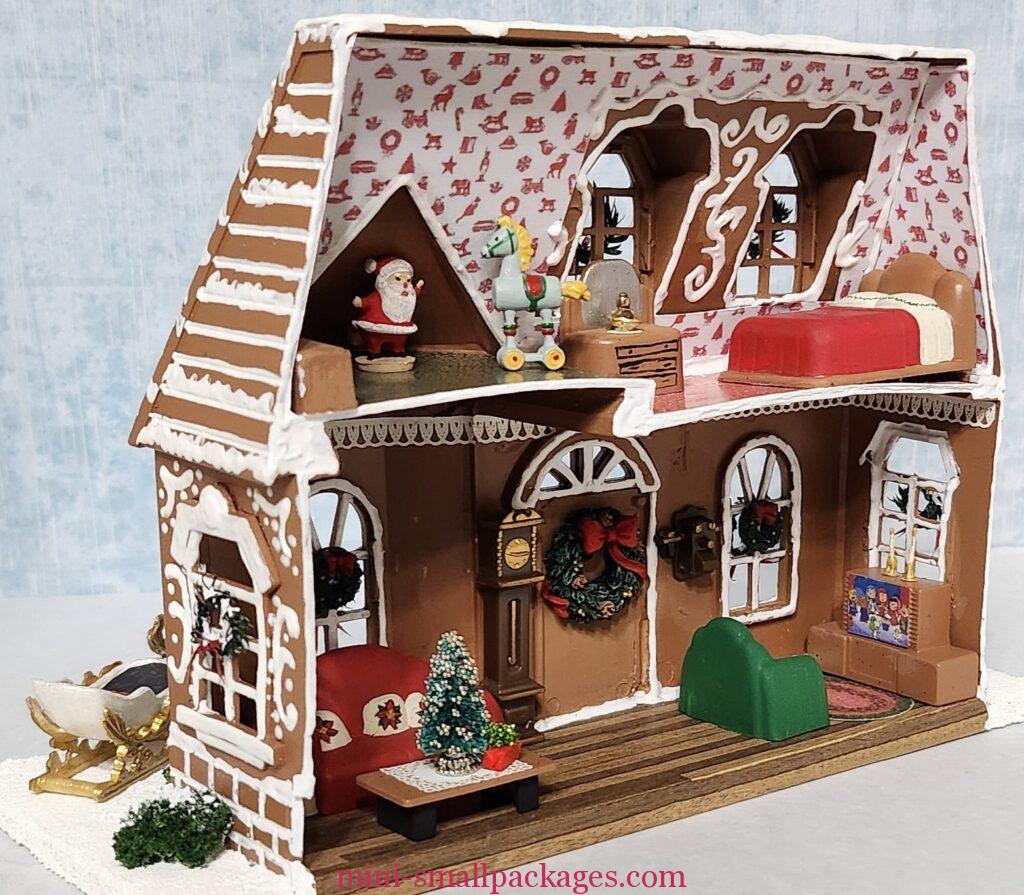
I decided to wallpaper the upper floor. I found a perfect design in my stash, but it was too small. I scanned this and made a larger piece. It isn’t equivalent in quality, but it works.
Cutting out that wallpaper was made harder by two things. The first was I had already done the piping decoration on the outside. Secondly because I hadn’t planned doing wallpaper, I couldn’t get a pattern for the dormer shape. As I mention above it would far easier if I had done so while the windows were out. It wouldn’t necessarily be perfect but much closer than I got when trying with wax paper. The paper kept shifting and it was just too aggravating. Instead I choose to cut that part away and add piping details.
The wallpaper ended up cut in three pieces. I knew that it wasn’t a perfect fit and had decided I could add piping to help cover these errors. I trimmed a couple times after the piping was done. I did this piping on wax paper.
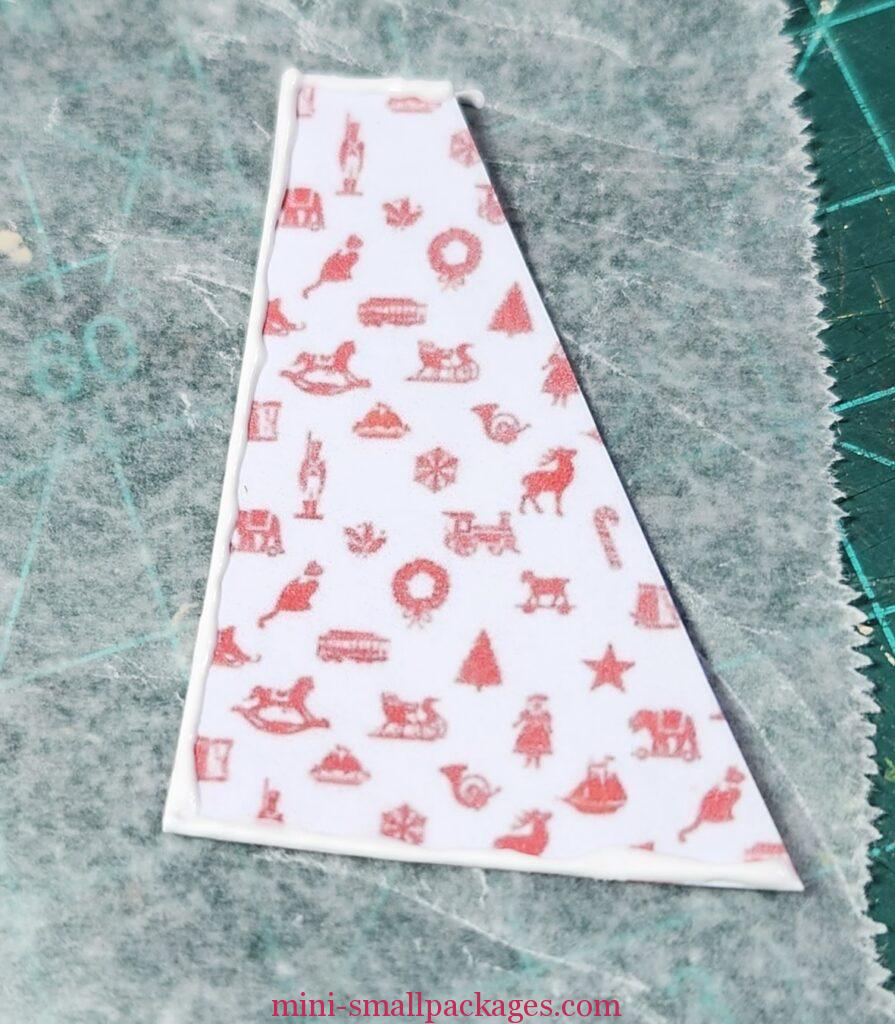
The ink did bleed a bit into the piping but since I had kept the piping thin, this was minimal. This may have been stopped had I coated with a sealer first. But the sealer might have smeared the print. A spray might have worked, but I didn’t try it.
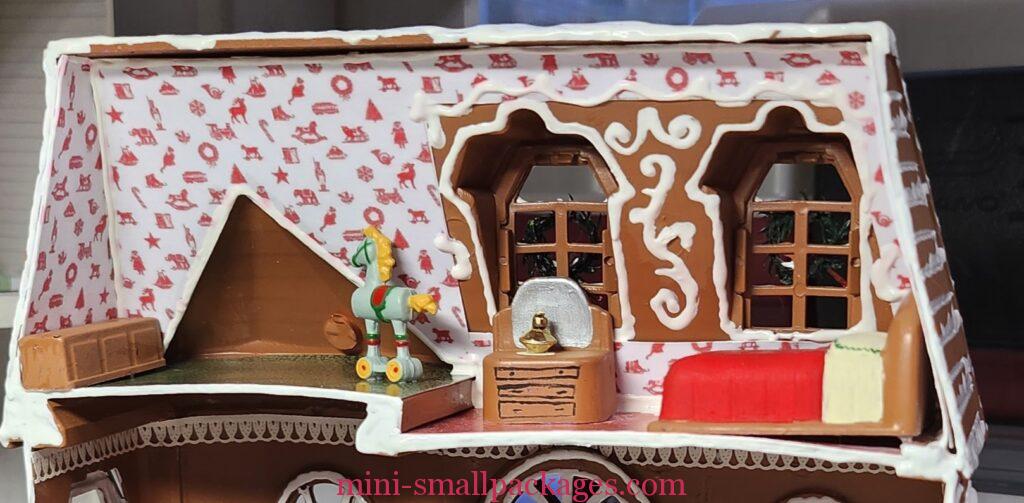
It may be hard to see here but I filled in at the bottom of the paper which sort of looks like baseboard. Later I added the piping to the floor and roof edge.
My floors are from two sample cards picked up at the hardware store long ago.
Furniture
I started with the plastic furniture included with the house. I used all the pieces. I spray painted them by placing on a piece of tape turned sticky side up taped down to my cardboard.
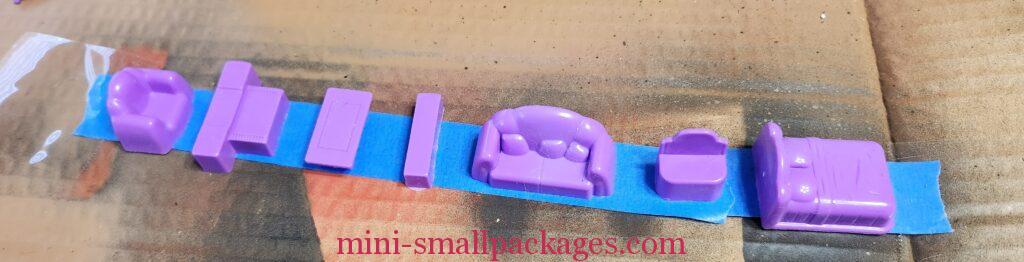
I wasn’t sure when I sprayed them if i would used all. The house is not deep. The bed only fits one way. I did briefly consider making the first floor extend outside the house.
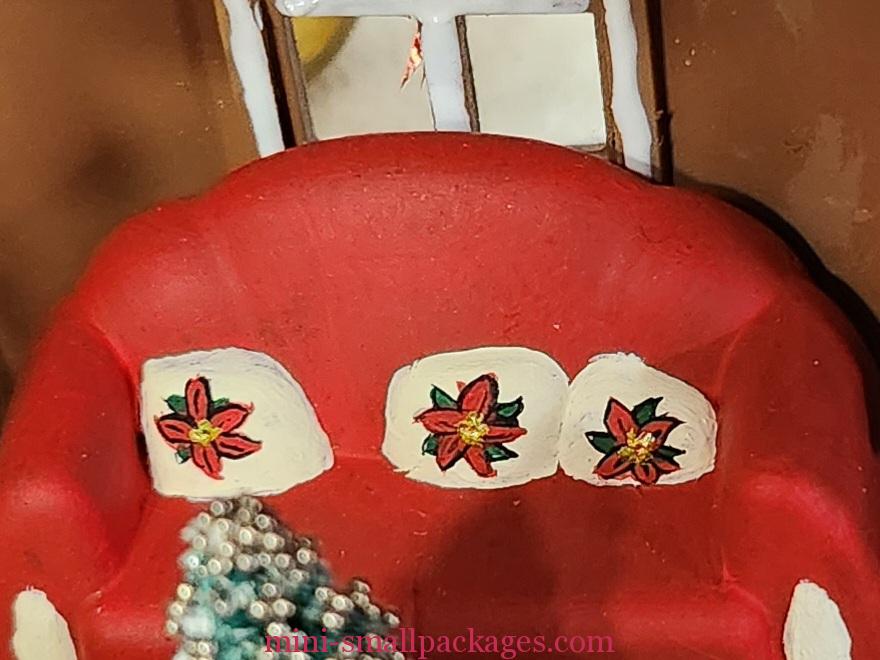
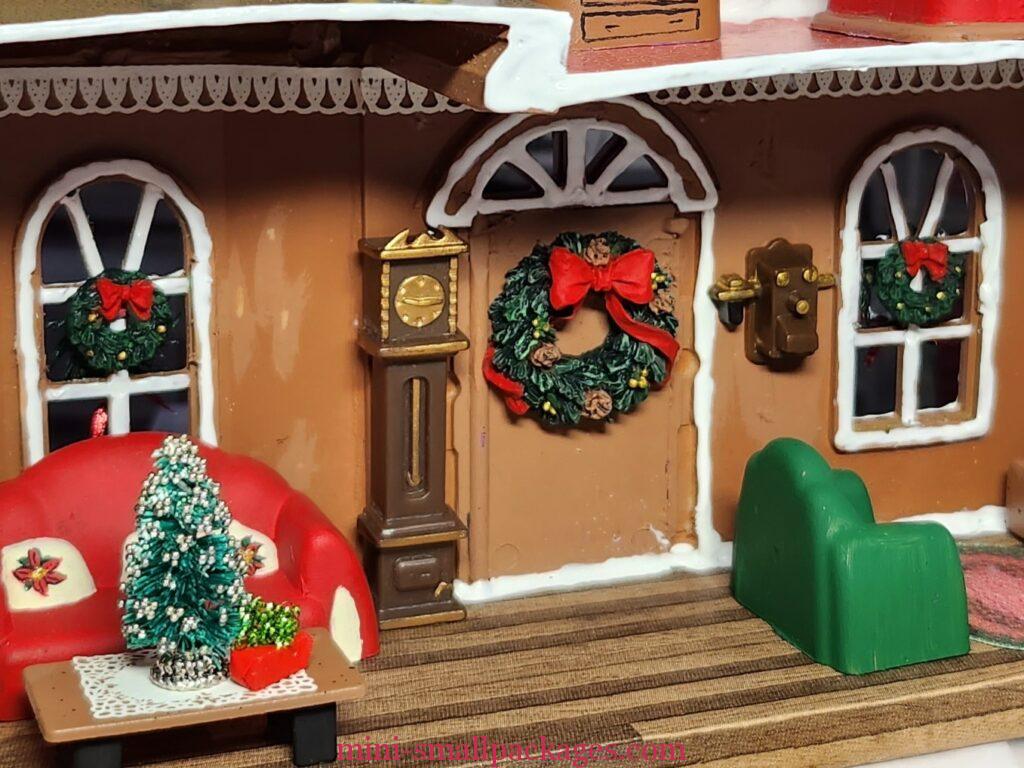
Once the pieces were spray painted I considered other colors. The couch had these neat pillows so I decided to accent those. I painted it red all over then went back over the pillows with ivory. Next I added some simple leaves. Then some simple red petals. I had searched for images of poinsettias and this is the design I went with. Next I outlined the red with black. These lines were a bit thick, but I was able to touch up spots to improve them. Yellow dots were then added. Then gold dots on top of the yellow.

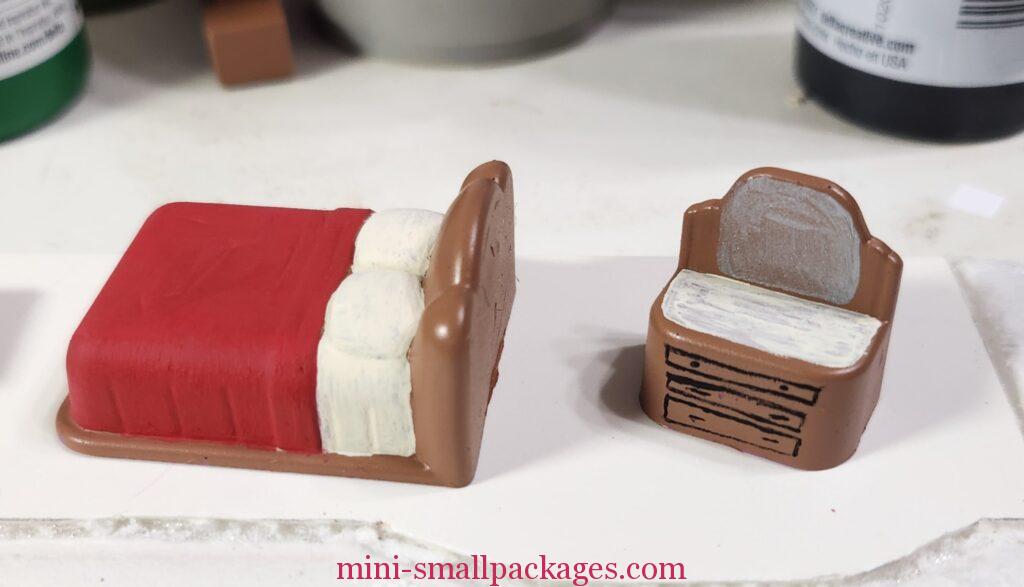
For the bed, I painted the cover and pillows leaving the edge brown. I decided it would go with the headboard to the right so I didn’t worry as much about was now to be the backside of the bed. The dresser, I painted lines for the drawers, silver for a mirror and white top. The silver needed several coats and the top got repainted brown later when I used a doily instead. I also added a green trim of wavy lines to the pillows.
Rest of the plastic furniture from the house set
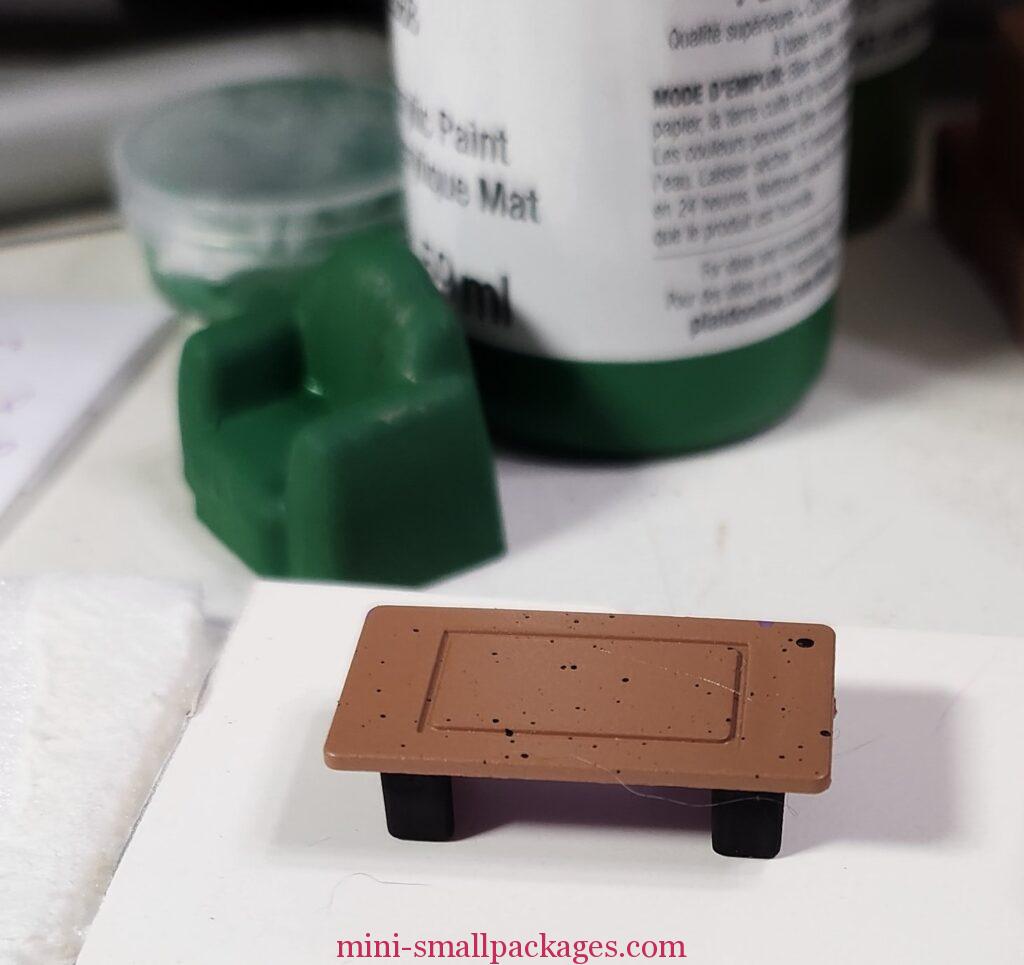
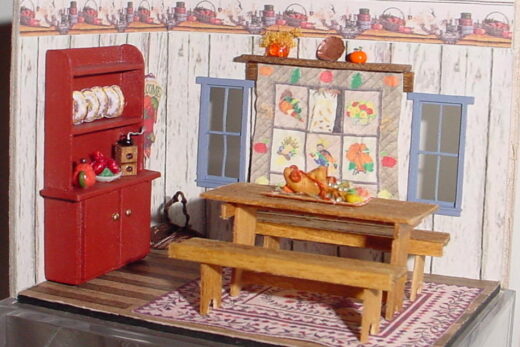
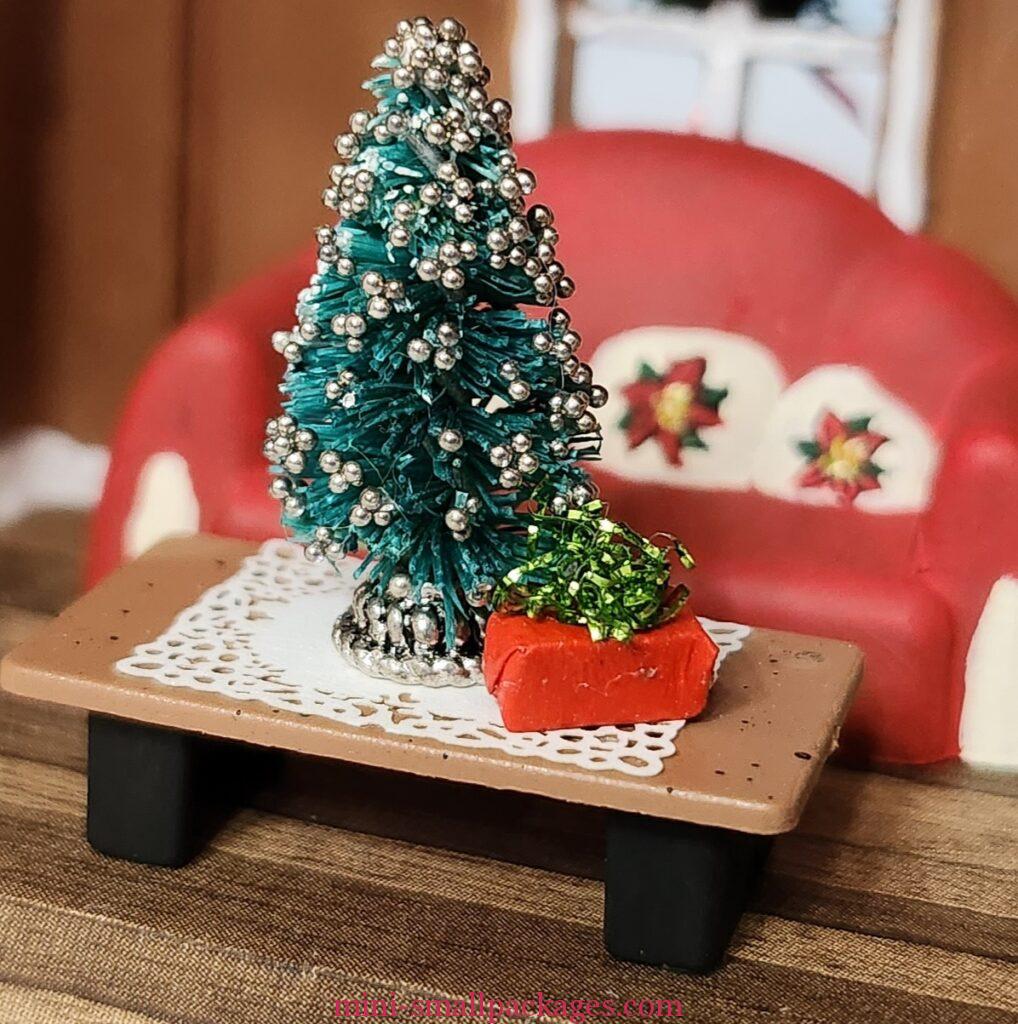
The table legs I painted black. I added a tree and a present for decoration. Both of these from my stash. The tree I added silver beads to decorate it. I was trying to do this faster than I might for other projects and so when the beads clumped because I poured them on, I decided to go with that.

The base is an end cap style bead. On the table is a placemat – laser-cut for 1/2″ scale product by Dale R Kendall. The present was a swap and I am not clear who made it.
For the other side downstairs is the TV area. The chair and TV fit here nicely. For the TV, I searched for an image I liked. I resized it in Word and then printed it to fit. The candles on the TV were made by Judy Doe from a swap. The printed rug was a swap as well.
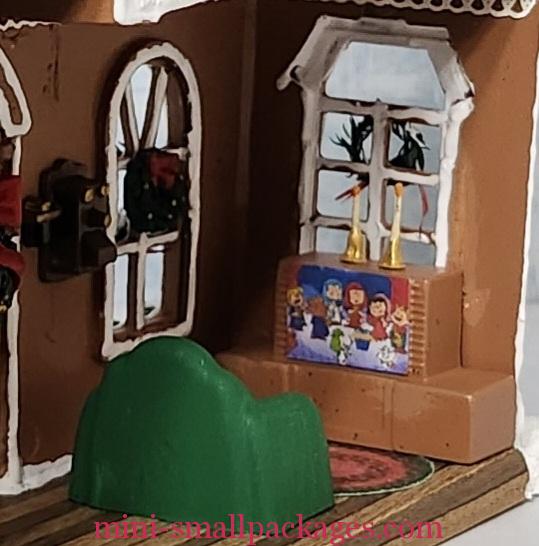
Other additions from my stash are the brown plastic clock and telephone. I did touch up the painting for the telephone. The other was the wreaths which are for the villages sold at Christmas time. All those were repainted some to fix any prior mistakes or add highlights to the elements.
The only thing I didn’t use from the set was the two people.
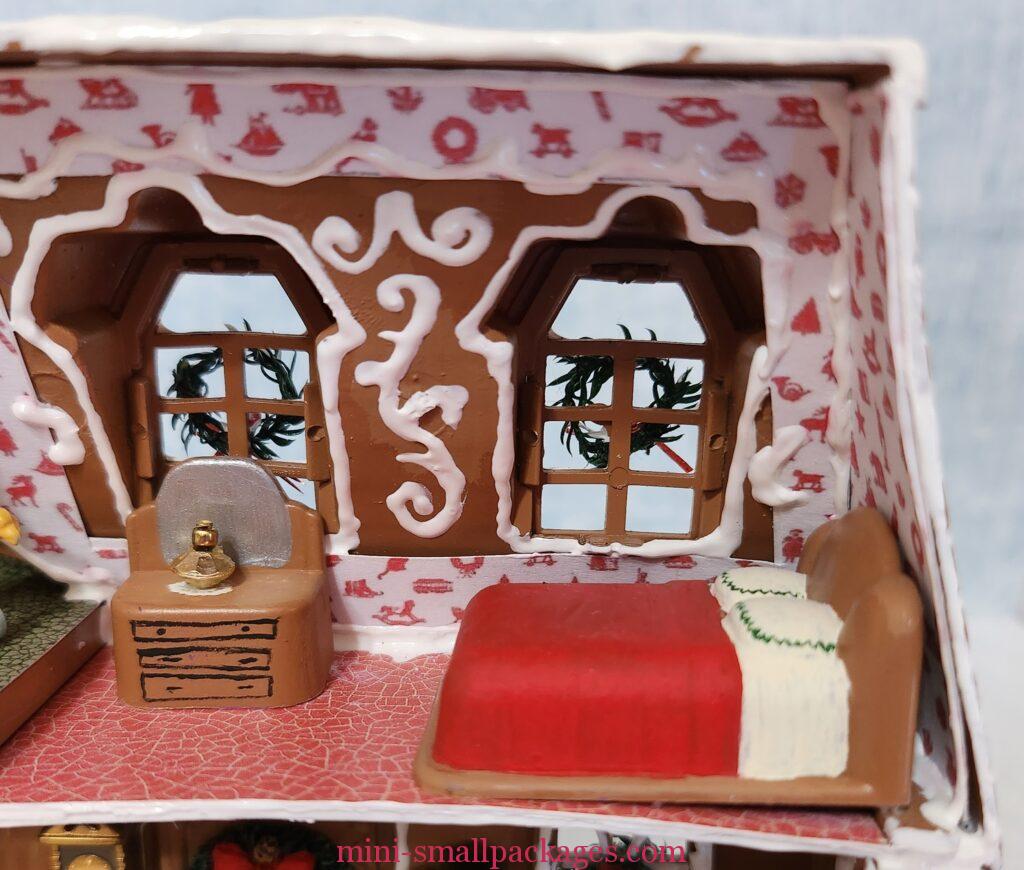
Upper Floor
I used the dresser and the bed. To the dresser I added a doily and a bead lamp. The hobby horse is an ornament. The chest/credenza is part of the house set.
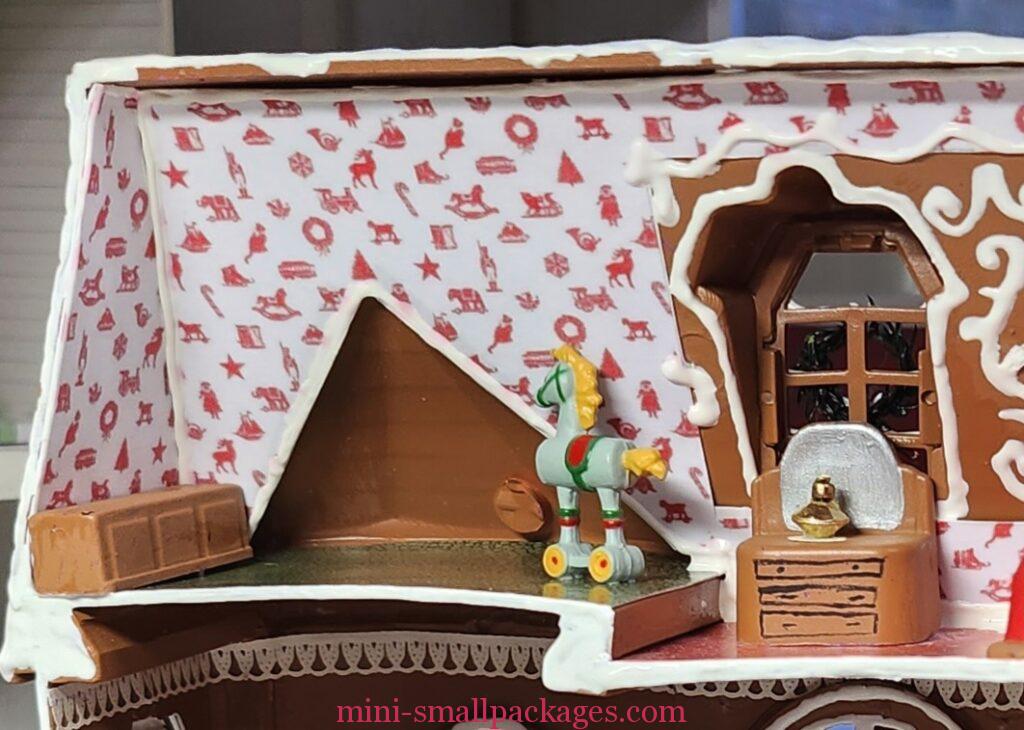
After seeing this picture, I decided I wanted to cover the bump I didn’t remove in the gable. This candidate was elected to be included.

Landscaping
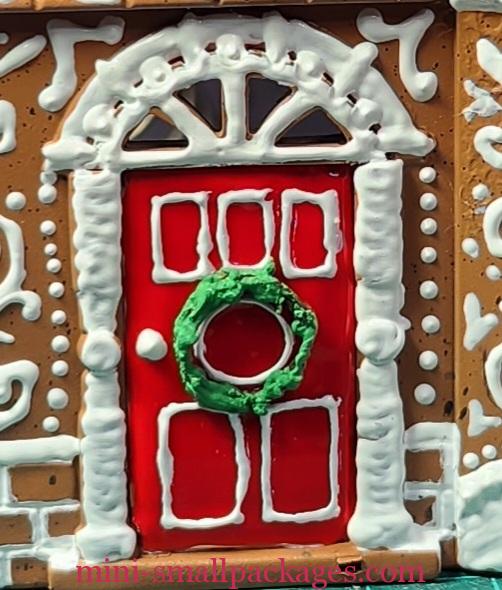
In choosing the piping designs, I knew that I was going to add wreaths to the door and all the windows on the outside. My first attempt was a wire covered with paint that had talc powder in it.
After seeing that wreath for a few days, I decided to try a different material. I pulled this lycopodium from my stash. To make it into a wreath I cut off the longest continuous pieces. Then using needle and thread, I wrapped the thread around (don’t need needle yet). After doing a couple of these I found it best to glue the thread at the ends but leaving a long tail. Make a loop with some overlap and tie the threads together. Use the needle on the long tail to wrap around the overlap. Glue here was good also.

I glued the wreaths in place and then added bows from some shiny ribbon from my stash.
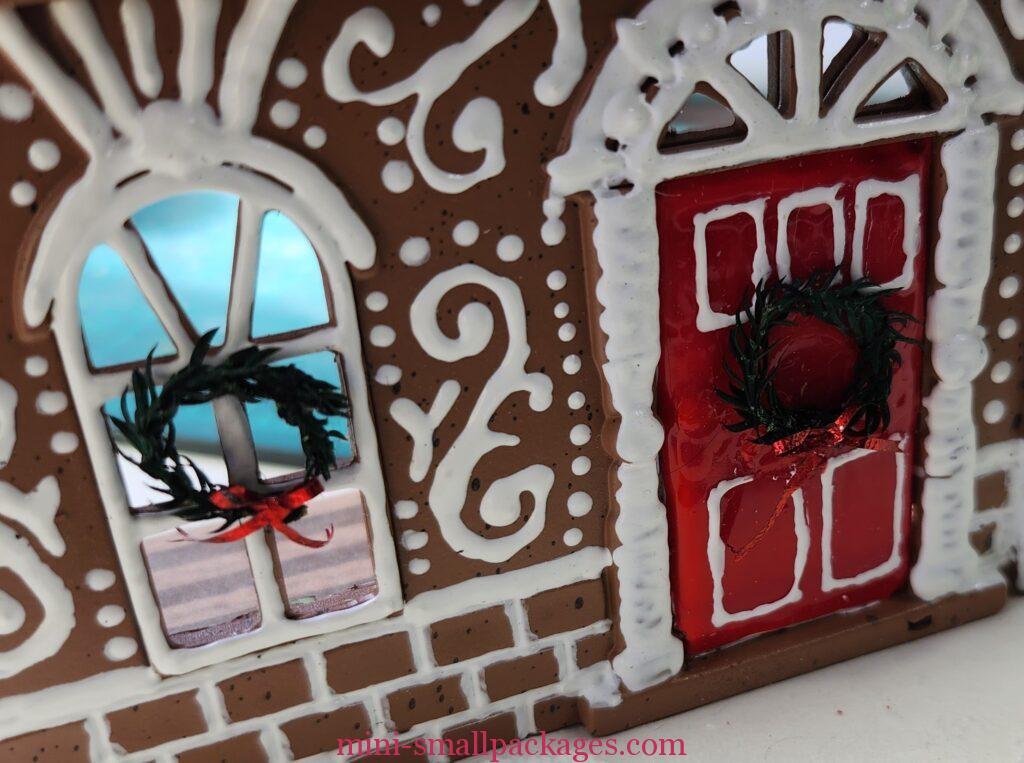
Lastly I added snow to the wreaths using the 3d paint.
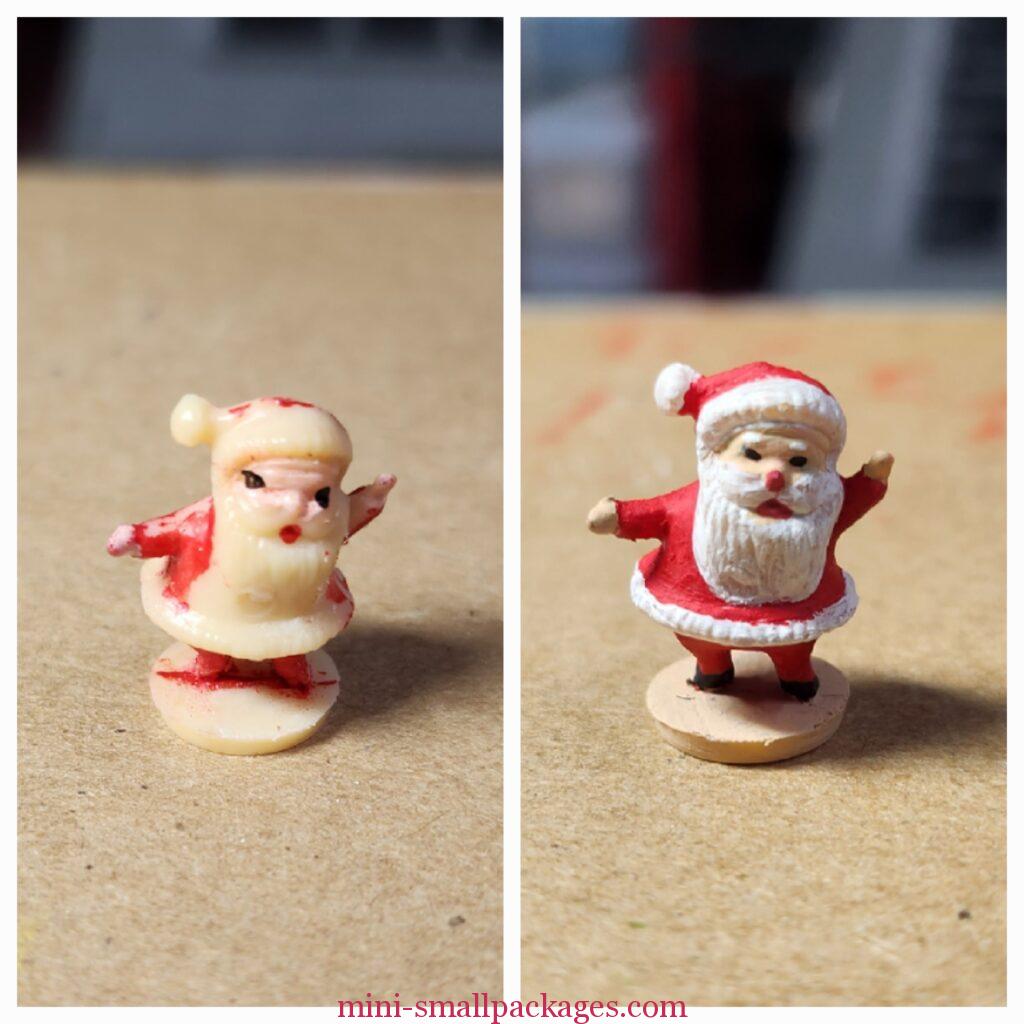
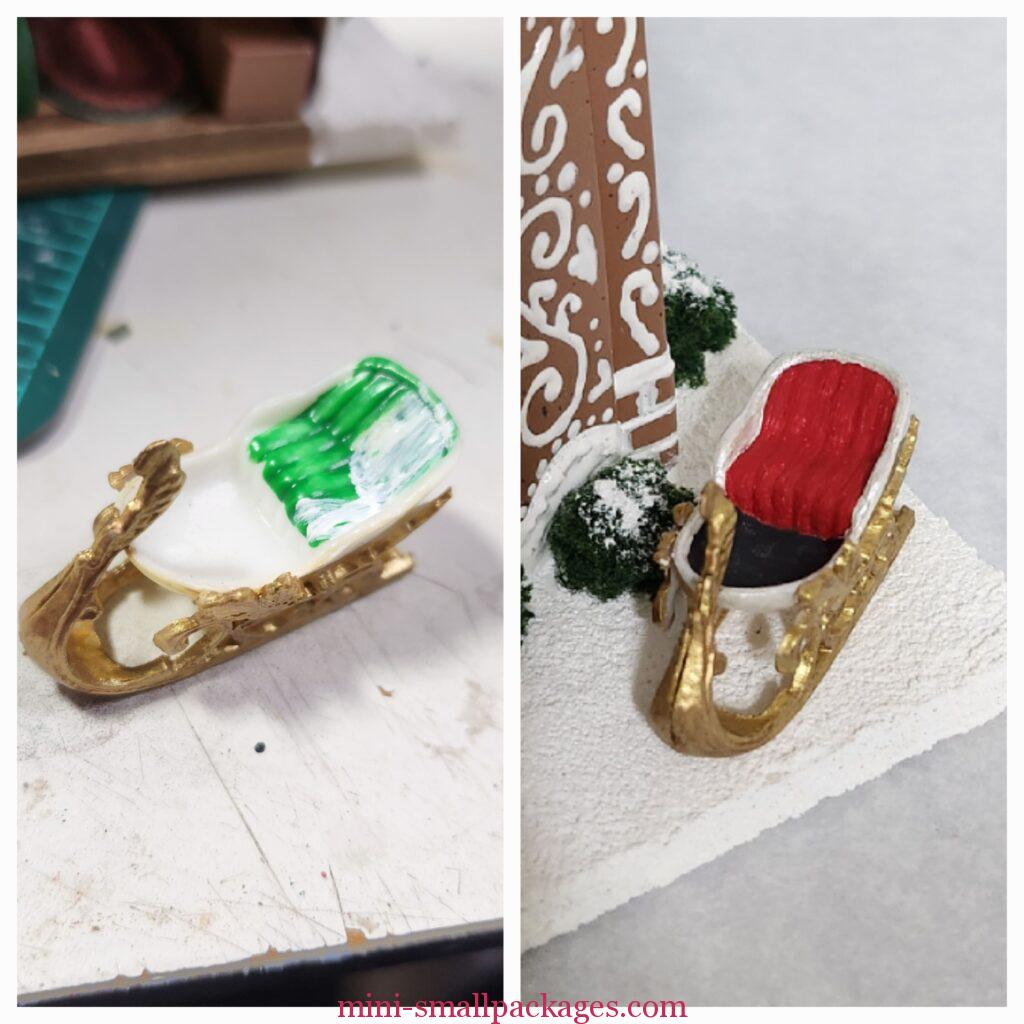
This sleigh was in my stash and I fixed the alignment and then repainted it.
I added a path in front of the door using model railroad ballast. This grey color seemed more natural to me.
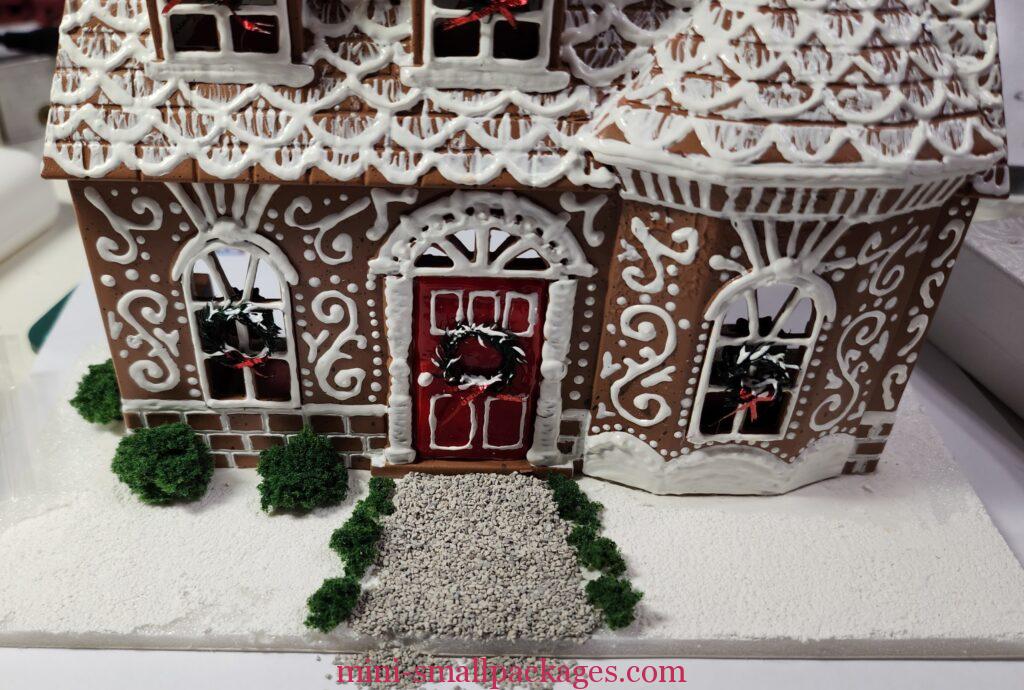
The green shrubs/bushes are made from model railroad landscaping foam. This is easily torn apart to fit the shape or size desired.
I used DecoArt Snow-Tex for the snow on the base. I filled in around the bushes and the house. I should have done that before adding any shrubs.
I dabbed the Snow-Tex on the shrubs, but it didn’t stick. Only the white liquid stayed so just white paint could have been used.
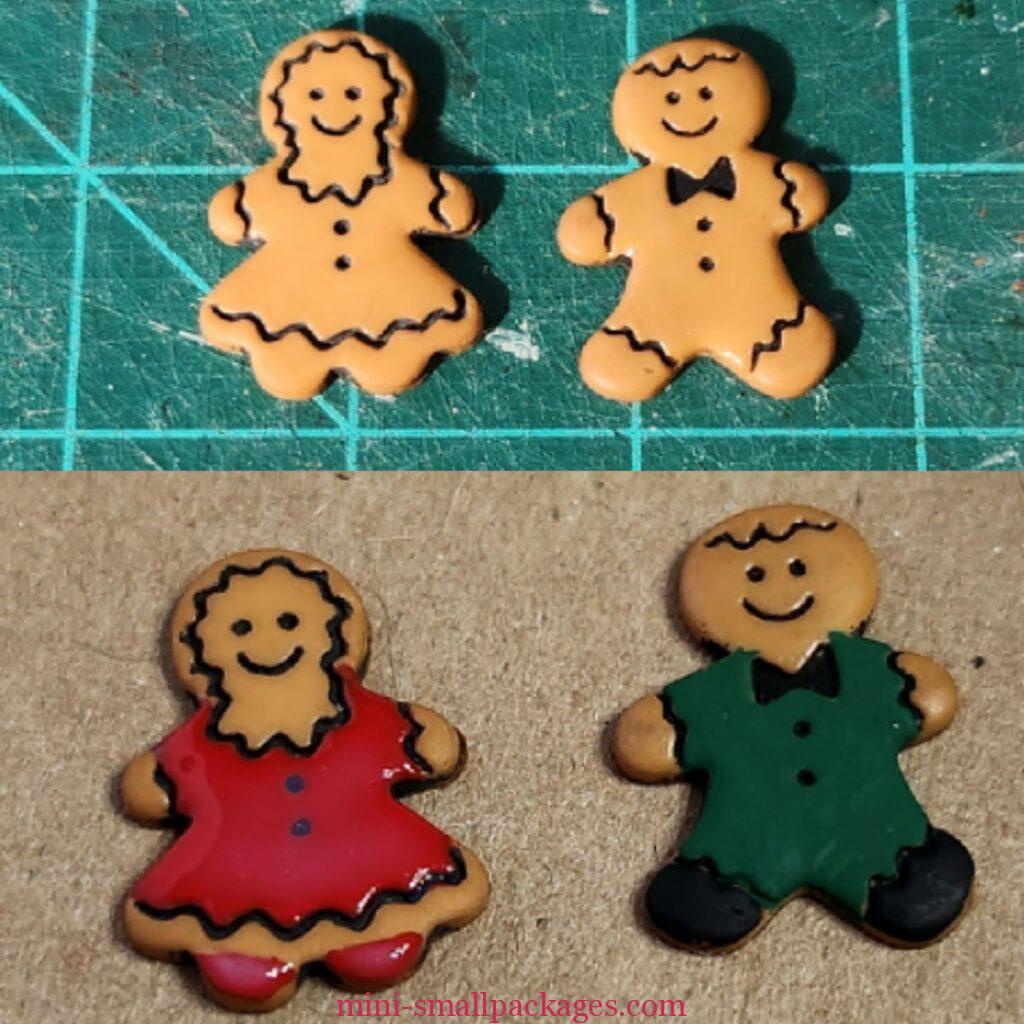
I thought I was done and then remembered these gingerbread buttons. I repainted them and added them to the front yard. They were painted with two coats of acrylic and then 2-3 coats of gloss varnish to give the cookie icing look. Lastly I carefully painted on the white piping/edging.
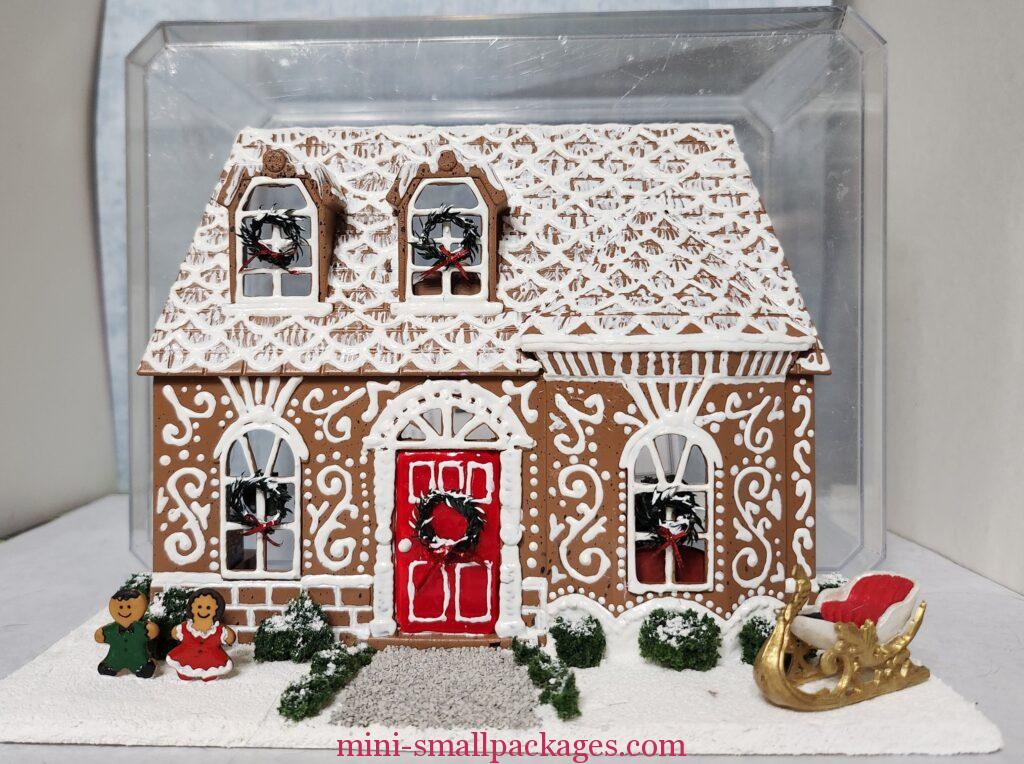
FINISHED
Happy miniaturing!
Preble
If you enjoy my website, please consider making a small donation via PayPal.me/minismallpackages. Thank you!