I was trying to come up with scenes to do in my project that fit certain areas. This particular scene wasn’t pictured in the book but I felt it was a good fit for what I wanted.
The first thing I did is decide that the house was only going to be half an inch depth. (That’s just two foot in real life.)

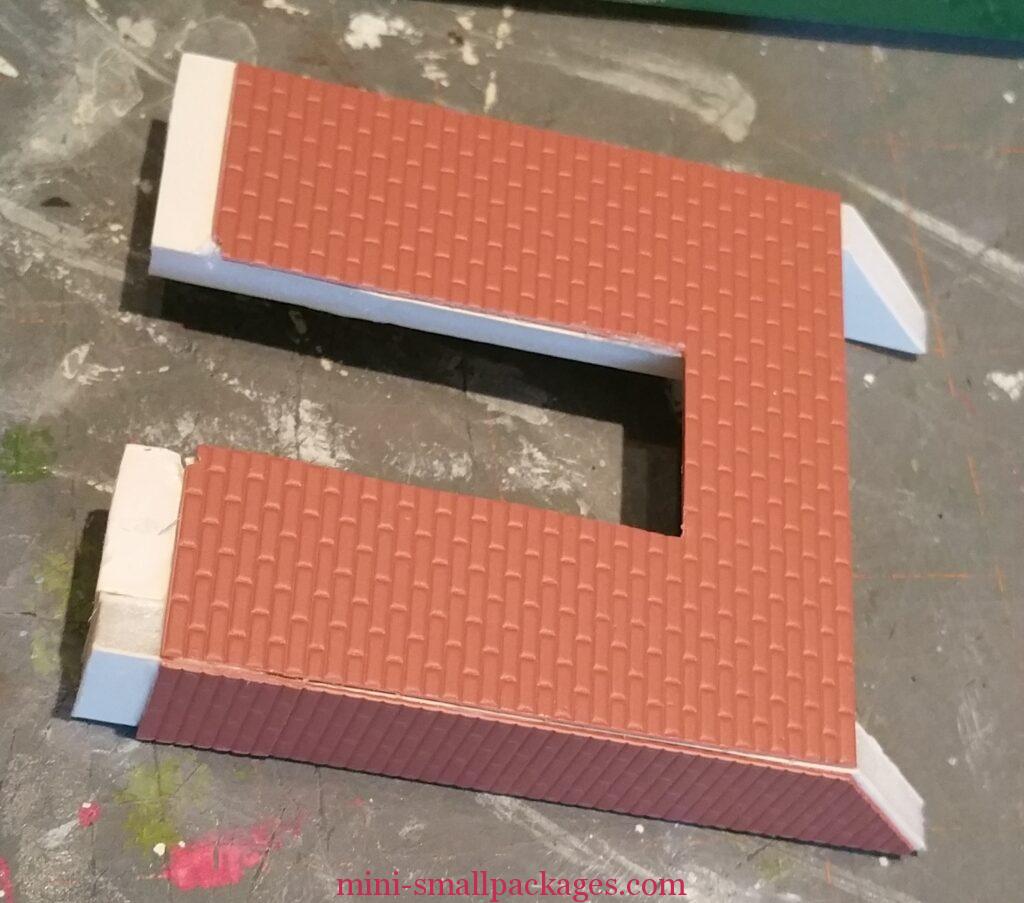
Next I selected some roofing. In my stash was this plastic molded piece and I decided it would fit. Only later did I realize it was too short for my preferences. This is after I painted this piece. More on that later.
I decided to cut a single piece of foam-core to support the wall.
Next was to cut pieces to support the side so I could adhere it to the wall. Then also cut a piece of brick for the side. Believe it or not I pieced the side one. The pieces fit so well together.
Next I painted the brick – well the grooves/grout. This is done by painting the plastic sheet and then wiping away on the face. I found this worked best if I let it dry some. Wiping while still fresh was likely to wipe away too much. Just don’t let the base color dry solid.
I had to repaint some portions of course to get the amount remaining right. This is one of those try it and see how it works. I have done it many times but always a bit of trial and error to it. If it really looks bad can always start over by soaking it. I have done that too.
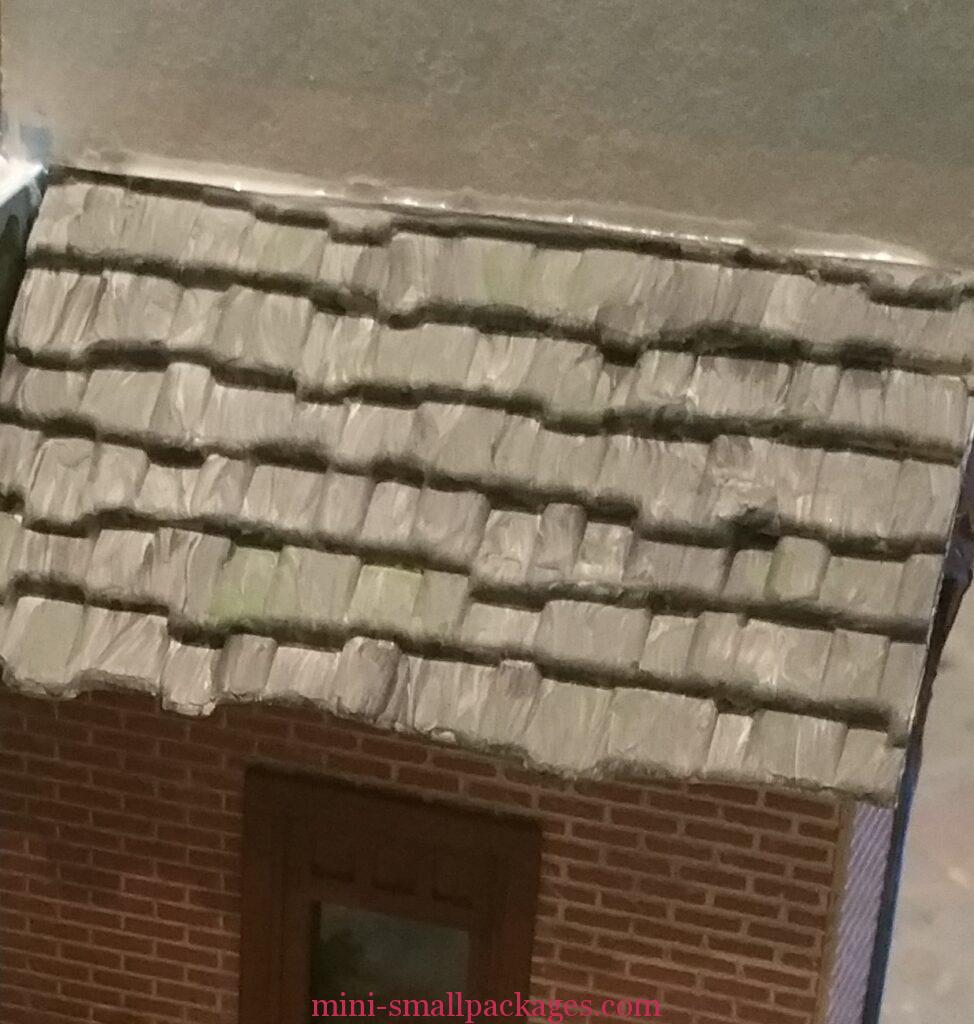
At this point is when I also painted the roof piece I cut first. Only to realize I had to cut another. Then that was still too short and cut a third. I wasn’t allowing enough at the top at first as I wanted it to fit up to the point the next level met the wall. Then not enough overhang in the front the second cutting. Thankfully I had extra in my stash.
To paint the roof what I found worked best was to start with a medium grey all over, then using a dark grey and a lighter plus a medium green to get these on my brush and sort of swipe at it. The idea was that I wanted it to show the grain of wood where it had aged.
When I changed to cut another roof, I also was using a different sheet. I actually liked this style more (although it is very similar).
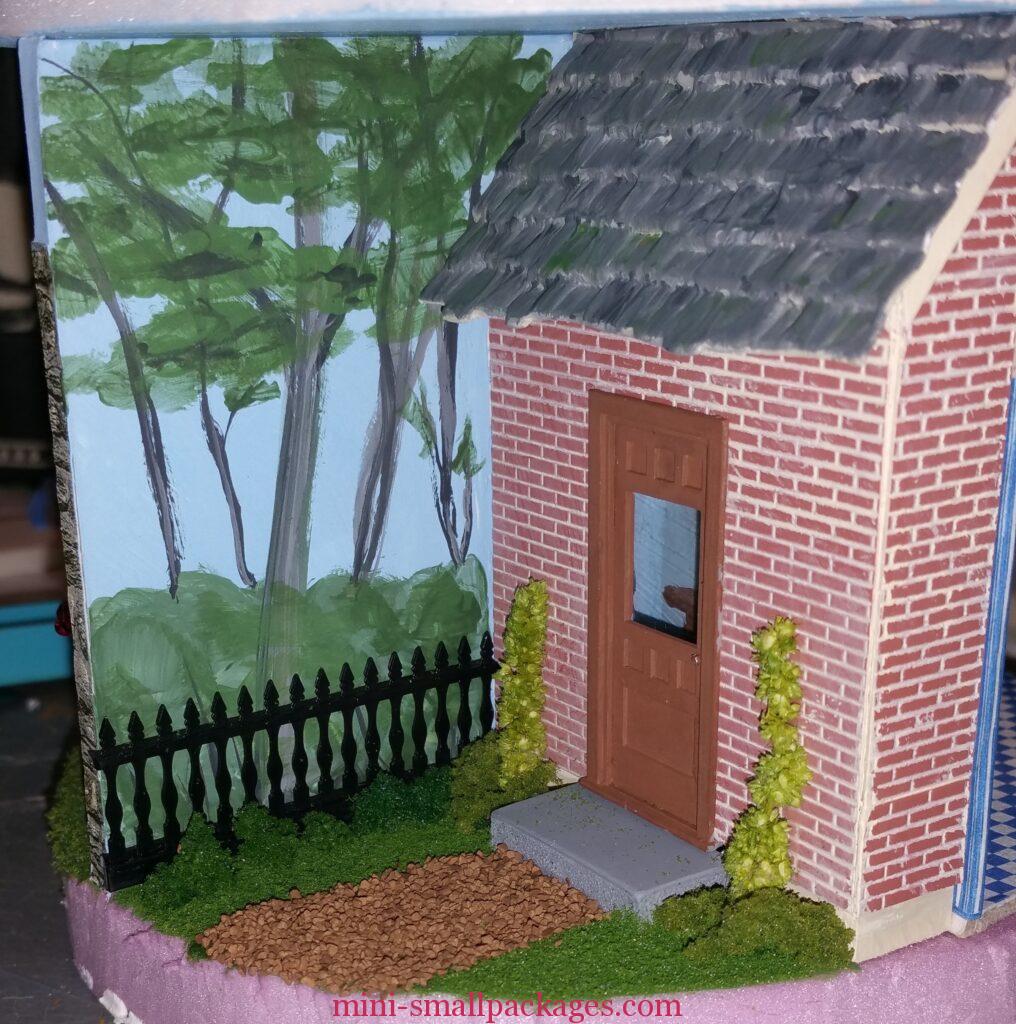
Next I painted the door and frame. I decided that the window might be seen through, so I painted the wall inside and added a faux table. That was just in case could see in the window.
Next was the side wall. I cut a piece of brick like I was going to have another side of the house showing but then I had the problem of what to do with the roof. My solution was to consider something else and that was to peruse my stash and I found the fencing. I’m telling you that sometimes these things just jump out at me and say “hey use me”. It was already black so I left it that way.
With the fencing I figured I wanted some trees or something behind and so my answer was to hand-paint the trees and shrubs.
The trim around the top was quilling paper that I painted. The base was painted below the brick and then I used the landscaping to hide it rather than make it look super good.
The step is a piece of foam-core board cut the size and painted.
Later I was able to add Rabbit.

The table where his gloves are was painted on the wall. The brass door plate is a piece of shiny paper that I wrote his name on.
Next: Transforming charms to characters
Happy miniaturing!
Preble