Cover and Basement structure
My next major decision was about the cover. I felt I couldn’t move forward properly until I had the cover so I knew for sure how much space I had for the basement. I prefer to find something already made as it often reduces the cost, but the size of this project was a challenge to find ready made. If I wanted to just cover it, I could get one, but I love the inside already even not finished. I love that this is a fully enclosed house, so I wanted to work with that.
Then it was deciding what position the house would be in when under cover. Open or closed? I was leaning towards open and at a right angle. I was even willing to consider cutting into the bottom of a cover so I could have the room I wanted for basement.
What won out was house closed with the ability to open. I have some photos of another person’s completion of their kit that also added a basement and lights. They also made the hinges work. I liked that. So I modified the corners of the roof to allow it to be opened and ordered a better hinge.
While in the cover, the house will be closed, but my custom cover has a door to open and then the house can be opened as well. This decision of being closed also reduces the footprint on the shelf when it is just sitting there. Price-wise for a custom cover that would fit an open house vs one that had a door was very similar. If cost had been my only decision, I would have gone with a cover that had to be removed in order to open.

The above shows the case closed (and the back not on the house) – it still has some cling wrap on the cover. This is to protect the cover from scratches as I work on the project. I have to keep the house inside the case when I am not working on it because of cats. The loose wires are very tempting to them.
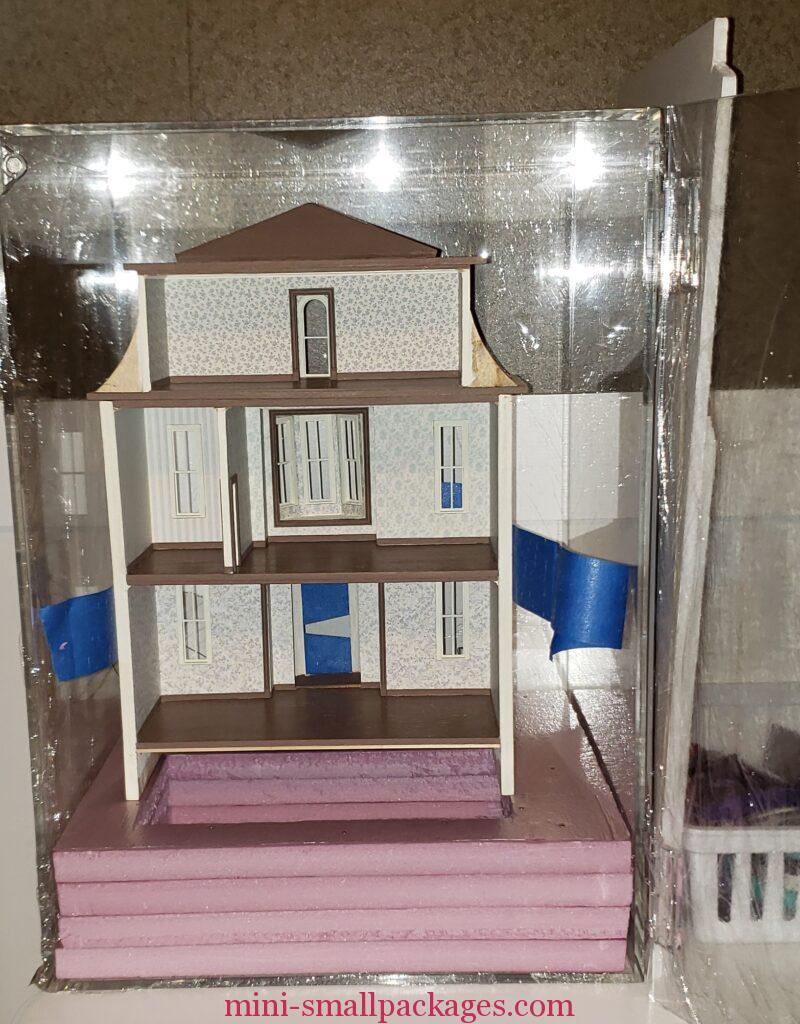
The house shown over the hole that I made to hold the basement.
Yet, now I have this bright idea that I want to add a car and a garage. I had to wait until it arrived to continue but that wait was short.
After talking this garage addition over with my husband on real world considerations, I go with his suggestions. I had thought about garage access from the front but due to space and other thoughts, I decided to leave the front intact.
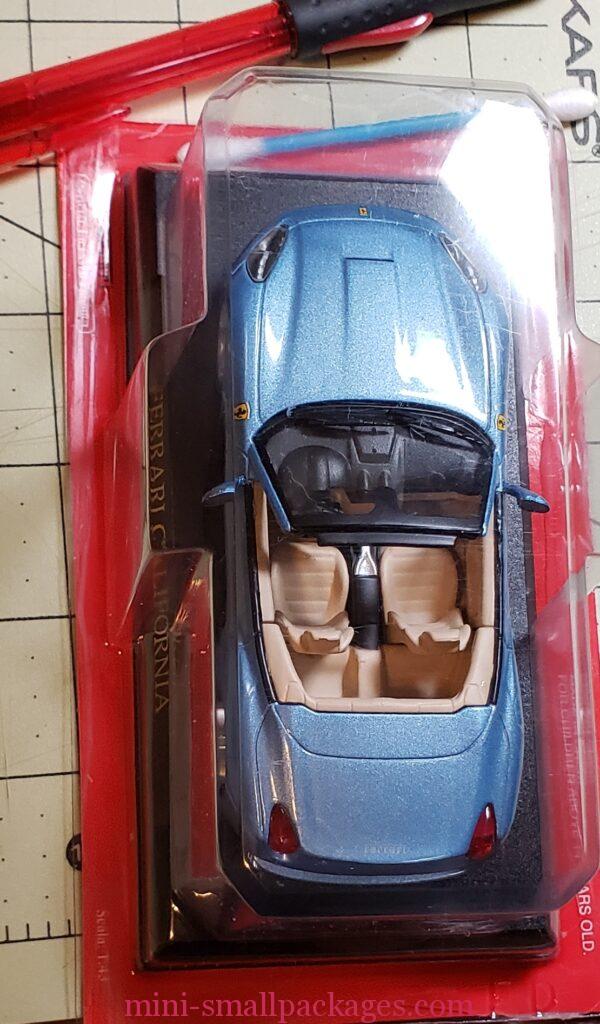
This is a 1:43 scale car which is the best that can be found in the style I was interested in. Until I had the car in hand, I wasn’t sure if it would work or how much base to cut away.

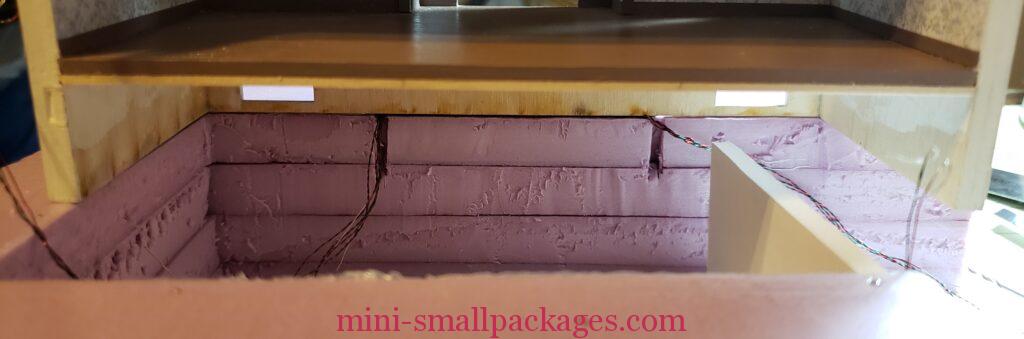
I’ve cut away 3 inches to allow for the garage. I plan to have the right side garage area open. The bottom of the garage and basement are using foam core board rather than the pink foam. The living area has a second layer of foam core board. The wall shown in the middle of this picture had to be re-cut.
I will also add a wall under the house outer wall, but just at the door area (middle of the pic). More on this later. This will leave room for a tiny laundry area just to the right.

Basement living areas
I’m torn on how to do the living area. I want a bedroom, bathroom and kitchen. The other miniaturist that added a basement has three areas. One of which has a cropped wall so can see what is behind. I decided to that as well since it was bothering me to almost completely hide one area behind a wall that goes crosswise.
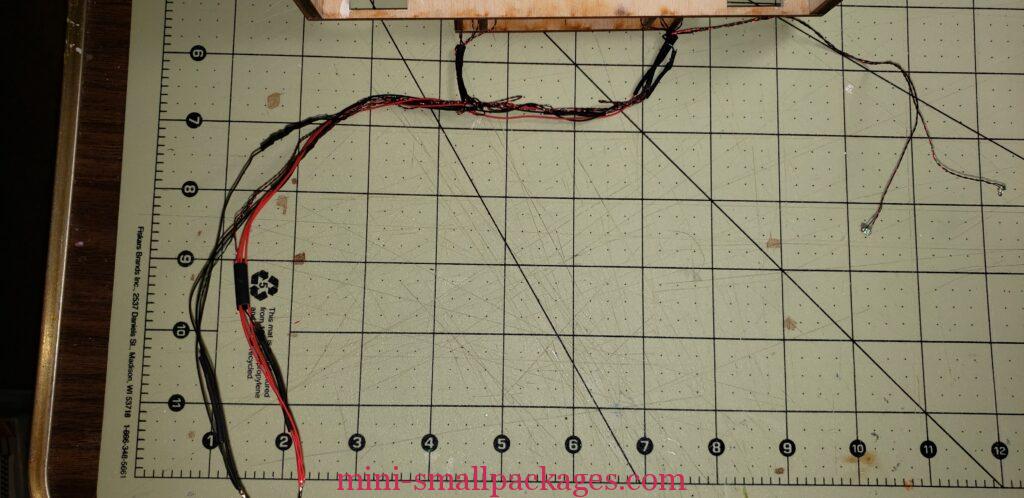
Also I have to deal with the electrical and battery location.
This mess of wires was bothering me. Plus I needed to be able to place the basement insert inside without the wires catching on the pink foam base. So I worked to combine all the wires together with additional shrink tubing.
Then I remembered that I would want a light over the car and over the laundry area. Oh wait, I have also decided I wanted a conservatory. More on that later. It will need lights as well. But I didn’t wire anything in yet.
Meanwhile I noticed I had not ‘finished’ the ceilings for the basement. So that was my next step.

This was just a test fit on the back wall. Which is when I noticed how ‘unfinished’ the sides were. Ceiling is good since I had added lights and a drop ceiling.

But the back half had not been ‘finished’ so here I have done so. I share this to remind to use a spacer on any surface that can be marred when using clamps. The underside was only the wood, so not spacer was used on that side, but on the wood floor side I have the old credit card.
I also noticed the archways.

I decided the brown archway looked better. Maybe unlikely to be seen, but I knew it was still white. I prefer the brown.
Adding flooring
I’ve decided on three rooms and I started adding the flooring – tile using a plastic sheet purchased as tile and grooved wood. I went ahead and glued the wall between bedroom and kitchen.
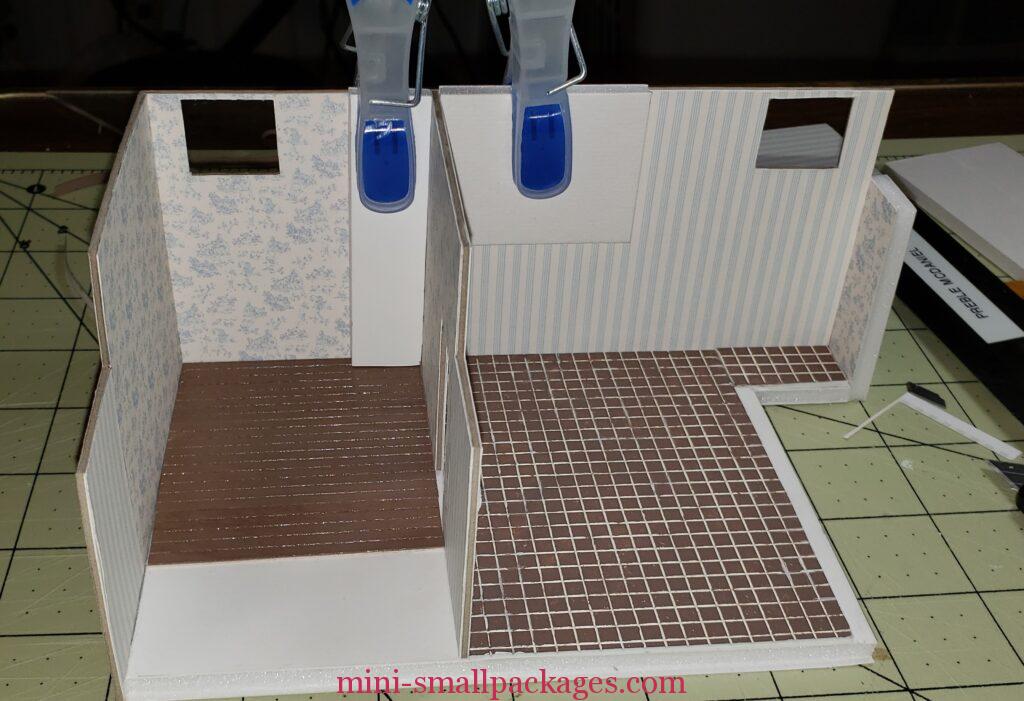
Although gluing this interior wall in place was premature, this picture does show a good clamping method using the foam core. The clamps are not flat but the edge of the foam core is.
Notice the cut away on both these inner and outer wall. This is for the back of the house. I realized it was premature gluing of this interior wall as I needed to install doors and their frames.
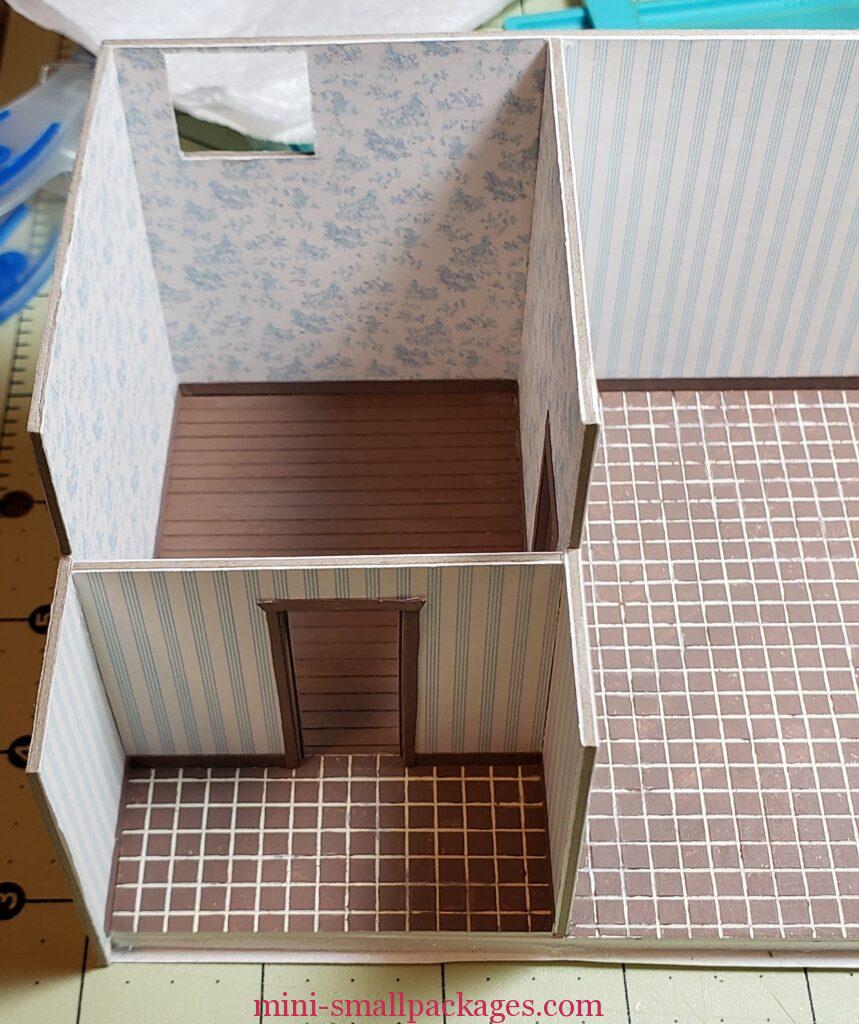
I’ve installed the bathroom wall. Notice how it is also shorter to allow the ability to see into the bedroom. The trim for this door is from quilling paper, like I use for the baseboard.
Floors, frames and doors are all installed. Frames in the bedroom also from quilling paper and the plastic ones.
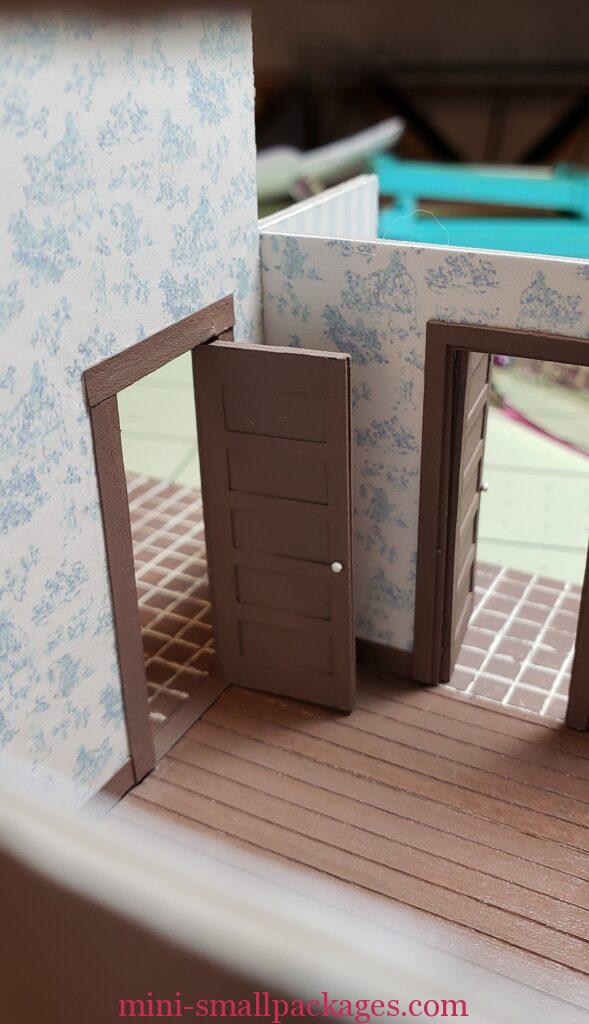
I did not plan well for the flooring at the doors. I had to work with those in order to have the thresholds flush and also to have them fit the room the belong to. So there was some cutting of trim and flooring.
The doors are glued in place in open position to be able to view across room to room. This view is actually from exterior through the small high window of the bedroom.
Furnishing the Housekeeper’s living quarters
Happy miniaturing!
Preble