First Floor
When I purchased the house kit, I decided to purchase many of the furnishing kits from Suzanne and Andrew’s minis. The basement was an exception because I hadn’t planned for it in the beginning.
When I decided to pull this project out to work on, one thing I did was to organize the purchased kits by floor. This made it easy to focus on what was needed to each floor. Well at least I think so. Ideally, I would have been putting them in place and finishing a floor at a time, but with this house design, it didn’t happen. Real life has a way of interrupting my flow which is fine by me.
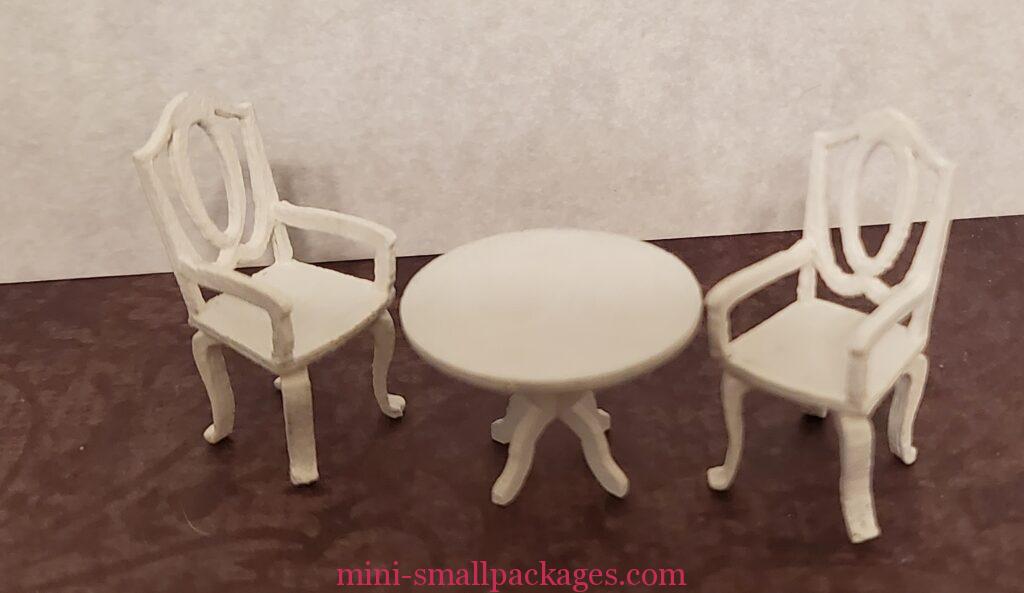
I pulled out the First floor bag and decide to work on the chairs for the dining room table and a side table. This was because I used my dremel on them as I done for the chairs in the kitchen. These were from a different laser cutter but still felt better to me to do the extra sanding. I didn’t try to round anything just smooth any unevenness.

The edges are rounded, but to be honest, I find it hard to see in the picture. Partially this is due to the color difference between the layers of wood.
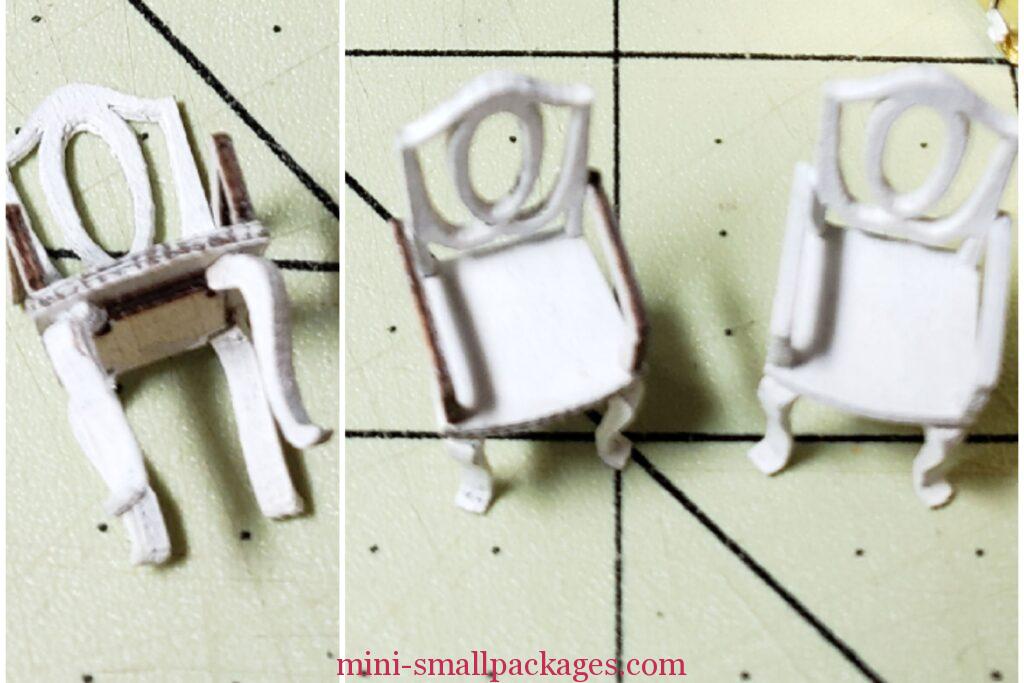
These chairs really look better when painted. When I painted these it was lightly sand using the dremel, then first coat of paint, light sanding with sandpaper, paint again. Another light sanding and touch up painting. These coats and sanding are due to the laser cutting causing dark spots, the plywood and using white paint. two light coats of paint are better than one thick one that doesn’t cover well. Sanding between helps take down high spots and also make a better looking miniature.
Plants
These ferns were made using an etched brass sheet. These need to be painted before removing from the sheet. I paint two coats per side. The first coat is for coverage and the second is to catch spots missed. I painted both sides the same, but could have done a lighter one on the back side. It is important to not use too much paint or will loose the detail in the brass.
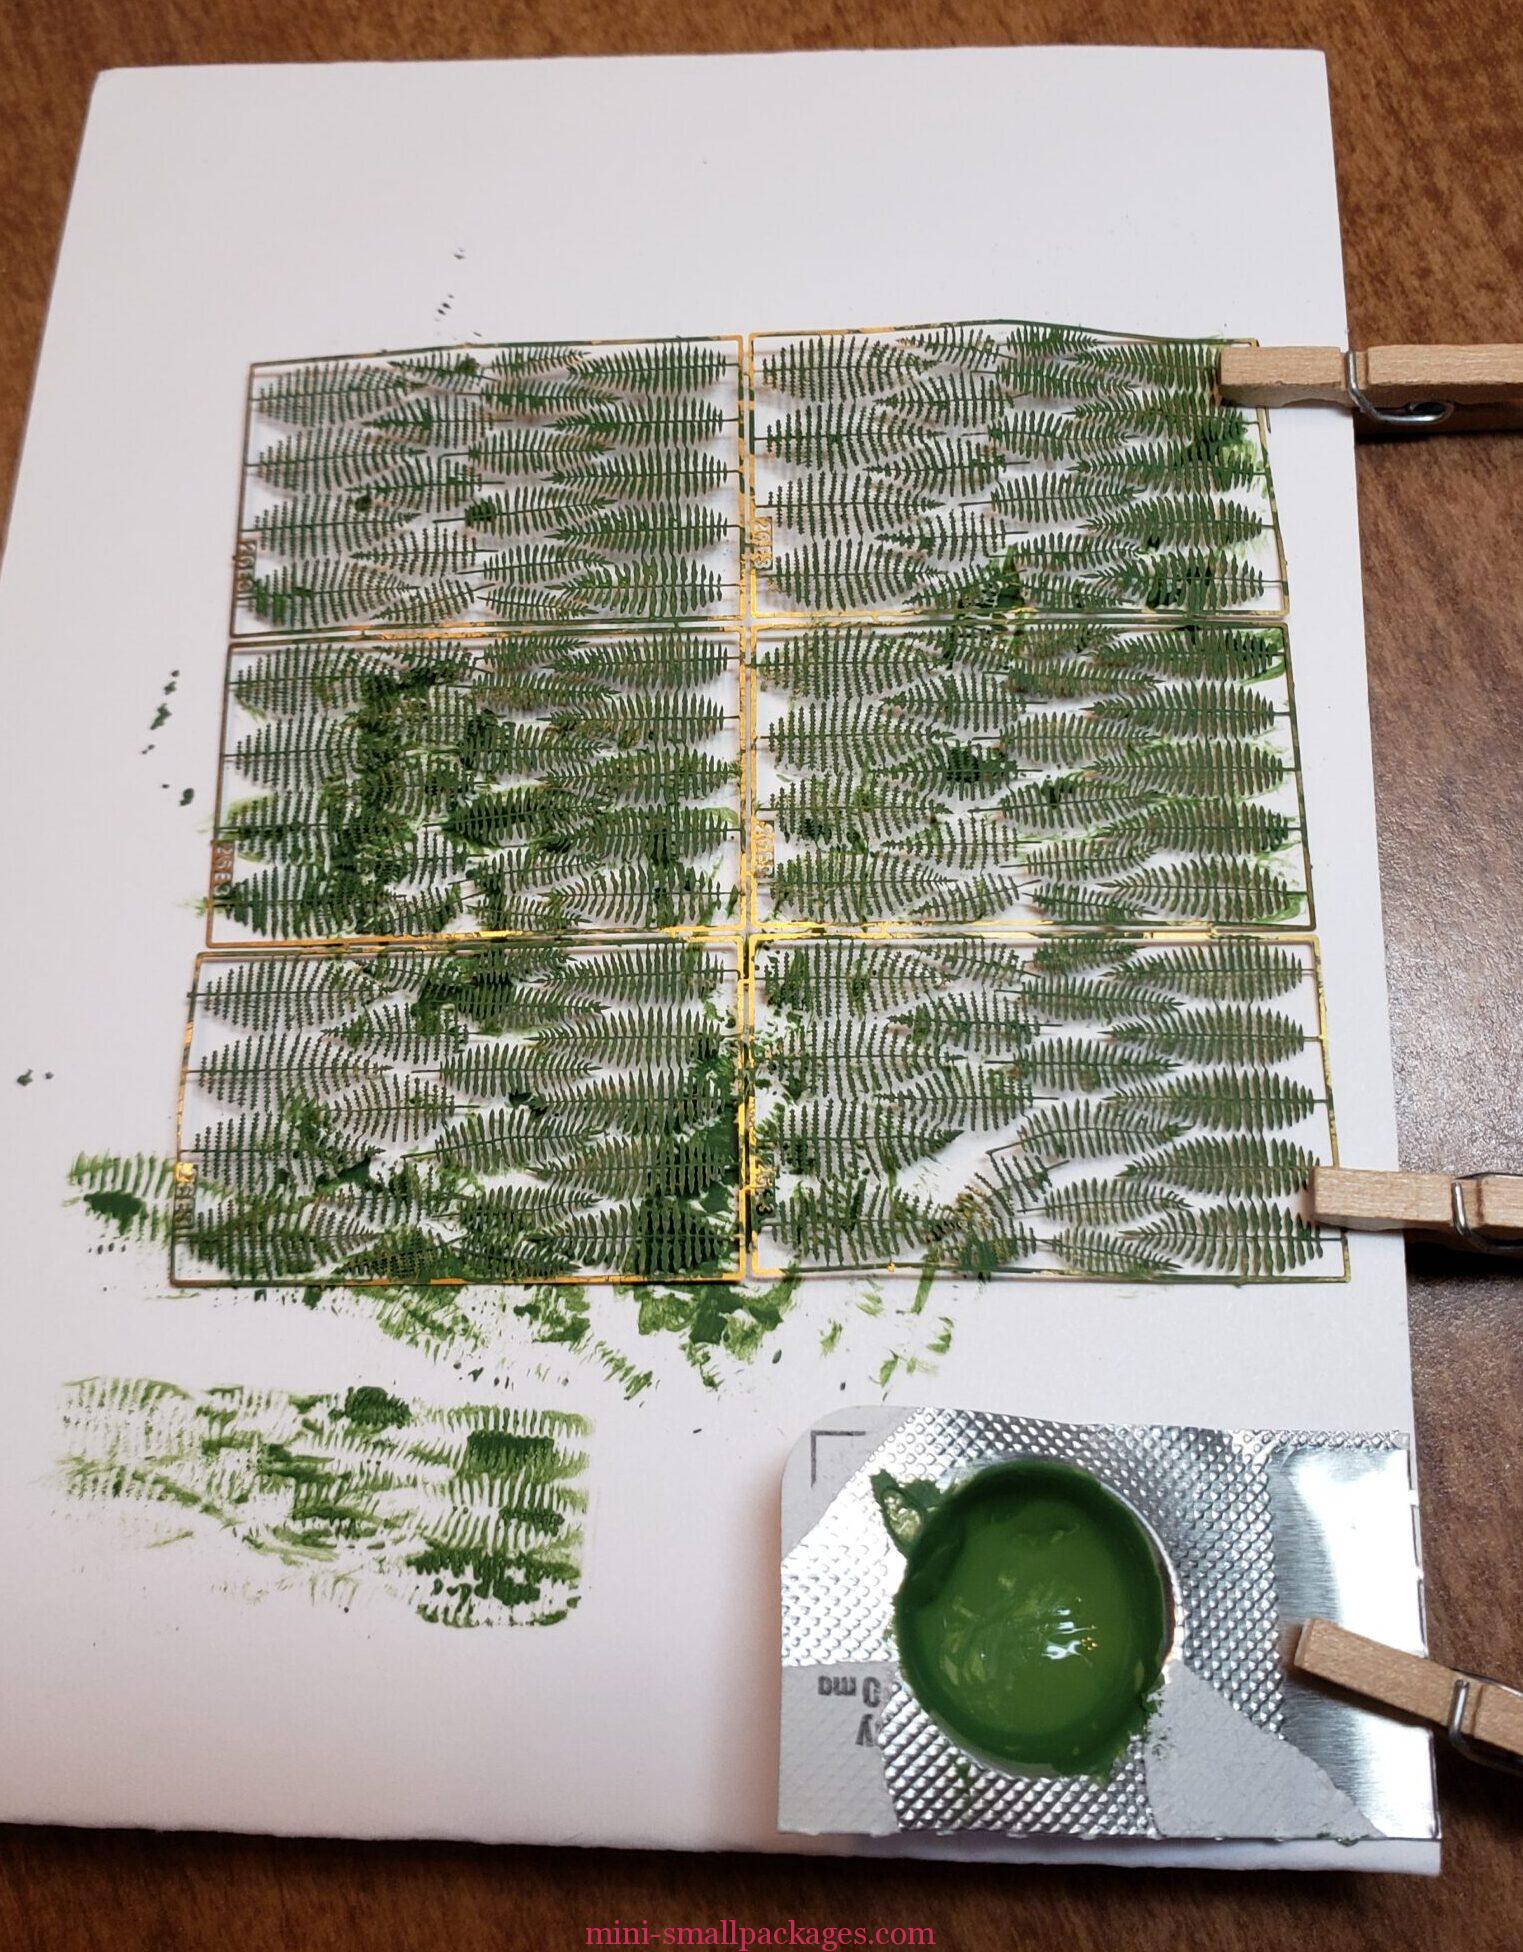
I used the clothespins to clip the sheet to a scrap piece of cardboard. This made it easier to brush the sheet as these leaves have a tendancy to move. I am using a pill packet for a paint pot and it can be tossed when I am done. Having it clipped to the cardboard is good because I work with heavy magnification so very close up. The paint being handy saves time and frustration finding the paint pot.
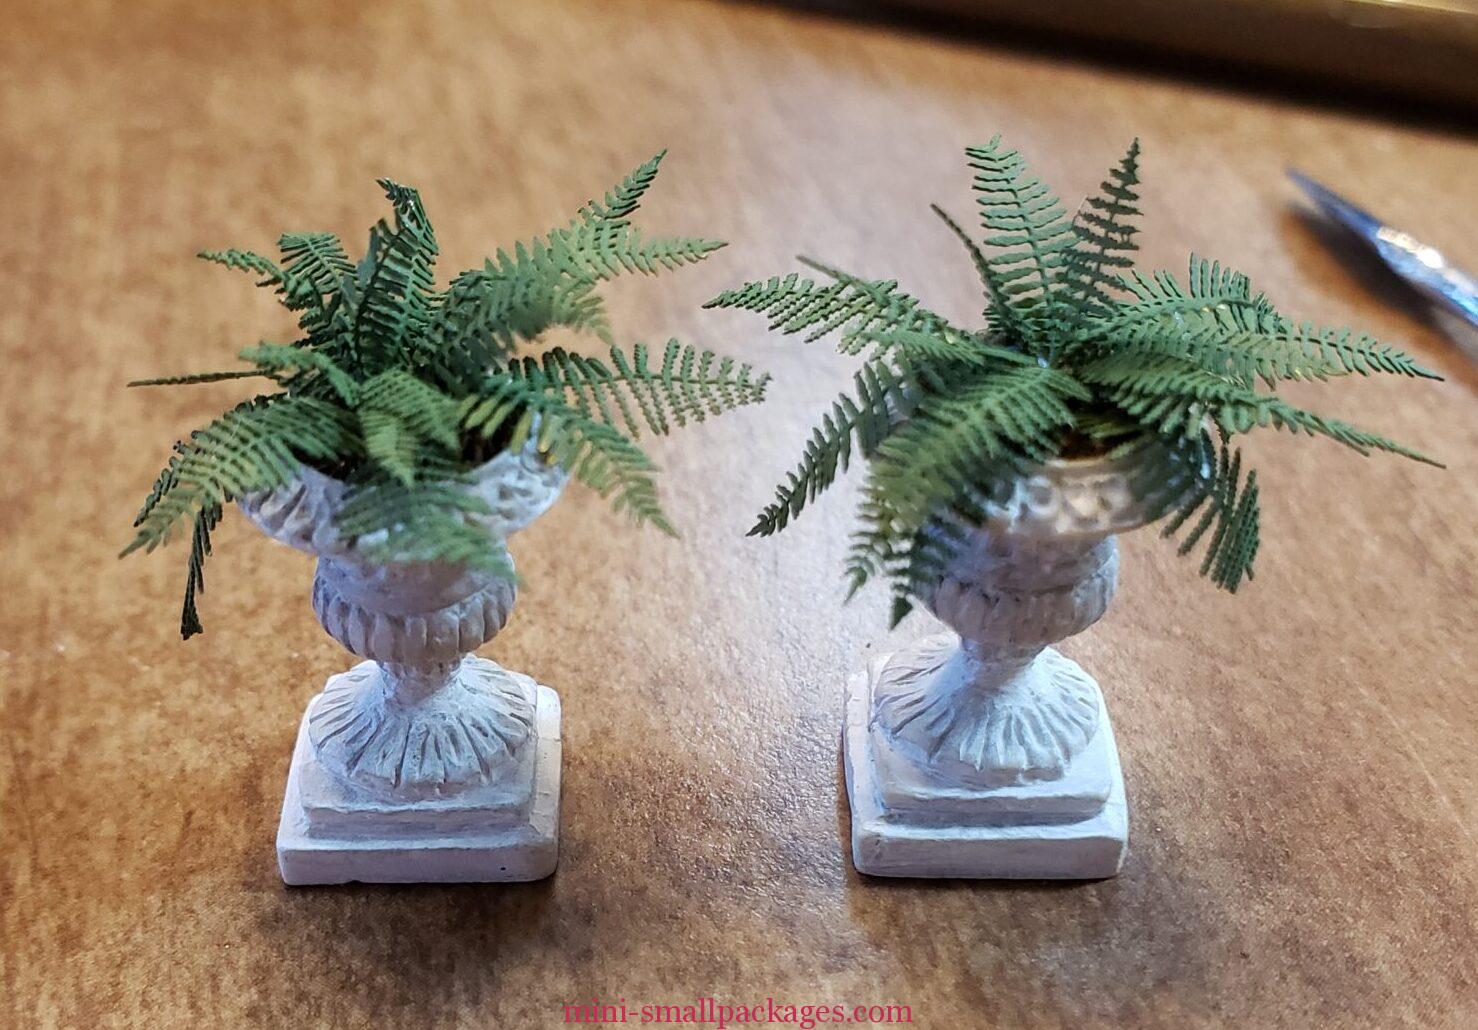
The bases were filled with glue and brown ballast. I trim the fronds from the sheet and shape with my fingers. Then I use tweezers to insert in place. If the glue dries, then I use extra glue on the frond end instead of adding to the base itself.
These chairs were tricky with the arms and the cloth back fitting inside the trim.

The pillows were made special to match. Here is how I do pillows.
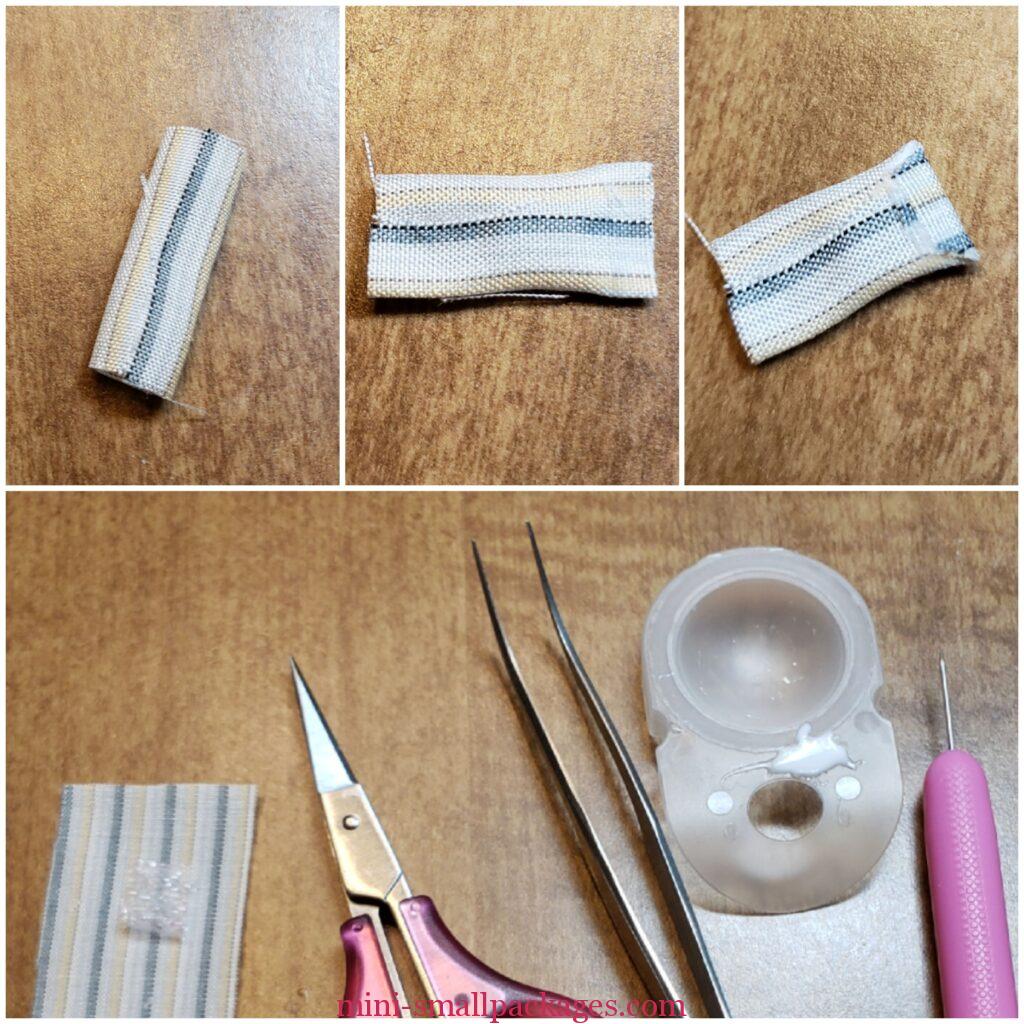
Looking at the bottom — The cloth and foam were provided. I use sharp and fine pointed scissors (I got mine from the etsy seller), fine pointed tweezers, tacky glue and a fine point tool. This was part of a 2 piece set for nail dotting – from Dollar tree. Also try Amazon. OR make your own using needles or pins inserted in wood dowel or heated with flame and inserted in plastic.
Now my process – Left – wrap around the foam cut to size. Middle – add glue lightly inside but don’t press, Right – trim the end so have a flap (remove fabric so only one layer) and lay tightly to the pillow form. Repeat for other end.
Here are some of the other pieces of furniture to be used in the first floor
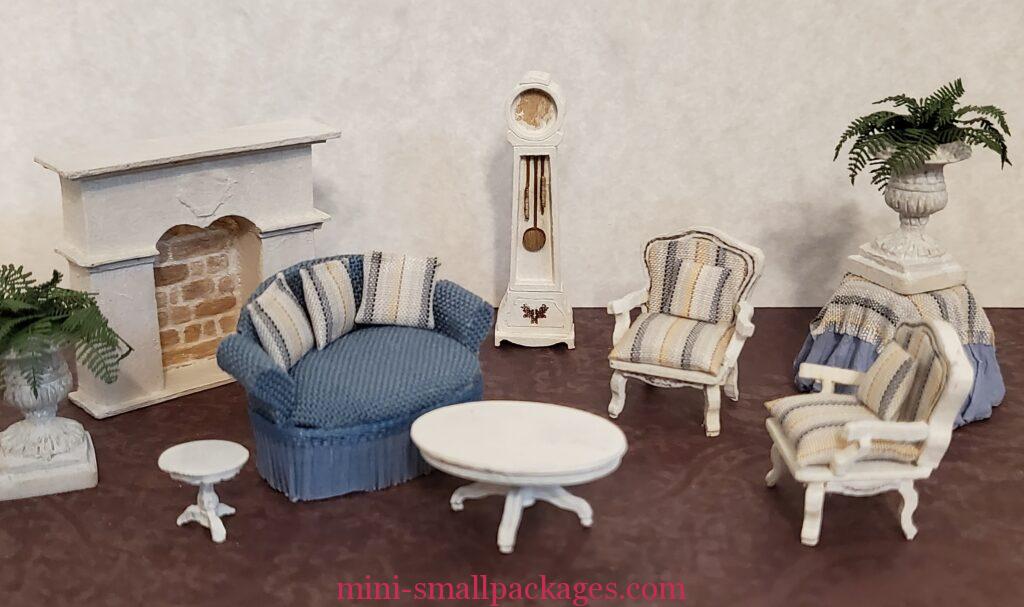
The two smaller round tables are metal minis.

These go on the back . I like keeping the laser grooves showing when possible. Those bead knobs have a tendancy to disappear. Thankfully I have extra so replace where needed.
All the kits are assembled, it is just putting it all together and adding the finishing touches.
Happy miniaturing!
Preble