I love Joann Swanson. I loved reading her articles in Nutshell News. I was very excited when I heard that she is now doing a blog sharing her DIY articles online. Awesome!!!
Well, this week she had one that I couldn’t resist.
http://joannswansondiyminiatures.blogspot.com/
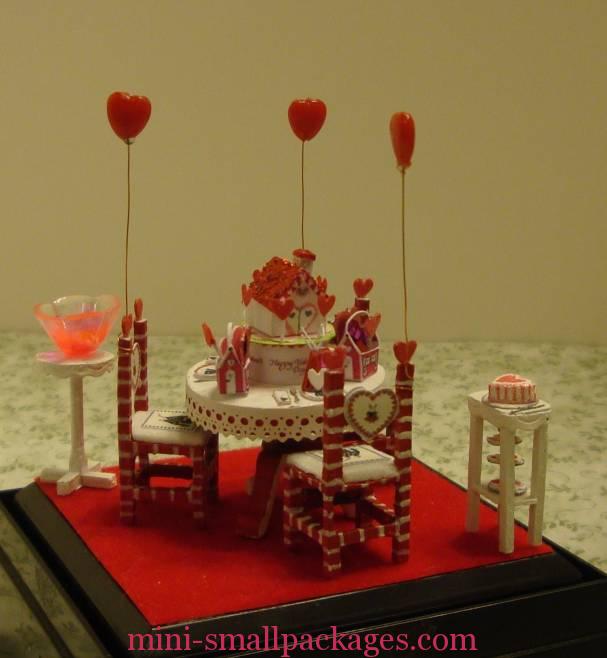
I decided to do this in 1:48 scale as this is my favorite scale. I knew this meant adjusting to what I could use.
I started on the chairs. I decided I would use the BPF (brown plastic furniture) for my chairs and table. I knew I could paint them to get them close enough for my personal taste and preference. I didn’t really want to build the chairs from scratch per her instructions. I also decided to paint as with BPF often there are imperfections not to mention using paper to wrap something not perfectly square would be beyond tedious.
Here are the steps I took to complete my version of her darling scene.
Work in progress…
Chairs
- Pre-step, clean up existing BPF from previous use (remove paint by scraping and soaking). Skip this step if you are using unused BPF.
- I used a craft knife with a sharp tip and blade to clean up the extra flashing that is sometimes present in BPF. Next use files and sandpaper to sand smooth any rough uneven spots that can’t clean up with craft knife. Use sharp scissors on edges to remove the fuzz caused by sanding.
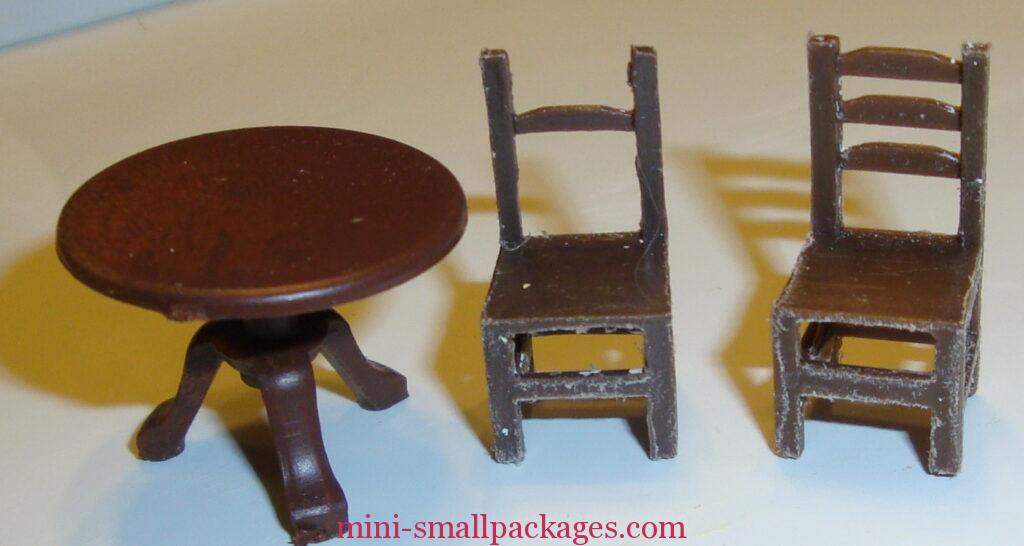
- I cut the top and bottom rung from my chairs. That was a mistake. I was working from memory on this project at this point and I should have keep the bottom rung instead.
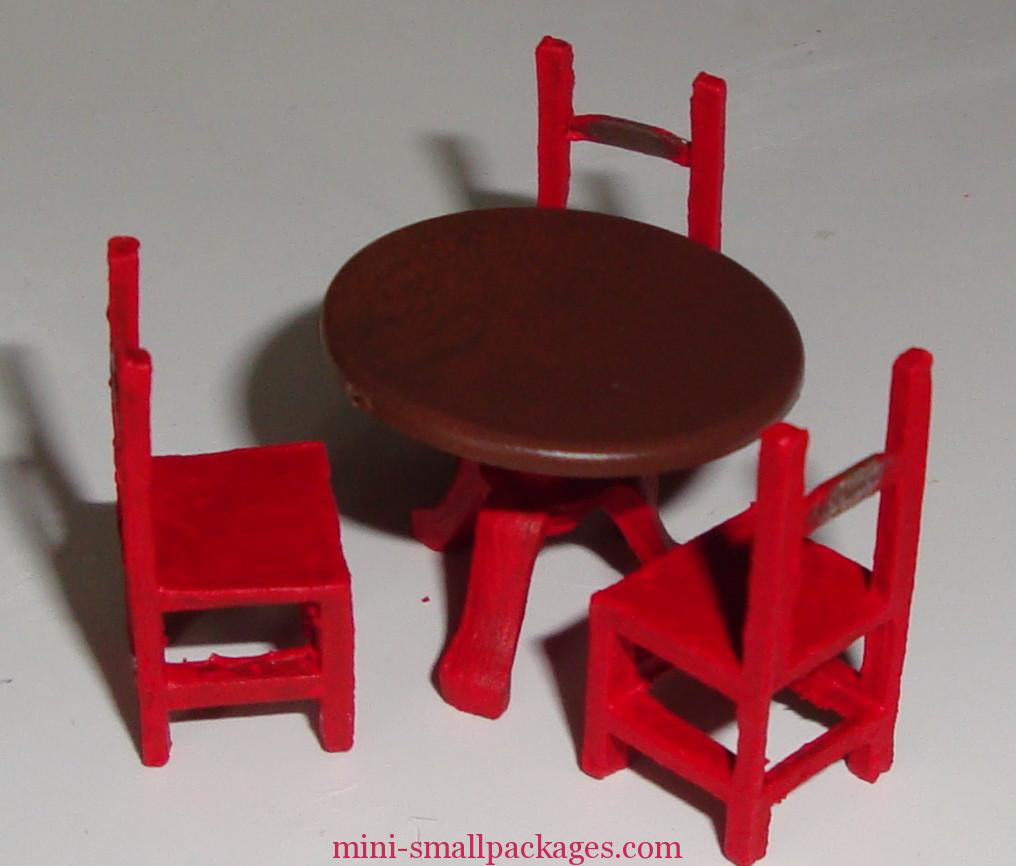
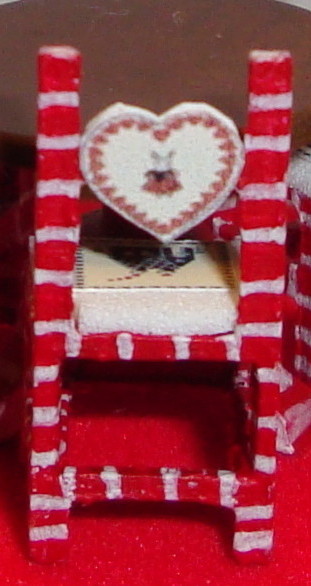
- paint solid red. Then using a 10/0 liner or smaller brush I painted lines on the chairs.

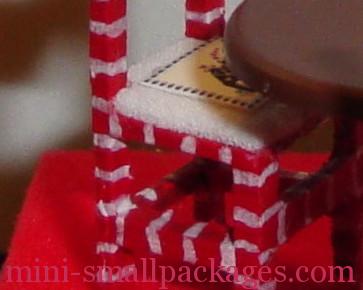
- I used the heart back graphics provided on Joann’s blog. I reduced them so they were 5/16″ wide. I attached mine to the middle rung that I left.
- I also printed out the graphics for the seat cushions. Mine are smaller than the seat, but I am ok with that. I used white fun foam to make the cushion. I trimmed it to fit the seat and then carefully sliced the foam in half for each seat. I glued the printie onto the cushion.
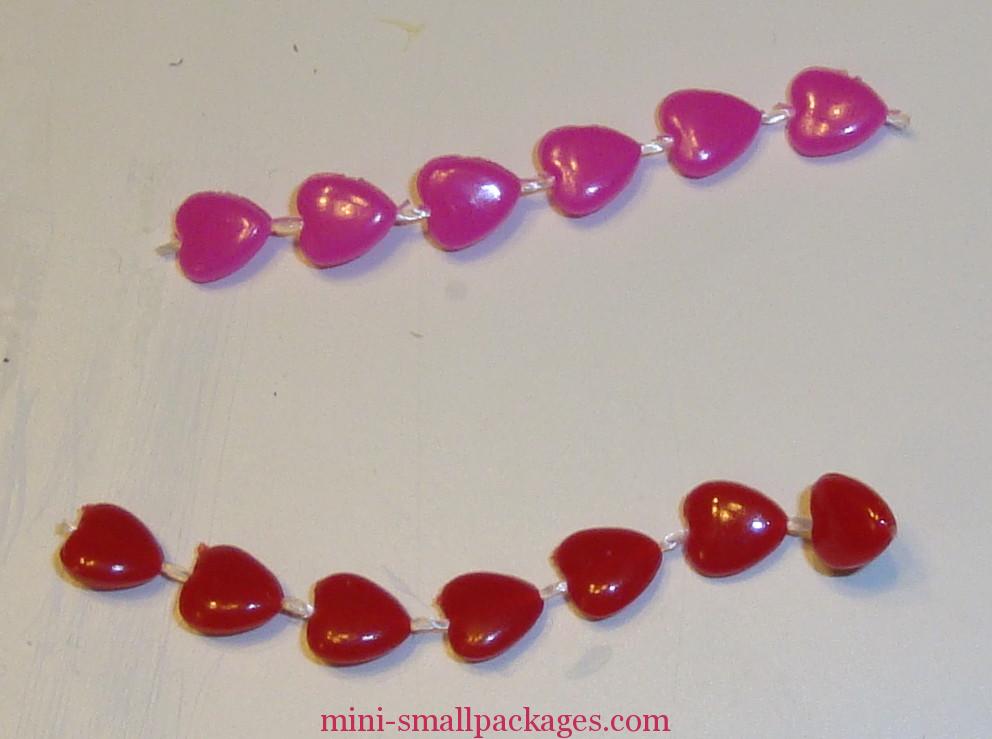
- I used the thinnest wire I had on hand for the balloons. I used these beads to make the balloons. My husband helped me drill a hole in each one to insert the wire. The white cord wouldn’t come out and the wire was slightly larger as well.
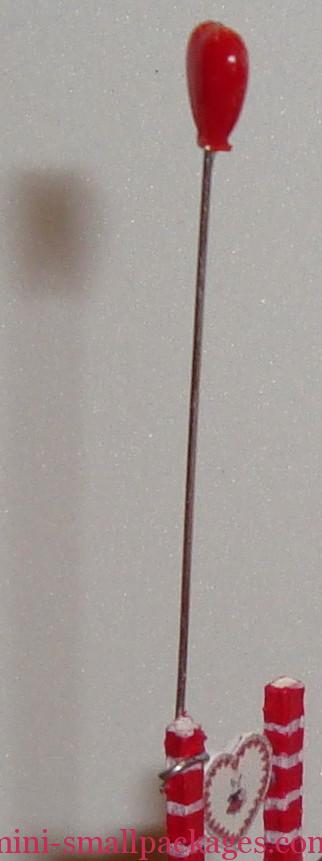
- Per Joann’s instructions I carefully added the balloon wire around the back of the chair before adding the tiny hearts at the top. I will use cardboard and paint them. I have a small flower punch that I will cut my tiny hearts from.
Table
- I painted the sides of the table legs white and also added white lines to the outside of the legs.
- I just purchased some laser cut lace and I will use that for the edging around the table top. more later…
Floor
- I cut a piece of foam-core board to the size of my acrylic box bottom. I glued red velvet ribbon to the foam-core board and then trimmed the ribbon. I will cut a strip of white thin card to add to the edge of the foam-core board.
Here’s what I have so far:

The black base is a 2 x 2 inch acrylic box base that a glass ornament came in.
I commented on Joann’s blog post and this was her return comment on mine

Bottom
Painted it white all over, then I came back with the red. At first I thought to try the stripes, but I didn’t like that so just went with the red on the outer flat of the leg.

Top

I went to a show and I just happen to pick up some shelf edging that is lacy. It is for 1:12 scale but I was happy with it for this application. I used a portion of the middle one. I trimmed some from the solid part. If I didn’t get that I would have most likely used paper scissors with the fancy curves like Joann did with hers. I have a smaller scallop would try or even just a wave. It would be possible to cut once and then go back with same scissors and carefully cut additional curves. Or I would get out my craft knife and do some curves free-hand. I did just purchase a swivel head craft knife and would have tried that. I wouldn’t have worried if each curve was even, just does it look good overall on the sections that get seen at any one time.
I painted the lace edging white (it was ivory).
I cut a piece of thicker paper ( 48 lbs) that I used to print the chair hearts on in a strip that would be narrower than the section of lace edging I will use. I painted this red. With the table upside down, I glued this around the top. Not to the table but to itself and removed from the table and it is just a ring. I glued this ring to a piece of paper bigger than the circle. I also inserted the table in this ring so can be correct shape while drying.
Then glued the lacing edging around (on top of) this ring. This allowed me to get a two tone coloration like Joann but different. Then when completely dry I carefully cut around the circle which became my table cover, which fit right over the table top quite snug.
Place settings
I used the plates and napkins from Joann’s blog.
The utensils were metal etched. I got a new set of these at the show I just attended. These things were remarkable but wow working them is tedious. They have to be cut from the framework and had to use scissors as the craft knife couldn’t do it. They also had a tendency to want to disappear. I was scared I was going to lose one, but they always fell in my lap. Glad I got them as they do add to the table.
The glasses are from some sort of light bright type peg. These have a round end. I cut a portion from the stem and then used a pink permanent marker to color them.

The table favor boxes are printie from Joann’s blog. The handle is a thin strip cut from paper. I cut them out using my sharp craft knife and then used the back of the knife to score. I then carefully folded them using tweezers and to get a good crease, I used the rounded end of my tweezers against the fold.
To fill them I used two hearts 5/32″ punched from paper. One double layered and the other I wrapped in pink candy foil I saved from some real Valentine candy. I also had some punched hearts 1/16″ – same I used previously on the chair back, to glue 2 to a piece of wire, then added a glossy glue to make them look shiny like suckers. I painted the wires white.
Party Hats
I used some shiny paper from my stash. I think it might be wrapping paper.
I cut a small triangle (the lines are about 5/16″ apart.)
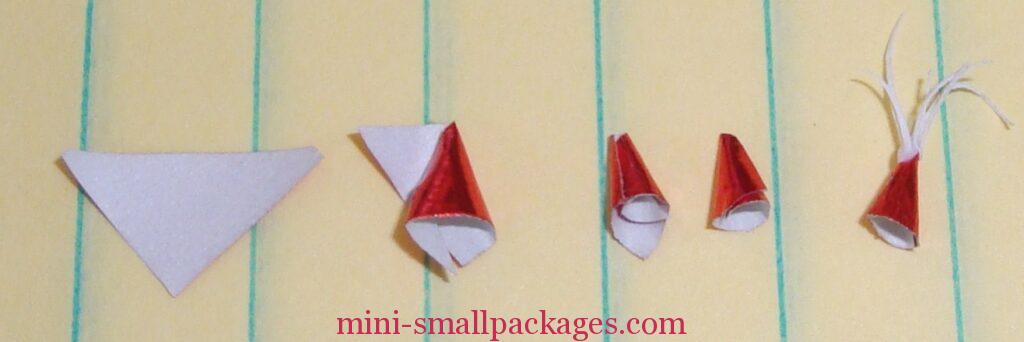
To make it cone shaped, I curled the left point to the center and then rolled it around and glued it.
Next I trimmed the lower edge to the right height and make it straight/even.
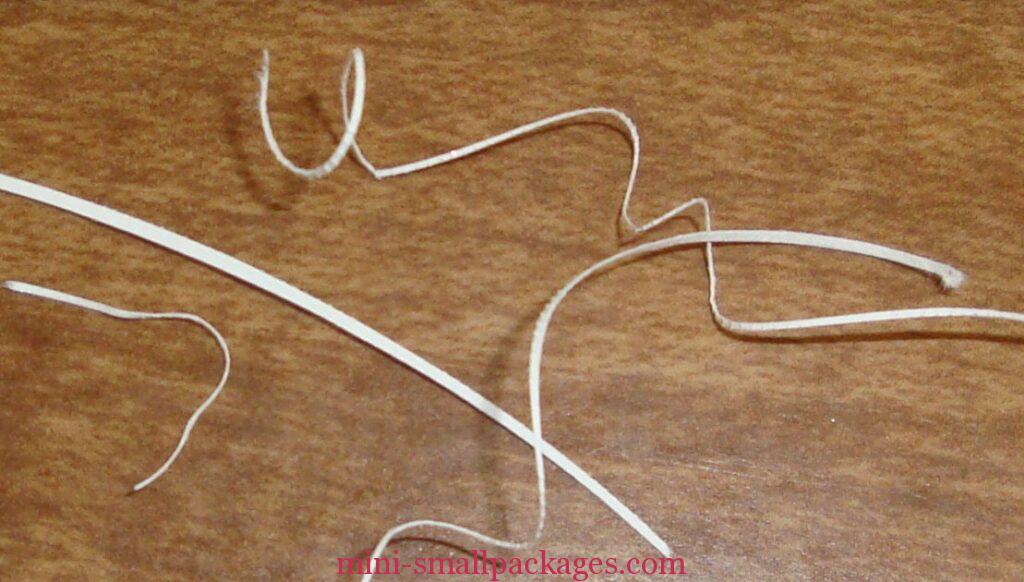
The curls are made by cutting very thin strips from paper. They curl on their own as they are cut. But I did add some additional curl after I cut them and glued in place.
The last thing I added was a white 1/16″ heart punch.
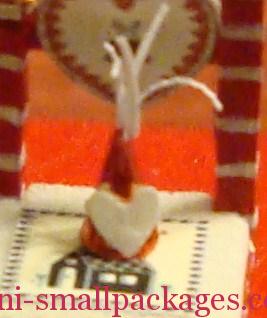
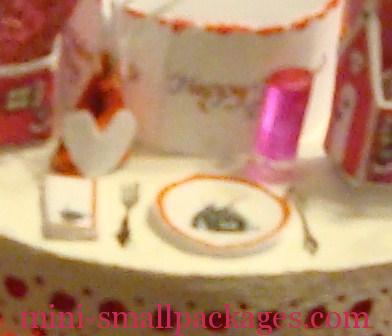
Centerpiece: Joann didn’t publish the house as a printie as she collaborated with another who is offering as kit but that is 1:12 scale so I had to cut my own.
She did include the riser portion – white with Happy valentine’s day wording. I painted the top edge red to give the illusion of the decorative edging she did.

- For the house and its base, most of the details are painted but if I could cut it, I did. I had printed a pic of just the house and used it to determine sizes. I guess-estimated based on other things in the big pic. The house is about 1/4″ by 1/4″ and the chimney is 1/16″ x 1/16″.
- I added ultra fine glitter to the roof and used an extra 7/32″ heart for the front door. I am very pleased with how it turned out even if I didn’t get the weather vane on.
- The base is a circle cut out by hand and then painted, the pink hearts under the house are from the 7/32″ heart punch.
- The lollipop trees are thin strips of paper with the smaller 1/16″ heart glued to them. One per ‘stick’. I painted the back where the heart and stick meet. To get these to stand up and stay on, I glued part of the paper stick under the pink hearts and then folded them to stand up.
Side Tables


The round table is made from a HO scale porch post that I cut to length – one on the right. The others were options I considered. I used some scrap wood for the feet and a 1/4″ round woodsie for the table top. I added the lace edging from the far right in the pic near the top of this post. I trimmed the top section so it just has swags and then once glued around the table top and once painted, it gave a carved look to the table edge – Sweet! Loved it so much used it for the cake table as well.


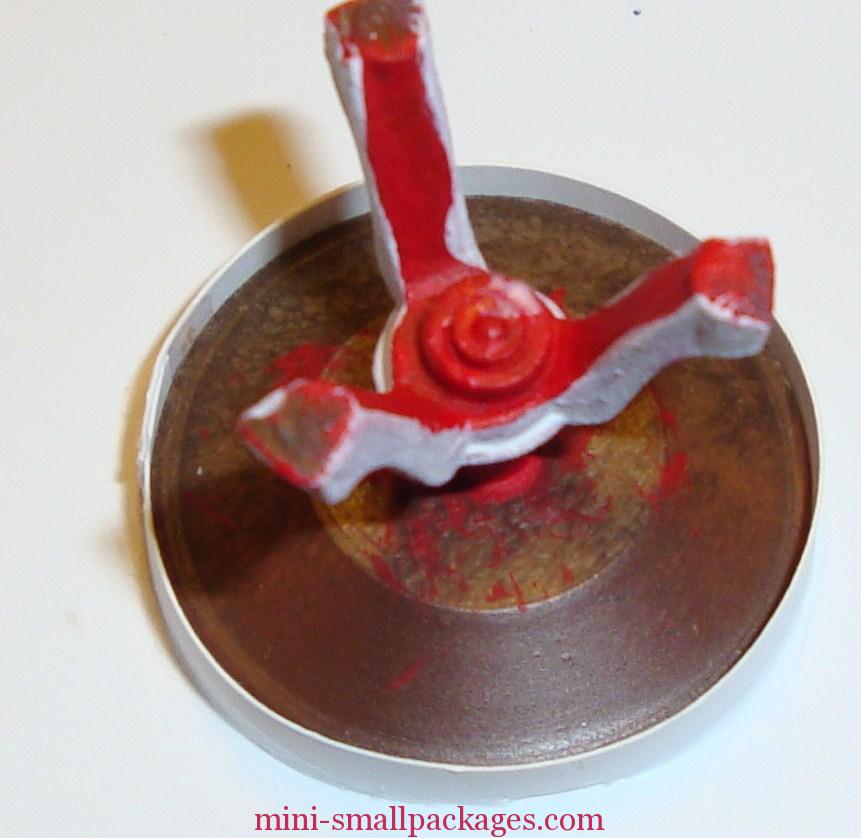
The punch bowl is a clear flower shaped bead that was 3/4″ tall. I used my dremel tool to cut it down and shape it. I added a punched clear base to seal the hole. Then I colored it with the permanant marker inside and added nail polish for liquid. The nail polish took several layers so don’t necessarily recommend it.

The rectangle side table for the cake was made by cutting wood pieces and by scaling down Joann’s dimensions. I used my scrap wood pieces. (Always good to save them – mine are sorted in a divided box so easy to pick and choose what might work.)
The 3 tier server – I used a swirl round hole punch to punch the various sizes. (Larger punches that punch different parts are a good source of different sizes we can use in smaller scale minis – use your ‘mini’ eyes when looking at punches for this purpose.) The center is a straight pin cut down to height with silver spacers from crimp beads, I used one for the top and two each for the middle and bottom section. Silver marker was used to added the edging to the plates of the tiers. The cookies on the tiers are 1/16″ round punch with painted hearts.
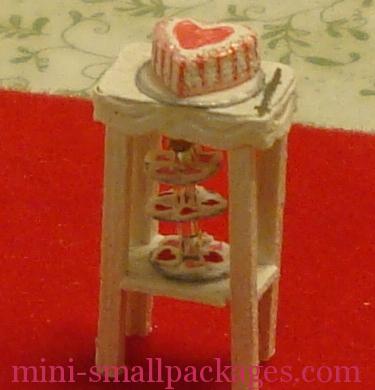
The cake – punched a heart from fun foam using my 1/4″ punch. Then I painted it with pearl paints. The cake plate is a 1/4″ round punch with silver edging using a silver marker. The knife is from the etched silverware set. Looks like I need to remove and trim the sides again.

Finished in its box
Happy miniaturing!
Preble