The band was a gift from a friend who let several of us choose some of her precious minis to take home. She had a lung disease and knew that she didn’t have much time left. This project celebrates her life. It reminds me to be generous.

My First Scrubby Holder Project
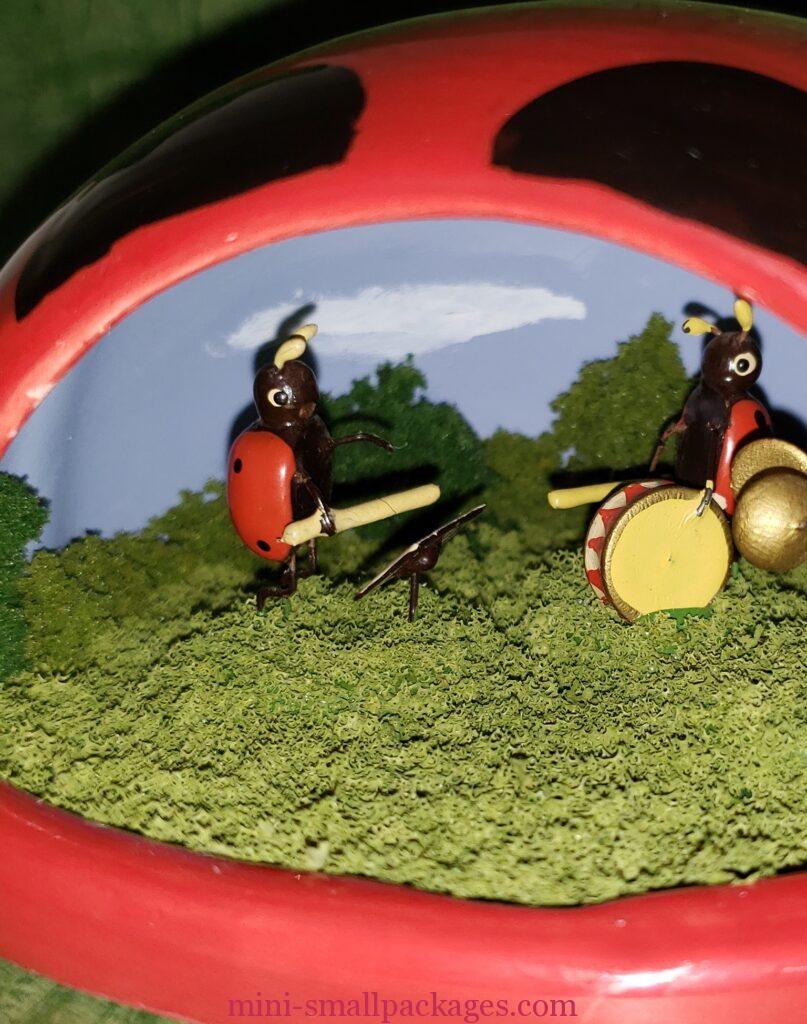
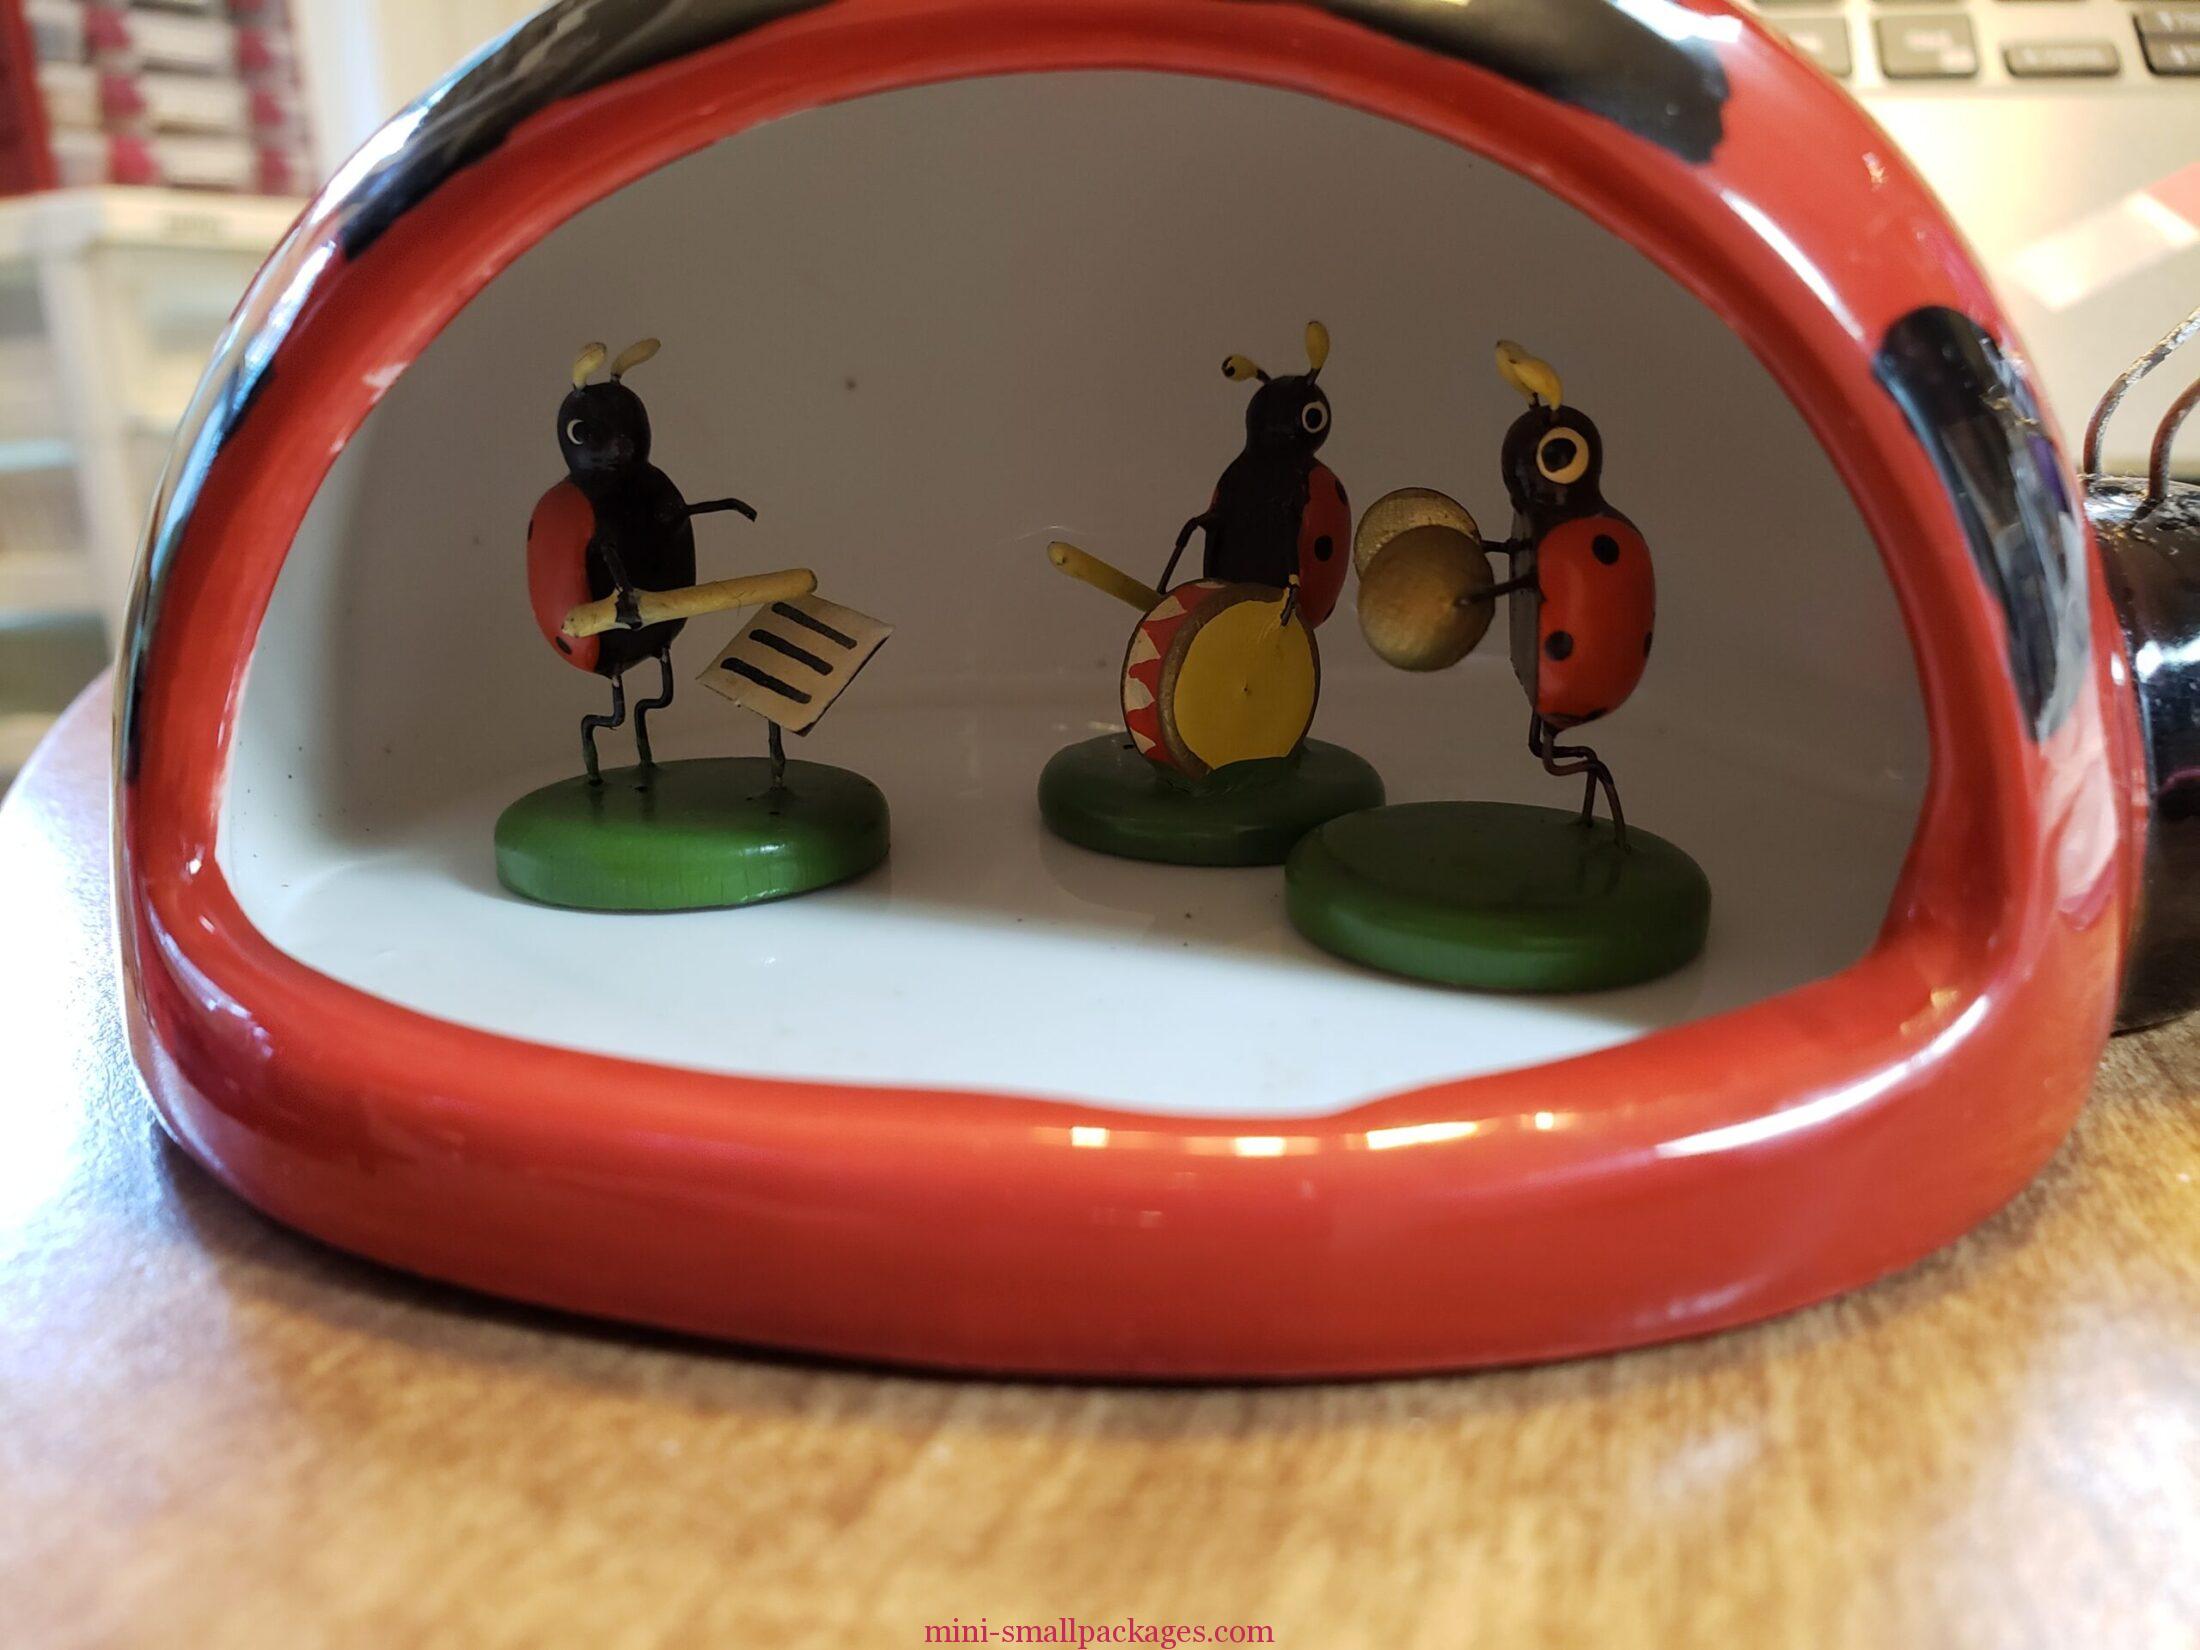
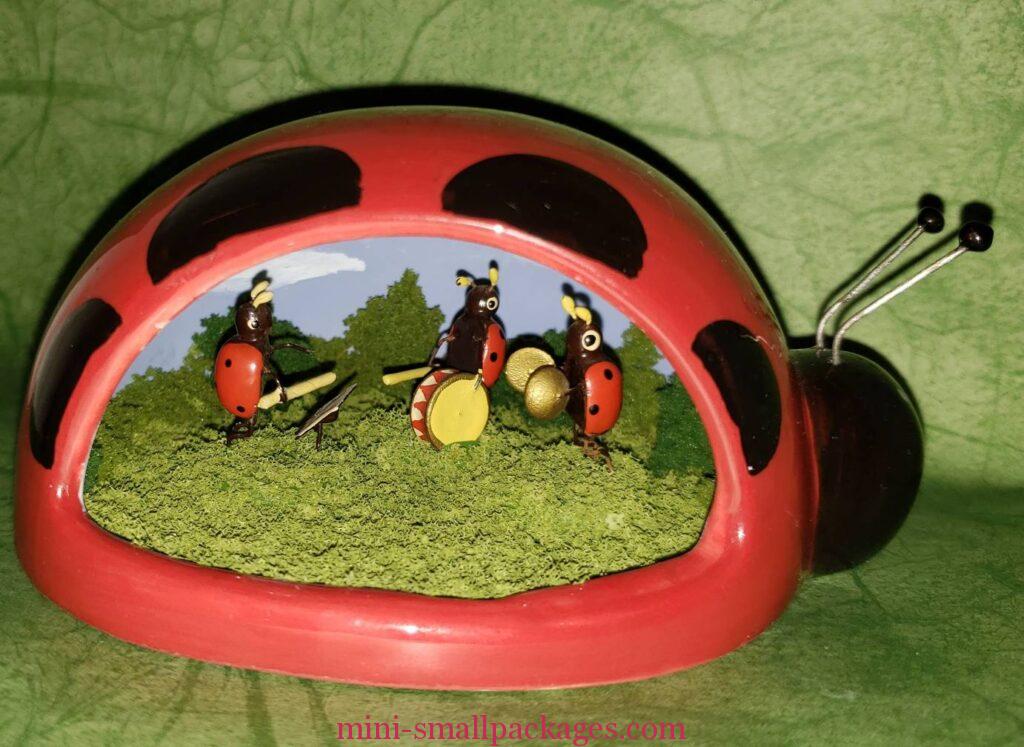
Browsing ebay I found a lady bug scrubby holder for a reasonable price (less than $10). Most ones I see aren’t ones I want for a project, but this one was for some adorable lady bug band. I got the band via a mini friend that passed away. A small group of us from our club were visiting and she offered for us to take some items. She knew it wouldn’t be long for her. I will always treasure this band in her memory. They are made with a combo of wood and metal.
When the scrubby arrived I removed the scrubby from inside. This was either too big or the holder too small. Either way, it didn’t matter to me for what I had plans for the holder. I then washed it to remove anything on the surface.
The band were on wood disks and I knew that is what held them up. I decided to only use paint and landscaping product to blend them together. Another miniaturist used plaster of paris, I have used paper mache in other projects, but for this, I felt I couldn’t do that and keep the disks. I didn’t want to figure out getting them to stand on their own. Or try to embed the disks into another product.
I decided roughly where to put the band and took a photo.
I painted the bottom green. I matched this green to the painted disks. In hindsight I wish I had painted the bottom brown like dirt and including the disks. Then I painted the sides and top blue. I added a few clouds as well.
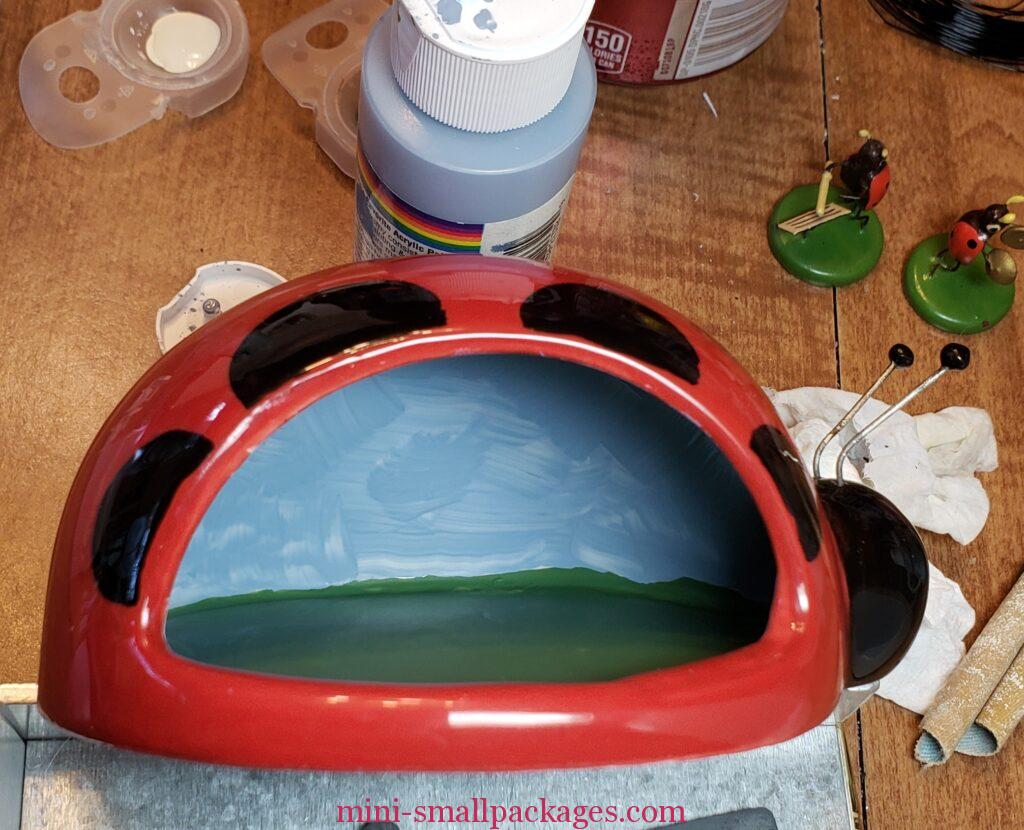
Next was adding some of the green landscaping. I wanted to fill in the back and as far as where the disks would go. I added three colors of green. Two as denser foam for shrubs and then a looser one for grass. I had recently purchased a tweezer set that I didn’t read the details very well. In that set was several larger 7 inch pairs. I saved them for just such a project.

The loose foam I would normally add glue, sprinkle on, pat down and let dry. Then shake the excess. Then use scissors to trim away any that stuck up too much. Because I was working with the disks and I wanted to blend the bottom with the disks, I went ahead and applied the loose foam behind, then to the disks one by one, glued them in place. I would sort of pat down the foam. Once I had to push some glue and foam out of the way as I had done too much forward. But it was still wet so easy to move. Then with all three band members in place, I added the rest to the front of them. About then was when I remembered my scissor trimming technique. I went ahead to continue the rest of the process. There was very little excess to shake off later, but I did have some spots to fill in. This is where the brown would be good. However I filled in the spots to make sure no shiny glue. A mix might have worked too. My issue with that is if I mix too much, then I have to throw away. Silly because it probably isn’t that much cost wise (50 cents at the most), but I still have that ‘don’t waste anything’ mentality. When I shake off the excess, I always do so over a paper plate so I can then fold the plate to funnel into the bag to save it. Can’t do that with the mix unless just make a bag of mix. Now there is an idea.
Happy miniaturing!
Preble
If you enjoy my website, please consider making a small donation via PayPal.me/minismallpackages. Thank you!