Updated 3/5/22
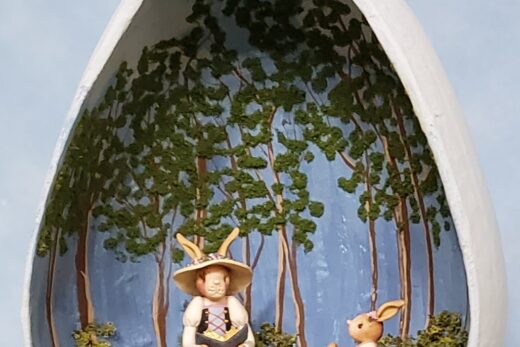
The NAME (National Association of Miniature Enthusiasts) OLHP (online house party) Splintered Fairytales was last week. I completed the TNP (Thursday night project) and the souvenirs in 1:48 scale.
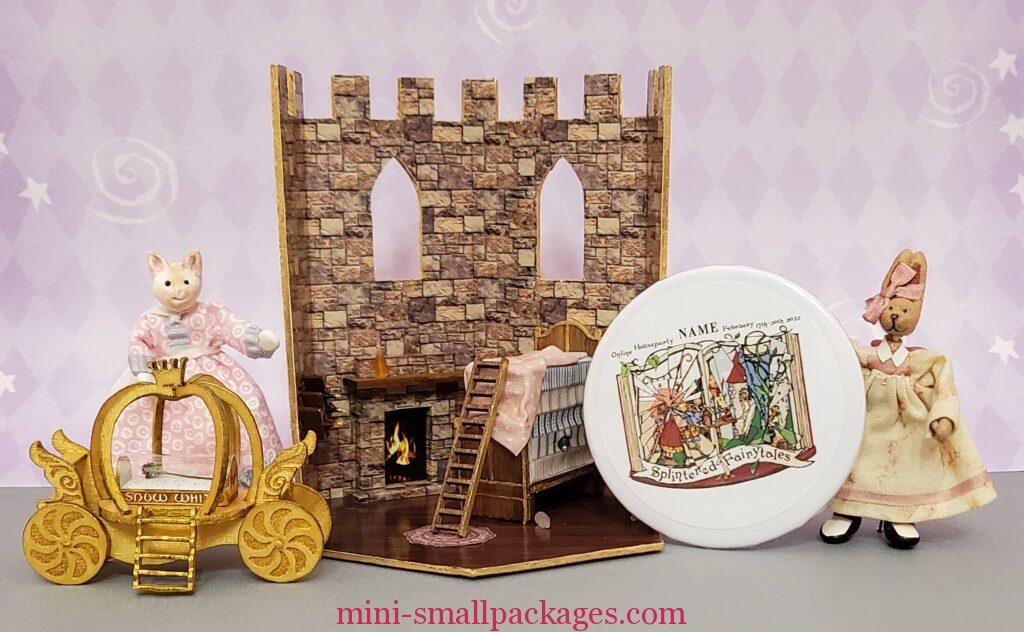
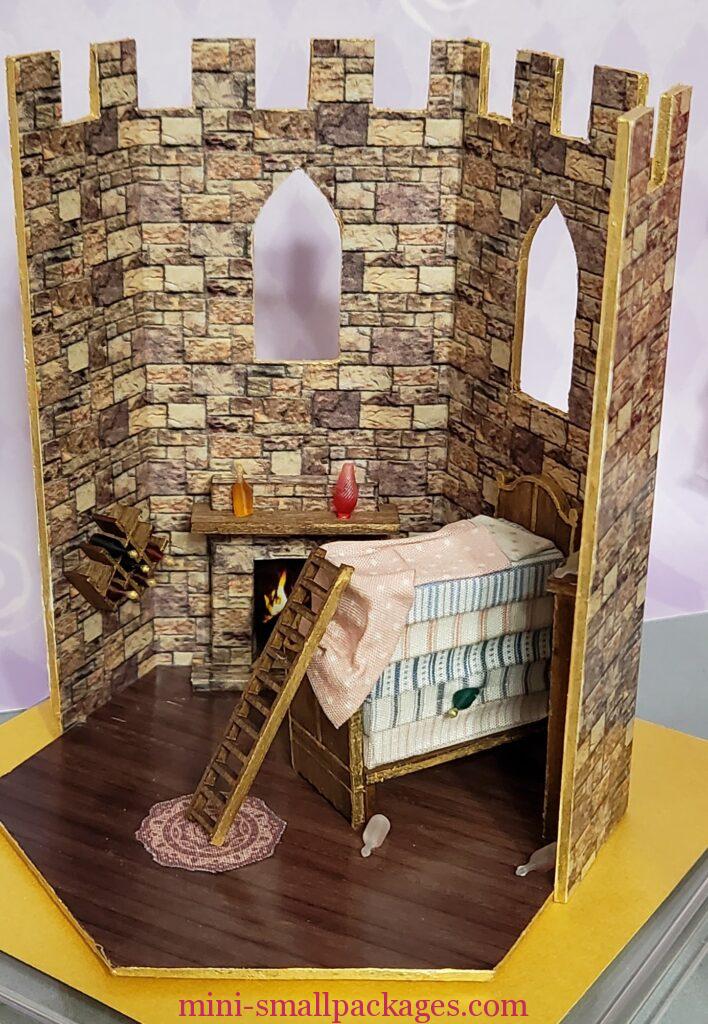
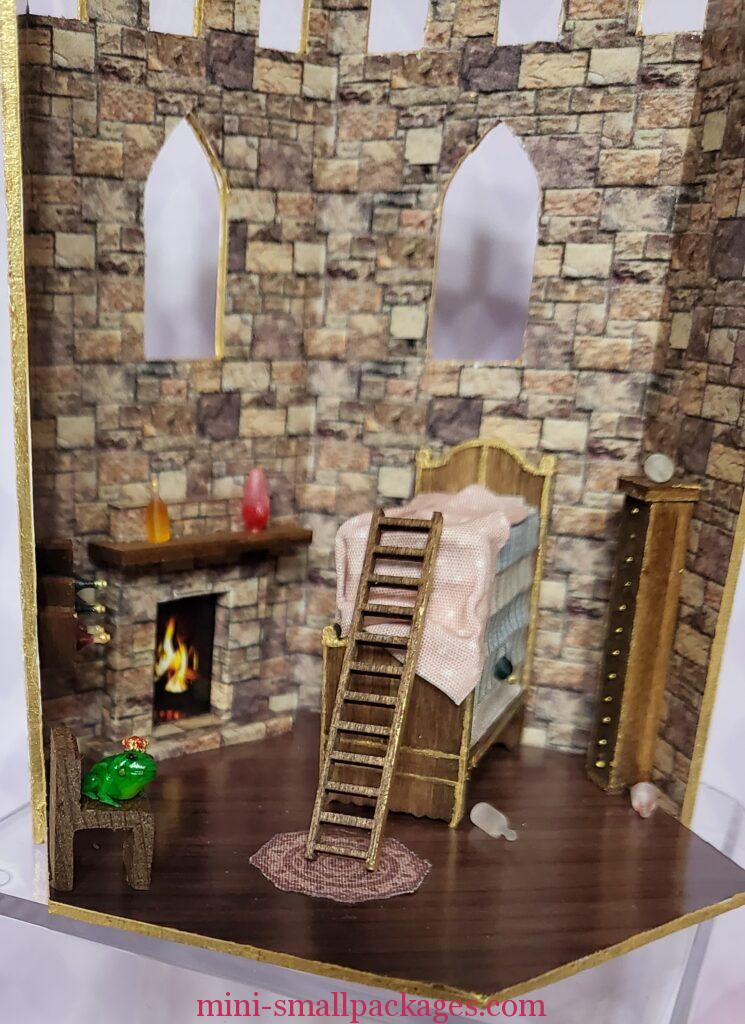
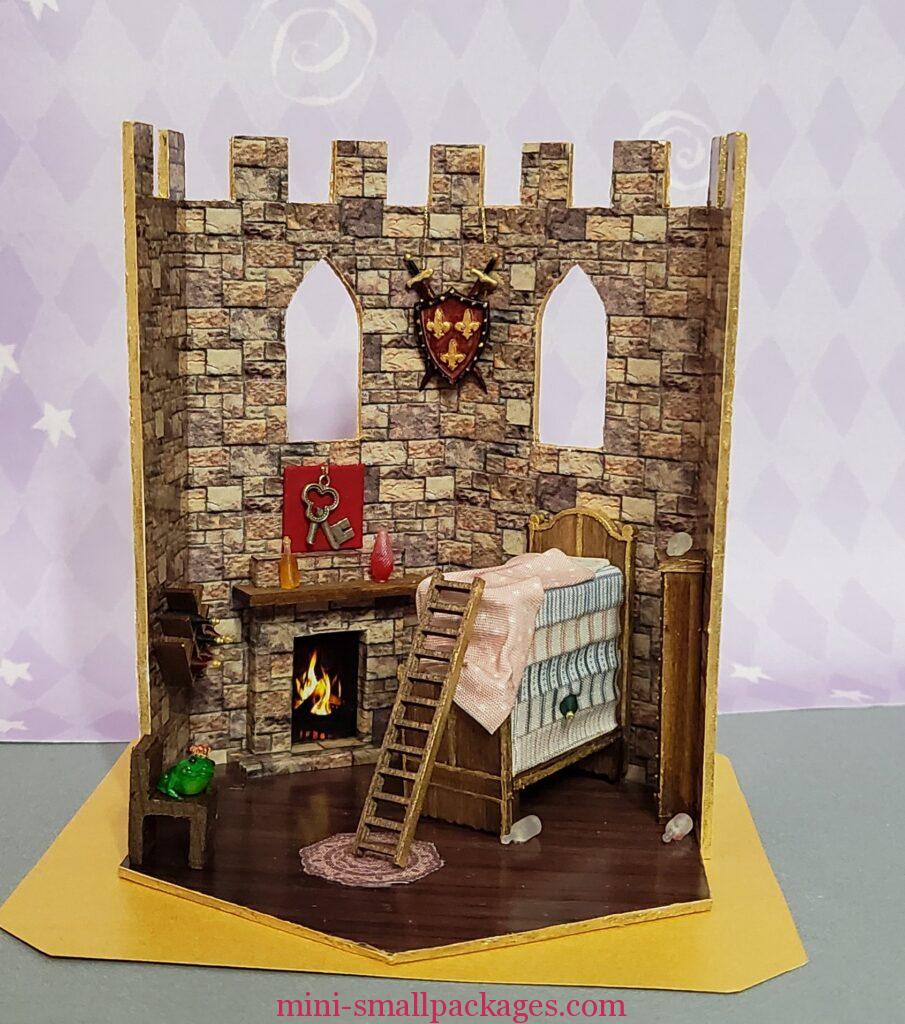
Thursday night project- Princess and the pea
Here some tips I have for this project.
- I used tacky glue to put my wallpaper on. I followed instructions and did the inside first. The problem I had was when it was folded. After doing the outside, I would recommend bending the wall first, then apply glue to one section at a time. That is how I did the outside and it was much better process.
- I apply tacky glue to the wall not the paper. I also made sure to smooth the glue using an old credit card so there aren’t lines or blobs before applying wallpaper. Although for this paper it may be on top hand unevenness if it will enhance the stone. However I didn’t try that on this project.
- I smooth paper using a bone folder. It’s a tool for pressing and smoothing paper and glue. It helps to press glue around under the paper if still wet. Also helps get glue out of the edges or corners.
- I cut out the windows and around the tower crenelations using a sharp blade. I have recently started re-sharpening my blades using the technique described here. https://karincorbin.blogspot.com/2014/02/xtra-sharp-craft-knives.html?m=1
- Next was gluing on the floor. I didn’t smooth my glue enough. But it doesn’t show in the end because of the bed , etc.
- Gluing the floor to the walls took three tries. The paper didn’t want to stick so CA glue (super glue) would have helped.
- Next was time to add the exterior wallpaper and I did this one panel at a time. Not by cutting to fit a panel, just gluing one panel at a time to the paper. However I did get slightly off at the bottom. Thankfully that doesn’t show. It was because of the folding.
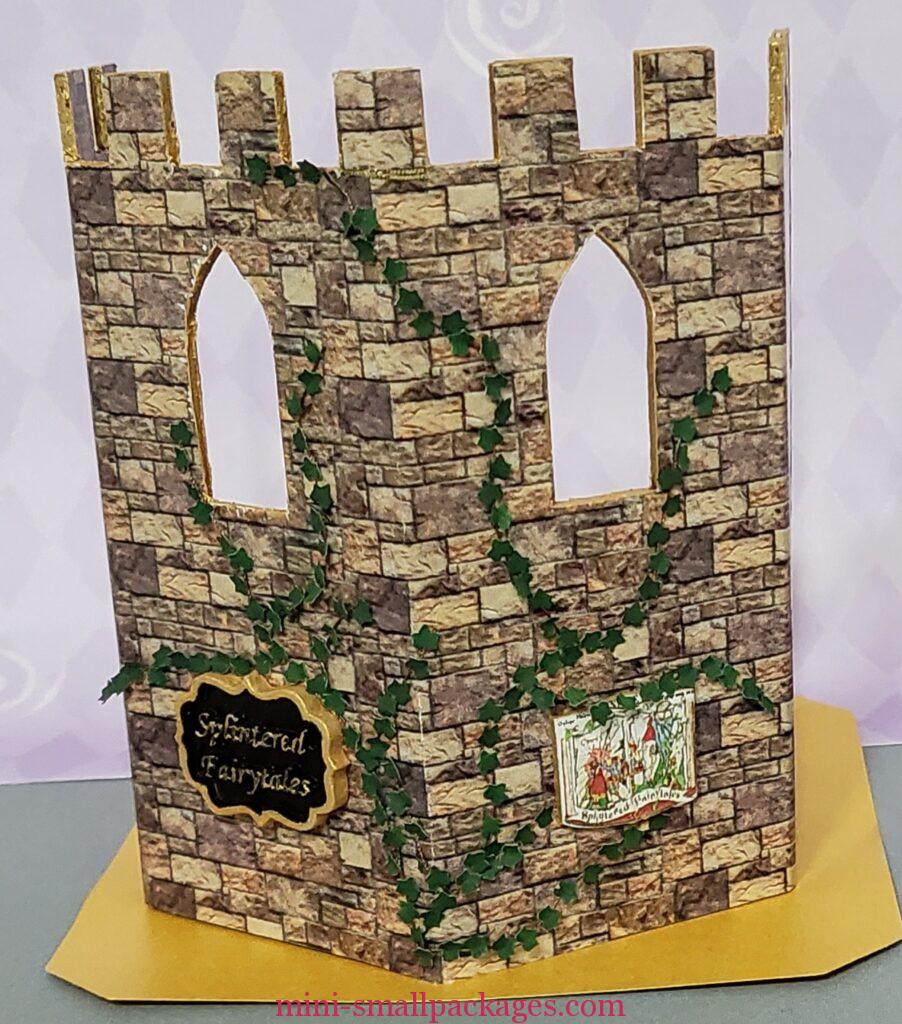
- After trimming the paper, it was nice to paint the edges gold. It covers the white edges and gives it a nice touch.
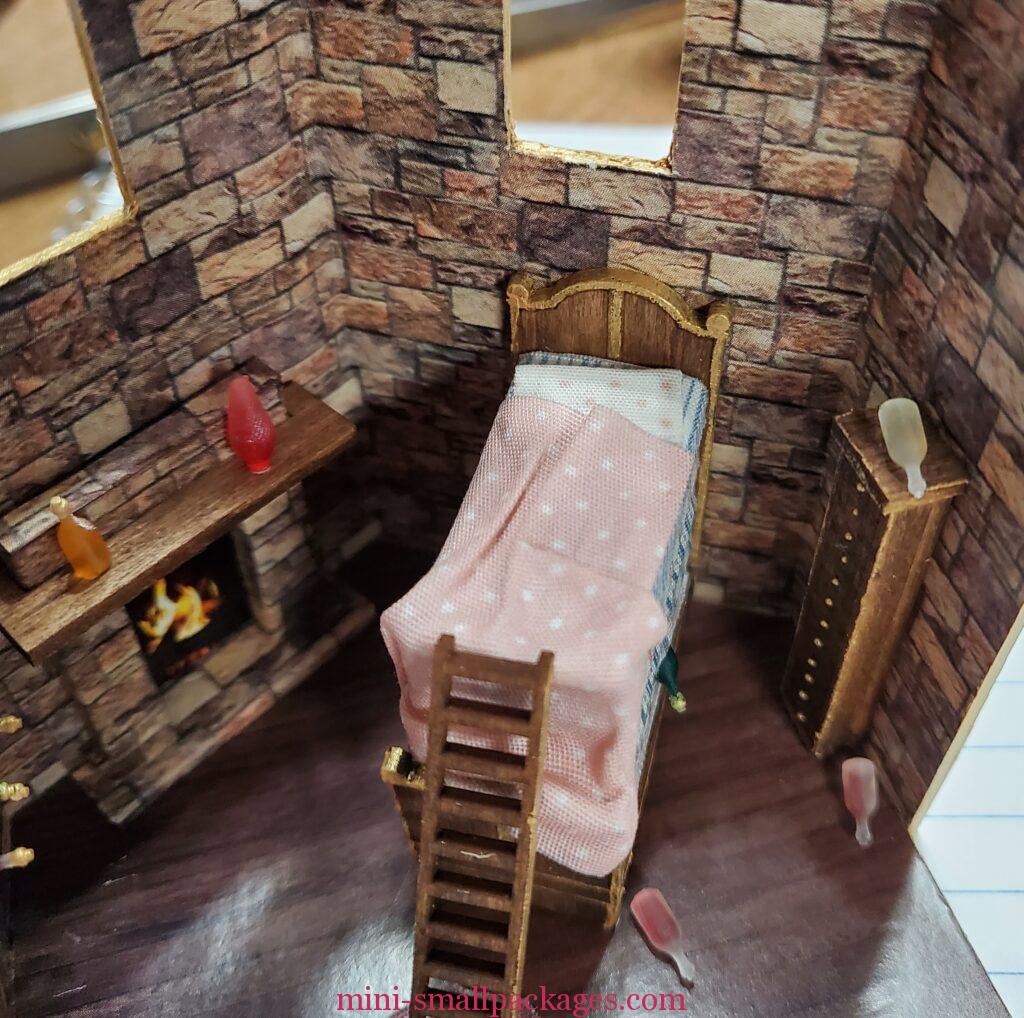
Furniture and Fireplace
Fireplace
First I assembled the fireplace. It took me a couple of tries to figure out what I was doing. There are two wood parts. One gets covered by stone paper as the hearth. It didn’t register with me at the time what the hearth really was. I so like it when instructors label parts either in the laser cutting or a diagram.
I was doing this in class although I was out of order. The class got ahead of me despite my prework.
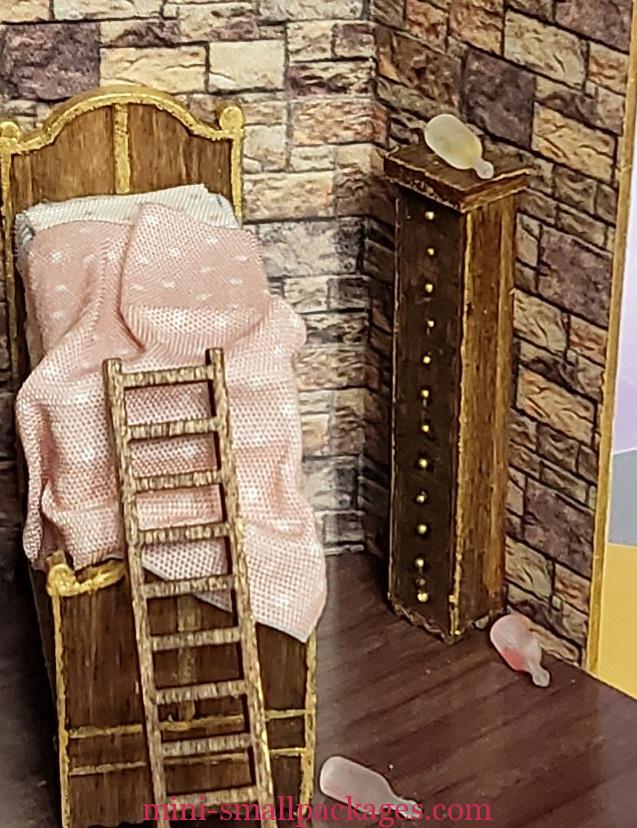
Bed, Chest of Drawers, Wine rack and bottles
I assembled the furniture according to the instructions. At end I realized that I had my hole for the bottle on the wrong side. It was because when I went to glue on the mattress end cover that I didn’t check which should be the end based on the hole for the bottle. Even though I marked the bottom so I could easily find it, it was on the opposite side. Not that it was critical which side. I like that I made this mistake and mine is different.
After the bed was dressed, I remembered about painting the knobs of the headboard. I started painting and just kept going because I felt a princess bed should have gold edging. I just wish I’d thought about that before adding the mattress. Then it would have been easier adding the gold in certain areas.
I used my new alcohol markers for the first time on the wine bottles. I tested colors on paper before I did on the bottles. I did several colors. Maybe there are different varieties for different Princesses. Could it be the reason why others slept ok?
I really enjoyed this project. I loved working on it via zoom even though I couldn’t keep up and did my own thing. I am accustomed to working on my own so not likely to do everything same way.
Addition #1
My Princess kissed her Prince and he turned into a frog so she picked up the bottle. Then another….
Can you imagine having to climb down that ladder for the little girl’s room.
Frog was from Alician Pearce at https://www.etsy.com/ca-fr/shop/BlackthornMiniatures
Addition #2 & 3
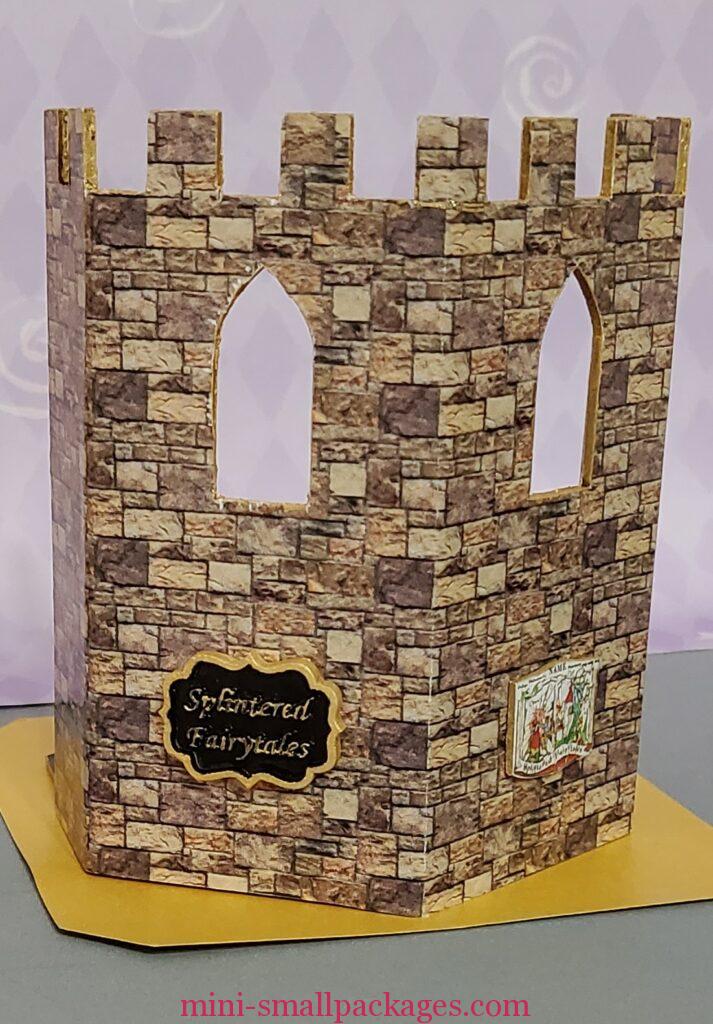
Exterior
I keep adding to my TNP. I can’t seem to stop.
I purchased from Kathy Abdinoor of Kit Kat Miniatures a sign and a shield.
Here is the sign in place.
Addition #4
Ivy by Shirley Foisy Roundtable kit
I saw yet another idea that I wanted to add to my castle. I just happened to get one of her kits. Thank you Shirley.
I started gluing on the vine.
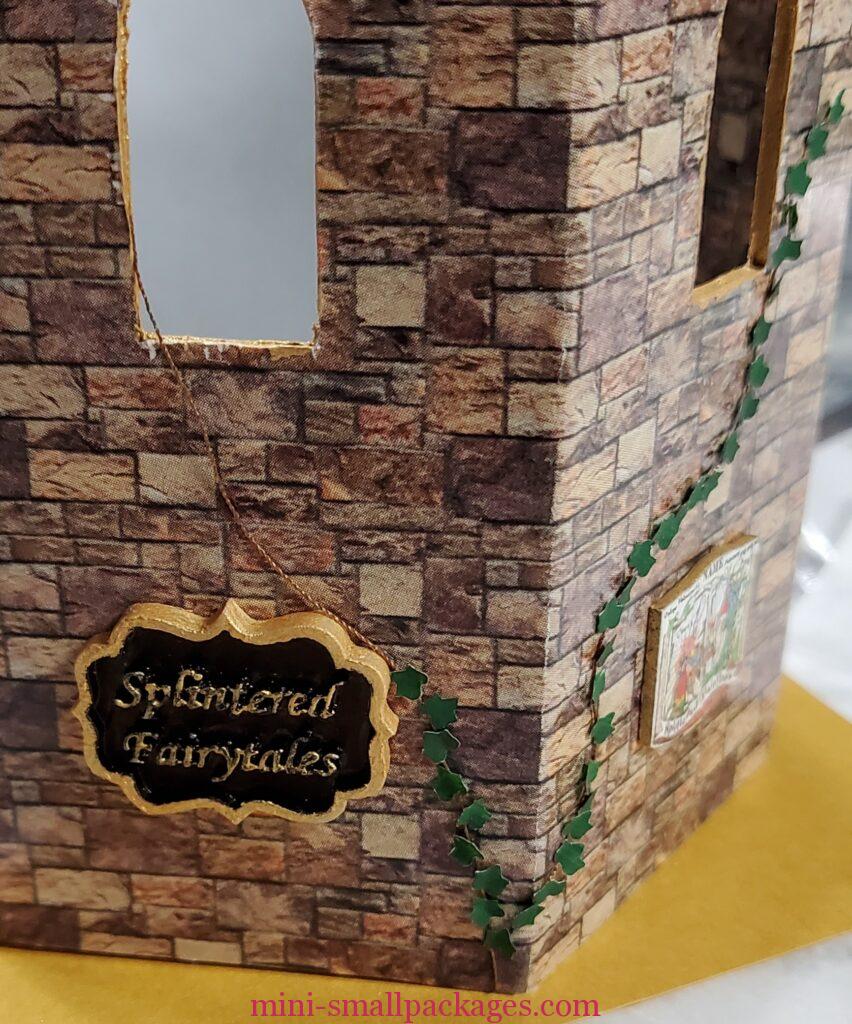
I did most of this that way. But I did leave some loose ends and let it hang. For the last vine I added I glued the leaves on the thread while on the wax paper. It stuck to the wax paper but that was OK pulling it up just like real ivy.
Finally done on the exterior
On the inside is two more things.
The broken key that was a committee gift is hanging over the fireplace. I made the backing by cutting a square from thick cardboard and then covering with some leather like paper. It hangs from a gold thread that came from raveled gold lame.
The shield also hangs by the same gold thread. I painted it with alcohol markers then touched up with my old gold water-based enamel. The same used around the crenelations.
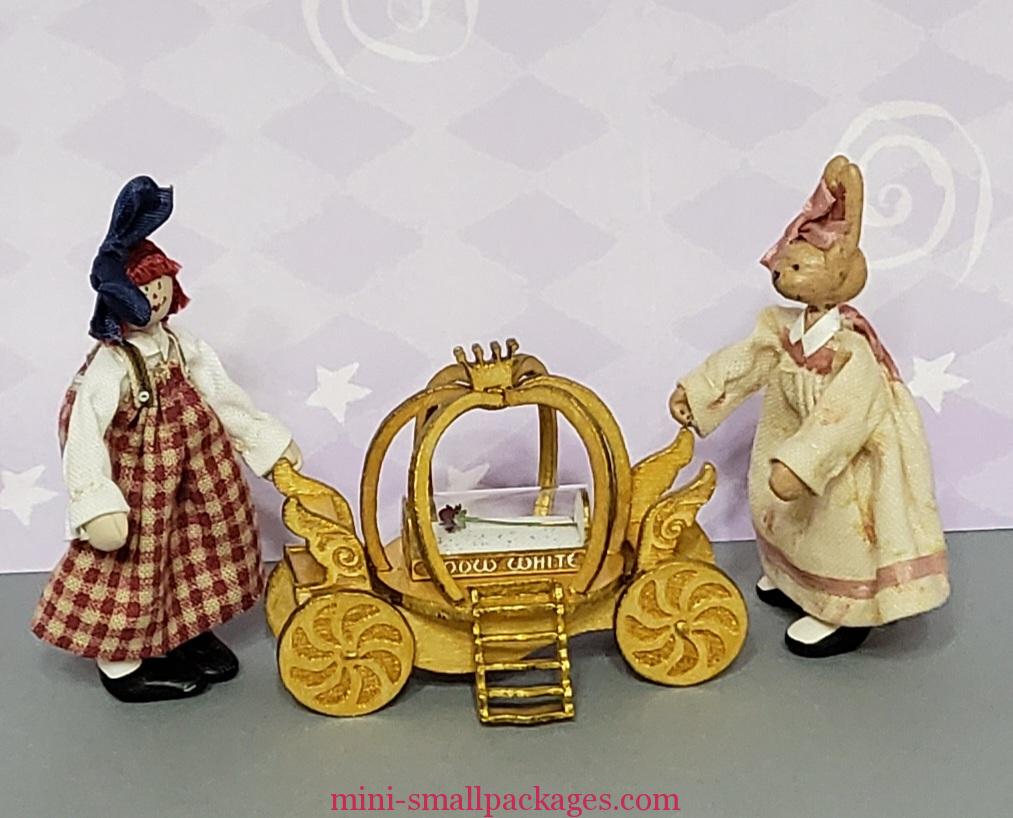
Souvenir Carriage
The souvenir carriage in 1:48 scale to me seems a bit small. But I love the design.
Issues with carriage and instructions
Body supports and seat
As I set to assemble this carriage, I studied the instructions. There is a photo in the 1:48 scale that I believe is actually the 1:12 scale. I say this because my carriage does not have any details that are holes in the sides. In the photo it shows to line the seat and brace using the holes, but having none I just eyeballed what I thought was good place. I was a tad off so it is wonky.
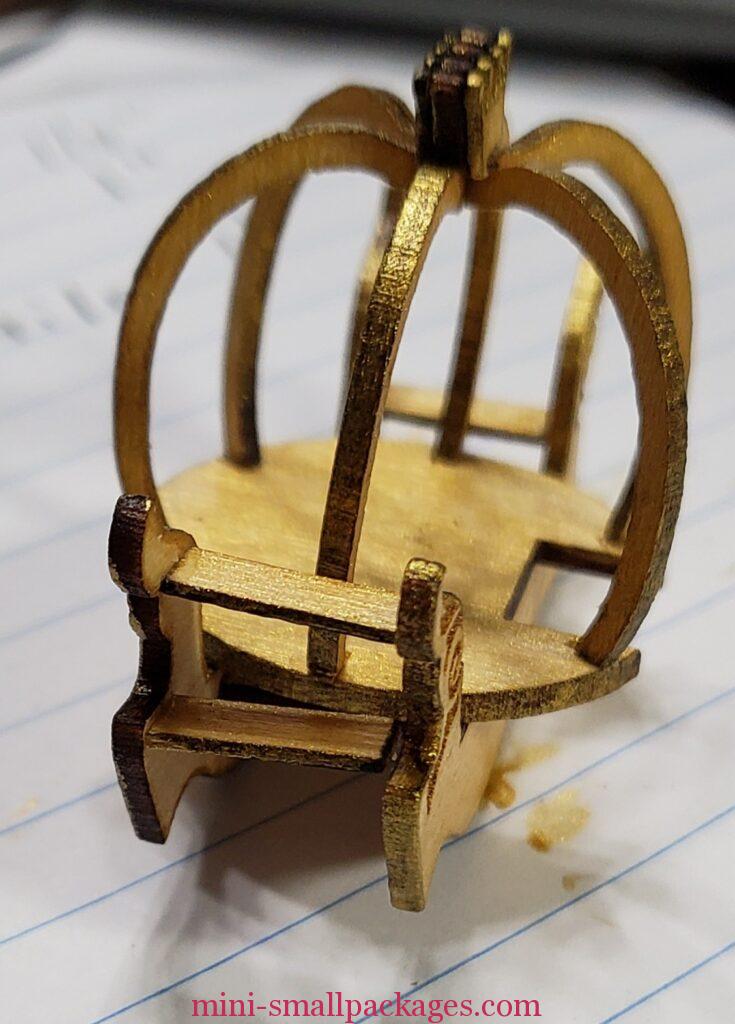
Crown
Another issue was with the crown. I felt it didn’t fit the carriage spines. Maybe I was assembled wrong or didn’t align them properly but I felt they weren’t cut correctly. To deal with this I glued the three pieces together and then trimmed off the legs so the three pieces were flat. One of the spines doesn’t seem to be secure and it moves. I probably need to completely re-glue.
Steps/stairs
The third issue I had was that the steps didn’t fit in the precut gap provided. I choose to use my stylo + dremel to sand back until the steps fit. It is possible my issue was due to having painted first as per instructions but I don’t think that was entirely the problem. I wondered if issue was fixed and laser cut better because one mini friend said hers fit just fine.

Wheels Move
I decided my wheels need to move. Looking at the bottom of the carriage I think there is a simple way for that to happen. I just add an axel and the carriage can rest in the curves. Only that did not work.
The axels are made from a straight pin. Once I made a hole in each wheel they slide on the pin. I decided how wide they needed to be and I bent the pin. For now I do not trim the pin.
This is when I learn that something needs to keep the axel from rolling against the carriage body. I decided to add a notch for the axel to fit in.
For anyone who understands how wheels and axels work they would be laughing at me. I don’t care how they really work as I’m just playing around.
After realized that my location is wrong based on the wheel diameter, I cut a new notch further away. But the axels won’t stay in place. I decided I wanted to add a strap made from a strip of cardboard.
Before gluing the straps, I cut the excess of the pin.

The strap works so I add to all four.

In the above photos it is not as obvious that I painted it all gold. I did the painting at the beginning. Once it was all together I touched up as needed. I chose the gold color after seeing what my friend had done.
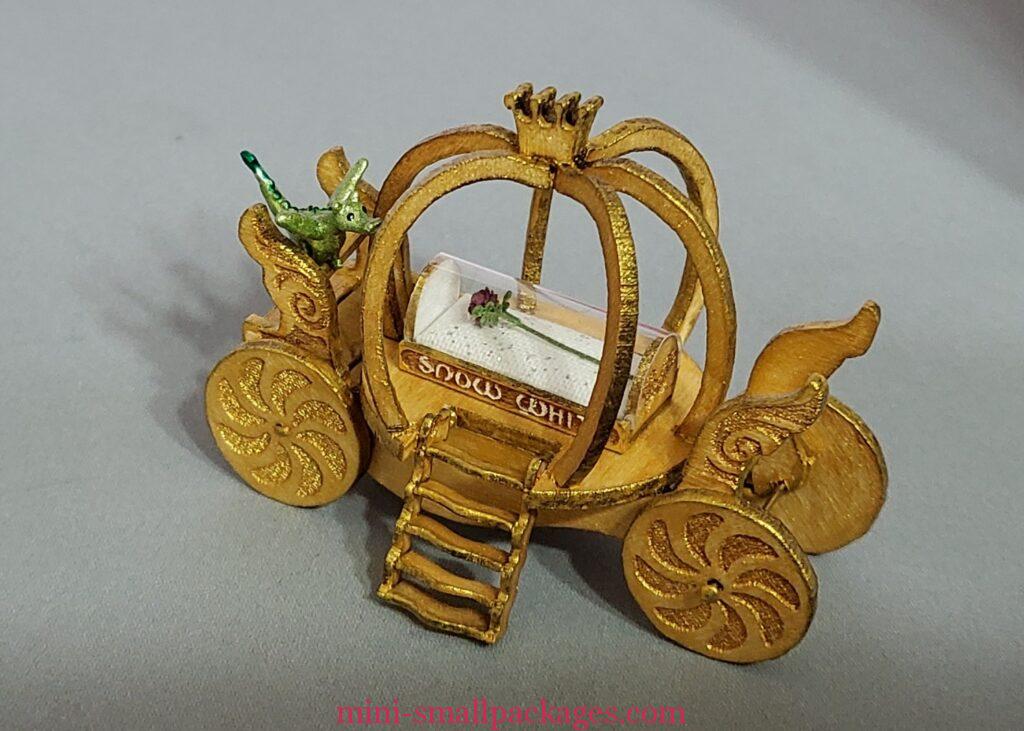
The Casket
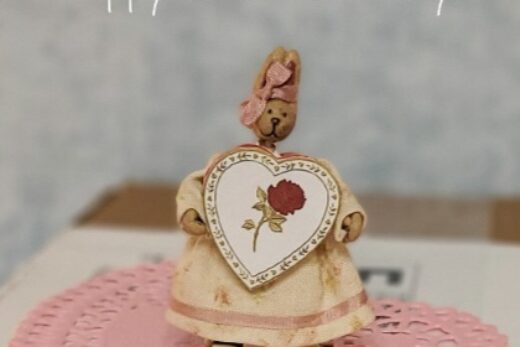
The title of this project is SnowCinder Carriage. The carriage is from Cinderella and the casket is Snow White’s. Since this is Splintered Fairytales, I accept this combination. I’m not too keen on the casket because I don’t have a Snow White or Cinderella doll for that matter. However someone else choose to put the rose (from Beauty and the Beast) we received as another one of the souvenirs inside the casket. I thought this is a great idea since I had no where else to put it.
I start assembly on the casket based on the instructions. There is one step and a picture. I was quite frustrated with the kit maker because I didn’t know what to do first.
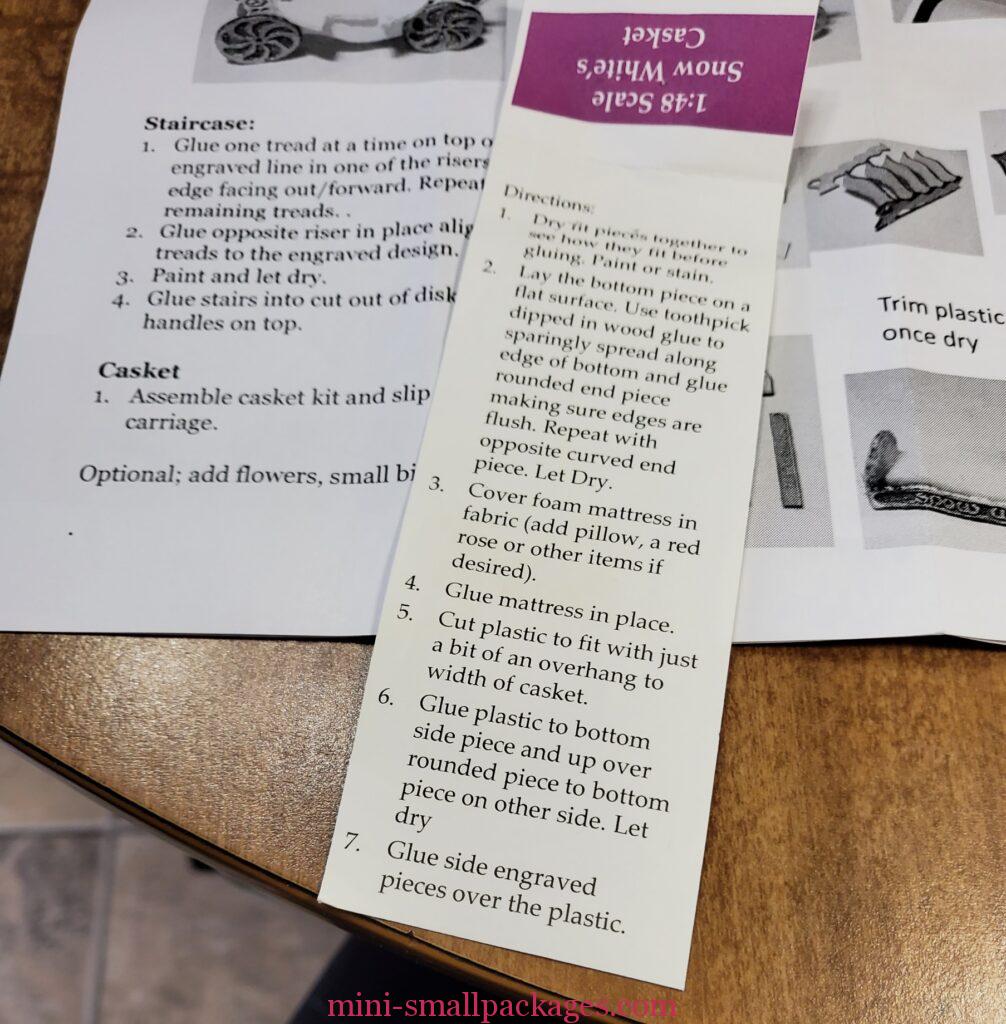
I get it all the wood glued together and realized I had missed the instructions attached to the kit for the casket. My mistake was not looking at the back of the card semi wrapped around the zip bags. I was at this point.

Once I read the correct instructions I took apart the wood pieces. I would add that it is easier to cut the fun foam mattress before doing any gluing as it is the size of the bottom piece.
The rose was glued in place before adding the plastic. It is not loose as I didn’t want it to roll to the side.
The hardest part was getting the plastic to curve just right. I did it with my fingers. Gently rolling it multiple times until I was satisfied with the shape. One can’t just bend plastic as it will cause a crease and I wanted a rounded arch shape.
I was concerned that glue would not hold it in the correct shape as my experience has been that shape was more important than glue. I didn’t cut to fit until it was the right curve. Although I continued with rolling around a little more.
I glued the plastic only on the sides not the ends. I was concerned with fogging from the super glue so I used it sparingly. Super glue or CA glue is great for gluing plastic but too much causes the plastic to fog or become white. It is the drying process.
I had waited to paint the sides until it was assembled. I only added gold to the outer edges and then used a tiny paint brush to add white to the Snow White letters.
Here it is finished.
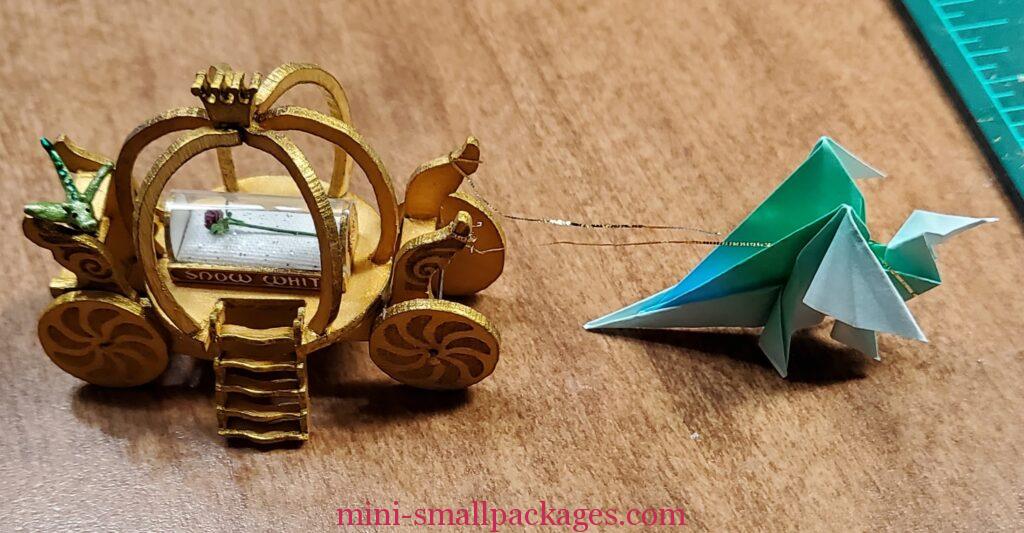
After the dragon arrived, I understood why the seat was wonky. This baby dragon broke it when he landed.
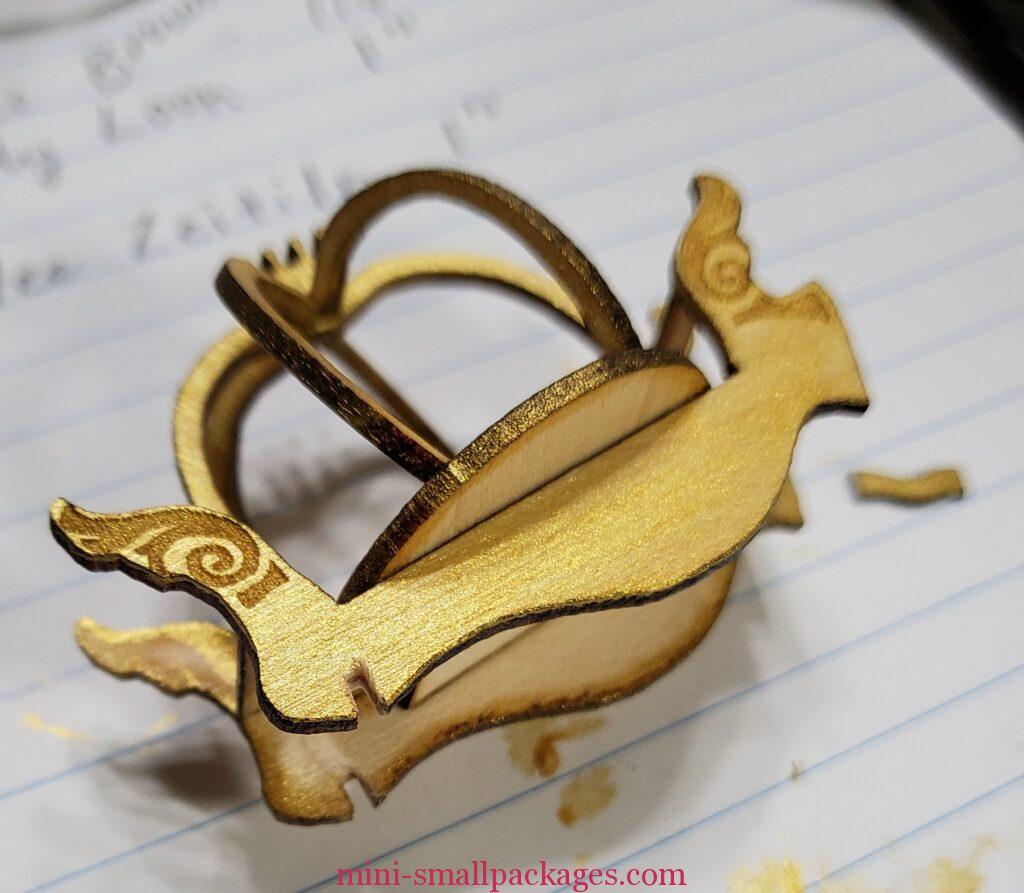
Addition #1 for Carriage
My mom said the carriage needed something to pull it and my origami dragon volunteered. He even produced a magical harness that ties itself to carriage. He said he was honored to pull it.
Happy miniaturing!
Preble
If you enjoy my website, please consider making a small donation via PayPal.me/minismallpackages. Thank you!

Preble, I love your creativity, AND your tips.
Preble,
I love it!!!! I’ve changed much around with my TNP but I need that sign from Kathy!!! I love the gold edges. Wish I had thought of that. I’m in the process of doing stain glass windows but of course I ran out of ink.
Your carriage is excellent. I had no problem putting mine together. Only thing I did wrong was the steps. I had the inside on the outside. Whoops. I also put my flower in the casket. And I lost my acrylic sheet as it flung across the room so I improvised.